
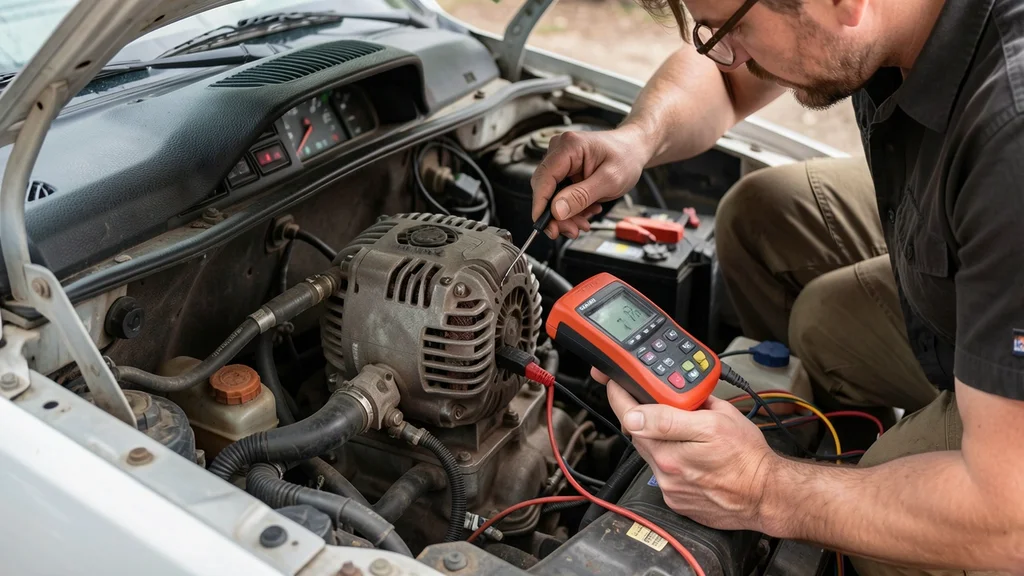
If your car’s electrical system is acting up, knowing can you test for a bad alternator can save you time and money. A failing alternator can leave you stranded, but you don’t need a professional to diagnose it. This guide walks you through simple, reliable methods to check your alternator’s health at home or on the road.
Yes you can test for a bad alternator yourself using a multimeter or simple visual checks. Look for dim lights, warning lights on the dash, or a dead battery after jump-starting. These signs often point to alternator failure.
Signs Your Alternator Might Be Failing
Your car often gives clear warnings before the alternator fails completely. The most common sign is the battery warning light on your dashboard, which can indicate an issue with the charging system. Dim or flickering headlights, especially when the engine is idling, are another red flag.
You might also notice electrical accessories like the radio, power windows, or air conditioning performing poorly or shutting off unexpectedly. A dead battery after a jump-start is a classic symptom—if the car runs but dies again once you remove the jumper cables, the alternator is likely the culprit.
- Battery warning light on the dashboard
- Dim or flickering headlights
- Electrical accessories malfunctioning
- Car stalls or has difficulty starting
- Dead battery after a jump-start
- Whining or grinding noises from the engine bay
- Smell of burning rubber or wires
Warning: If you notice a burning smell or see smoke, pull over immediately and turn off the engine. This could indicate a serious electrical issue that needs professional attention.
Tools You Need to Test an Alternator
Testing an alternator at home requires just a few basic tools. The most essential is a digital multimeter, which measures voltage and helps you determine if the alternator is charging the battery properly. You’ll also need a pair of safety glasses to protect your eyes from any sparks or debris.
Jumper cables can be useful if you suspect the battery is dead and want to rule it out as the issue. A flashlight might help you see the alternator and battery terminals clearly, especially if you’re working in low light. Finally, keep a notebook handy to jot down your test results for reference.
| Tool | Purpose |
|---|---|
| Digital multimeter | Measures voltage to check alternator output |
| Safety glasses | Protects eyes from sparks and debris |
| Jumper cables | Rules out a dead battery as the issue |
| Flashlight | Improves visibility in dark areas |
| Notebook | Records test results for later reference |
Having these tools on hand ensures you can perform a thorough and safe test without missing any critical steps.
Step by Step Guide to Testing Your Alternator
Testing your alternator involves a few straightforward steps. Start by ensuring your car is parked on a flat surface with the engine off. Open the hood and locate the battery and alternator.
The alternator is typically a small, cylindrical component near the engine with a belt connected to it.
Before you begin, inspect the alternator and its connections for any visible damage, such as frayed wires or corrosion on the terminals. If everything looks intact, you can proceed with the voltage test.
- Prepare Your Multimeter
Set your digital multimeter to read DC voltage (usually marked as “V DC” or “V—”). The range should be set to at least 20 volts to accommodate the battery’s voltage. - Test the Battery Voltage with the Engine Off
Connect the red probe of the multimeter to the positive (+) terminal of the battery and the black probe to the negative (-) terminal. A fully charged battery should read between 12.5 and 12.8 volts. If the voltage is below 12.2, the battery may be weak or dead. - Start the Engine and Test Again
Have someone start the engine while you monitor the multimeter. With the engine running, the voltage should increase to between 13.8 and 14.4 volts. This indicates the alternator is charging the battery properly. If the voltage stays the same or drops, the alternator is likely faulty. - Rev the Engine
Ask the person to rev the engine to around 2,000 RPM. The voltage should remain stable or increase slightly. If the voltage drops significantly, it’s a sign the alternator isn’t producing enough power. - Test the Alternator Directly
Locate the alternator and connect the multimeter probes to its terminals. The positive terminal is usually marked with a “B+” or “30,” and the negative terminal is the alternator’s metal casing. The reading should be similar to the battery voltage test with the engine running. - Check for Voltage Drops
Turn on the headlights, radio, and other electrical accessories. The voltage should remain above 13.5 volts. If it drops below this threshold, the alternator may not be able to handle the electrical load.
Important: If at any point the voltage readings are outside the expected ranges, stop the test and consult a professional mechanic. Continuing to drive with a faulty alternator can damage your car’s electrical system.
How to Test an Alternator Without a Multimeter
If you don’t have a multimeter, you can still perform a few basic checks to determine if your alternator is failing. These methods aren’t as precise as using a multimeter, but they can give you a good indication of whether there’s a problem.
Start by checking the battery terminals for corrosion or loose connections. Corrosion can prevent the battery from charging properly, mimicking alternator failure. Clean the terminals with a wire brush if necessary and ensure they’re tightly connected.
- Jump-Start Test
If your car won’t start, try jump-starting it. Once the engine is running, remove the jumper cables. If the car stalls or dies immediately, the alternator is likely not charging the battery. - Headlight Test
With the engine running, turn on the headlights. If they start dim and get brighter as you rev the engine, it’s a sign the alternator isn’t producing enough power at idle. However, if the headlights remain bright and steady, the alternator is likely functioning correctly. - Battery Terminal Test
While the engine is running, carefully disconnect the negative terminal of the battery. If the car continues to run without stalling, the alternator is likely working. If the car stalls, the alternator isn’t producing enough power to keep the engine running. Warning: This test can be risky if done incorrectly, as it may cause sparks or damage to the electrical system. - Listen for Unusual Noises
Turn off the radio and listen for any whining or grinding noises coming from the engine bay. A failing alternator often produces a high-pitched whine or grinding sound due to worn bearings or a slipping belt. - Check the Belt
Inspect the alternator belt for signs of wear, such as cracks, fraying, or glaze. A loose or damaged belt can prevent the alternator from spinning properly, leading to charging issues. If the belt looks worn or feels loose, it may need to be replaced.
Tip: If you’re unsure about performing any of these tests, it’s always best to consult a professional mechanic. Safety should be your top priority.
Common Mistakes to Avoid When Testing an Alternator
Testing an alternator seems simple, but there are a few common mistakes that can lead to inaccurate results or even damage to your car’s electrical system. One of the most frequent errors is using the wrong multimeter settings. Always ensure your multimeter is set to DC voltage and not AC voltage or resistance.
Another mistake is testing the alternator with a dead battery. If the battery is completely drained, the alternator may not be able to charge it properly, leading to false readings. Always start with a battery that has at least some charge.
Additionally, avoid revving the engine excessively during testing, as this can stress the alternator and other components.
- Using the Wrong Multimeter Settings
Always double-check that your multimeter is set to DC voltage before testing the alternator. Using the wrong setting can give you incorrect readings or damage the multimeter. - Testing with a Dead Battery
A completely dead battery can skew your test results. If the battery voltage is below 12 volts with the engine off, charge or replace the battery before testing the alternator. - Ignoring Safety Precautions
Always wear safety glasses when working with car batteries and electrical systems. Avoid touching both battery terminals simultaneously, as this can cause sparks or electrical shocks. - Disconnecting the Battery While the Engine Is Running
While this is a common test method, it can cause voltage spikes that may damage sensitive electronic components in modern cars. Only perform this test if you’re confident in your ability to do it safely. - Not Checking the Belt
A loose or damaged alternator belt can cause charging issues, even if the alternator itself is fine. Always inspect the belt for signs of wear or damage before concluding the alternator is faulty. - Assuming the Alternator Is the Problem
Other components, such as the voltage regulator or wiring, can also cause charging issues. If your tests are inconclusive, consider having a professional mechanic perform a more thorough diagnosis.
How to Extend the Life of Your Alternator
Alternators don’t last forever, but with proper care, you can maximize their lifespan and avoid unexpected failures. One of the simplest ways to extend your alternator’s life is to drive your car regularly. Alternators need to run to stay in good condition, and short, infrequent drives can lead to premature wear.
Keeping your battery in good condition also helps your alternator. A weak or dead battery forces the alternator to work harder, which can shorten its lifespan. Regularly check your battery’s charge and replace it if it’s more than 3-5 years old.
Additionally, avoid overloading your car’s electrical system with aftermarket accessories, as this can strain the alternator.
- Drive Regularly
Aim to drive your car at least once a week for 20-30 minutes. This helps keep the alternator and battery in good working condition. - Check Your Battery
Test your battery’s voltage regularly and replace it if it’s weak or more than 3-5 years old. A healthy battery reduces the strain on your alternator. - Avoid Short Trips
Frequent short trips can prevent your battery from fully charging, forcing the alternator to work harder. Try to combine errands into longer drives when possible. - Inspect the Alternator Belt
Check the alternator belt for signs of wear or damage every 6 months. Replace it if it’s cracked, frayed, or glazed to ensure the alternator spins properly. - Limit Electrical Load
Avoid running too many electrical accessories at once, especially when the engine is idling. This can strain the alternator and reduce its lifespan. - Keep the Alternator Clean
Dirt and debris can build up on the alternator over time, reducing its efficiency. Use a soft brush or cloth to clean the alternator periodically, but avoid using water or harsh chemicals.
| Maintenance Task | Frequency | Benefit |
|---|---|---|
| Drive regularly | Weekly | Keeps alternator and battery in good condition |
| Check battery voltage | Every 3-6 months | Reduces strain on alternator |
| Inspect alternator belt | Every 6 months | Ensures proper alternator function |
| Clean alternator | As needed | Improves efficiency and lifespan |
Regular maintenance can significantly extend the life of your alternator and prevent unexpected failures.
When to Replace Your Alternator
Even with proper maintenance, alternators eventually wear out and need to be replaced. The average lifespan of an alternator is between 5 to 7 years, or about 100,000 to 150,000 miles. However, this can vary depending on driving conditions, electrical load, and the quality of the alternator.
If your alternator is consistently producing voltage outside the expected range (13.8-14.4 volts with the engine running), it’s a sign that it’s no longer functioning properly. Other indicators include frequent battery drain, dim lights, or electrical accessories that don’t work correctly. If you’ve tested the alternator and confirmed it’s faulty, it’s time to replace it.
- Age
Most alternators last between 5 to 7 years. If yours is approaching this age and showing signs of failure, it’s likely time for a replacement. - Mileage
Alternators typically last between 100,000 to 150,000 miles. If you’ve driven your car this far and are experiencing electrical issues, the alternator may be the culprit. - Consistent Low Voltage
If your multimeter consistently reads below 13.5 volts with the engine running, the alternator is not charging the battery properly and should be replaced. - Frequent Battery Drain
If your battery keeps dying, even after being replaced, the alternator may not be charging it sufficiently. This can lead to repeated jump-starts and inconvenience. - Visible Damage
If you notice physical damage to the alternator, such as a cracked casing, burnt wires, or a seized pulley, it’s best to replace it rather than attempting repairs. - Whining or Grinding Noises
Unusual noises coming from the alternator are often a sign of internal damage, such as worn bearings or a failing pulley. These issues typically require a full replacement.
Tip: If you’re unsure whether to replace your alternator, consult a professional mechanic. They can perform a more thorough diagnosis and recommend the best course of action.
Frequently Asked Questions
Can I test an alternator without a multimeter?
Yes, you can perform basic checks without a multimeter, such as the jump-start test, headlight test, or listening for unusual noises. However, a multimeter provides the most accurate results and is the recommended tool for testing an alternator.
How long does it take to test an alternator?
Testing an alternator with a multimeter typically takes about 10-15 minutes, depending on your familiarity with the process. If you’re performing additional checks, such as inspecting the belt or battery, it may take a bit longer.
What should I do if my alternator is bad?
If your alternator is confirmed to be faulty, you’ll need to replace it as soon as possible. Driving with a bad alternator can lead to a dead battery and leave you stranded. Consult a professional mechanic for the replacement if you’re not comfortable doing it yourself.
Can a bad alternator damage my battery?
Yes, a failing alternator can cause your battery to drain repeatedly, which can shorten its lifespan. Additionally, an alternator that overcharges the battery (producing voltage above 15 volts) can cause damage to the battery and other electrical components.
How much does it cost to replace an alternator?
The cost to replace an alternator varies depending on the make and model of your car, as well as whether you do it yourself or hire a professional. On average, you can expect to pay between $200 to $500 for parts and labor. DIY replacements can save you on labor costs, but be sure you have the necessary tools and experience.
Final Thoughts
Knowing can you test for a bad alternator empowers you to diagnose issues before they leave you stranded. With a multimeter and a few simple steps, you can quickly determine if your alternator is the problem. Regular maintenance and timely replacements will keep your car’s electrical system running smoothly for years to come.
Leave a Reply