
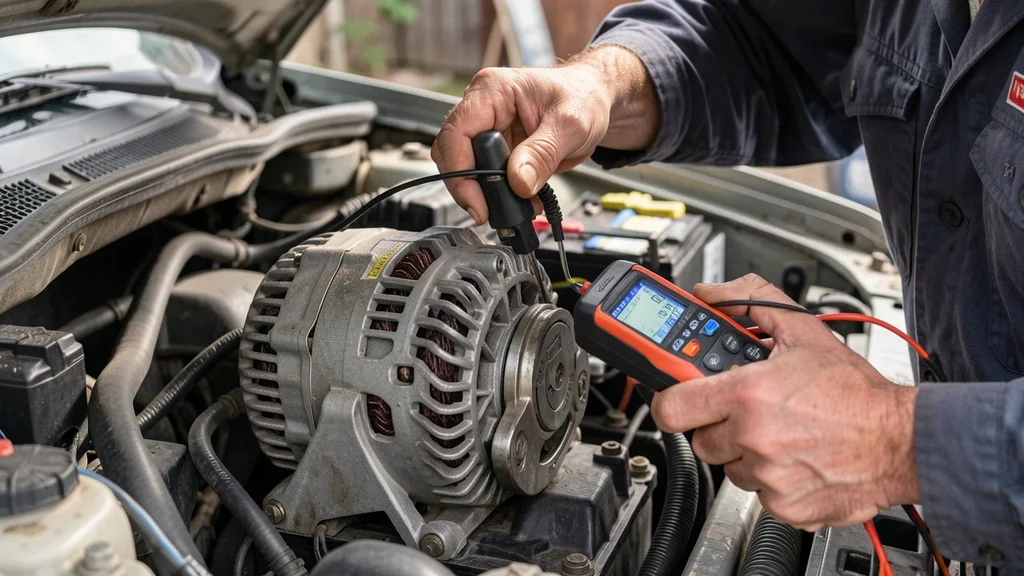
If your car’s electrical system is acting up, knowing how can you test if your alternator is bad can save you from a breakdown. A failing alternator can cause dim lights, a dead battery, or even leave you stranded. This guide covers simple and advanced methods to diagnose the issue, whether you’re a DIYer or just want to confirm a problem before visiting a mechanic.
You can test if your alternator is bad by checking battery voltage with a multimeter, listening for unusual noises, or observing dashboard warning lights. A voltage reading below 13.5V with the engine running indicates a problem.
Signs Your Alternator Might Be Failing
A failing alternator often gives warning signs before it completely dies. Recognizing these symptoms early can help you avoid costly repairs or getting stuck on the road.
- Dim or Flickering Lights: Headlights or interior lights that dim or flicker, especially when the engine is idling, often signal alternator trouble.
- Dead Battery: If your battery dies frequently, even after jumps or replacements, the alternator may not be charging it properly.
- Warning Lights: The battery or alternator warning light on your dashboard is a clear indicator of an electrical issue.
- Strange Noises: A whining or grinding noise from the engine bay could mean the alternator’s bearings are wearing out.
- Electrical Failures: Power windows, seats, or other accessories may move slowly or stop working entirely.
- Stalling or Difficulty Starting: The engine may stall or struggle to start if the alternator isn’t providing enough power.
- Burning Smell: A burning odor, often like rubber or wires, can indicate the alternator is overheating or has wiring issues.
According to AAA, alternator issues account for nearly 15% of all roadside assistance calls related to battery problems. Ignoring these signs can lead to a complete electrical system failure.
Tools You Need to Test an Alternator
Before you start testing, gather these essential tools to ensure accuracy and safety:
- Multimeter: A digital multimeter is the most reliable tool for measuring voltage and diagnosing alternator issues.
- Jumper Cables: Useful for testing voltage drop or jump-starting your car if the battery is dead.
- Safety Gear: Wear gloves and safety glasses to protect yourself from electrical shocks or accidental sparks.
- Flashlight: Helps you see clearly under the hood, especially in low-light conditions.
- Basic Tool Kit: Wrenches and sockets may be needed to access the alternator or battery terminals.
Warning: Never disconnect the battery while the engine is running. This can cause a voltage spike that damages the alternator or other electrical components.
Step-by-Step Guide to Testing Your Alternator
Testing your alternator doesn’t require advanced mechanical skills. Follow these steps carefully to diagnose the issue.
Step 1: Visual Inspection
Start by inspecting the alternator and battery for any obvious issues.
- Check the alternator belt for wear, cracks, or looseness. A damaged belt can prevent the alternator from charging properly.
- Look for corrosion or loose connections on the battery terminals and alternator wires.
- Ensure all electrical connections are tight and free of debris.
Step 2: Test Battery Voltage with Engine Off
A multimeter is your best friend for this test.
- Set your multimeter to DC voltage (20V range).
- Connect the red probe to the positive (+) battery terminal and the black probe to the negative (-) terminal.
- With the engine off, a healthy battery should read between 12.5V and 12.8V. If it’s below 12.2V, the battery may be weak or dead.
Step 3: Test Voltage with Engine Running
This step checks if the alternator is charging the battery.
- Start the engine and let it idle.
- Use the multimeter to measure the voltage across the battery terminals again.
- A properly functioning alternator should produce between 13.8V and 14.4V. Readings outside this range indicate a problem.
Tip: If the voltage drops below 13.5V with the engine running, the alternator is likely not charging the battery adequately.
Step 4: Load Test
A load test helps confirm the alternator’s performance under demand.
- Turn on as many electrical accessories as possible (headlights, AC, radio, etc.).
- Measure the voltage at the battery again. It should stay above 13.5V. If it drops significantly, the alternator may be failing.
Step 5: Check for AC Voltage (Optional)
Alternators should only produce DC voltage. Any AC voltage indicates a problem.
- Set your multimeter to AC voltage.
- With the engine running, measure the voltage at the battery terminals.
- If the reading is above 0.5V AC, the alternator’s diodes may be failing.
Alternative Methods to Test Your Alternator
If you don’t have a multimeter, you can try these alternative methods to check your alternator’s health.
Method 1: The Headlight Test
This is a quick and easy way to check for alternator issues without tools.
- Start your car and turn on the headlights.
- Rev the engine to about 2000 RPM.
- If the headlights brighten significantly, the alternator may not be charging properly at idle.
Method 2: Remove the Positive Battery Terminal
This method is controversial and should be done with caution.
Warning: This test can damage sensitive electronics in modern cars. Proceed only if you’re confident in your vehicle’s electrical system.
- Start the engine and let it idle.
- Carefully disconnect the positive battery terminal.
- If the engine stalls, the alternator is not producing enough power to keep the car running.
Method 3: Use a Clamp Meter
A clamp meter measures the current flowing through a wire, which can help diagnose alternator output.
- Set your clamp meter to DC amperage.
- Clamp it around the positive battery cable with the engine running.
- A healthy alternator should produce between 40-60 amps. Lower readings indicate a problem.
Common Mistakes When Testing an Alternator
Even experienced DIYers can make mistakes when testing an alternator. Avoid these pitfalls to ensure accurate results.
- Not Checking the Battery First: A dead battery can mimic alternator symptoms. Always test the battery’s health before assuming the alternator is at fault.
- Using the Wrong Multimeter Settings: Ensure your multimeter is set to DC voltage, not AC or resistance, for accurate readings.
- Testing with Electrical Loads Off: Always test with some electrical accessories on to simulate real-world conditions.
- Ignoring Belt Condition: A loose or worn alternator belt can cause charging issues. Inspect the belt and replace it if necessary.
- Disconnecting the Battery While Engine Runs: This can cause a voltage spike that damages the alternator or other electrical components.
- Overlooking Corrosion: Corroded battery terminals or alternator connections can disrupt voltage readings. Clean them before testing.
When to Replace Your Alternator
If your tests confirm the alternator is bad, it’s time to replace it. Here are signs that replacement is necessary:
- Consistent Low Voltage: If your multimeter consistently reads below 13.5V with the engine running, the alternator isn’t charging the battery properly.
- Noisy Operation: Grinding or whining noises from the alternator indicate worn bearings or internal damage.
- Burning Smell: A burning odor suggests the alternator is overheating or has electrical issues.
- Frequent Battery Failures: If your battery keeps dying despite being new or recently charged, the alternator is likely the culprit.
- Warning Lights: Persistent battery or alternator warning lights on the dashboard are a clear sign of trouble.
| Symptom | Likely Cause | Solution |
|---|---|---|
| Dim lights at idle | Low alternator output | Test alternator, replace if faulty |
| Battery warning light | Alternator failure | Inspect alternator connections, replace if needed |
| Grinding noise | Worn bearings | Replace alternator |
| Frequent battery deaths | Alternator not charging | Test alternator output, replace if defective |
According to the Car Care Council, alternators typically last between 80,000 to 150,000 miles, but extreme temperatures and electrical demands can shorten their lifespan.
How Much Does It Cost to Replace an Alternator
The cost of replacing an alternator varies depending on the vehicle make, model, and whether you do it yourself or hire a professional.
| Vehicle Type | Alternator Cost | Labor Cost | Total Cost |
|---|---|---|---|
| Economy Cars | $100 – $200 | $100 – $150 | $200 – $350 |
| Mid-Size Sedans | $200 – $350 | $150 – $200 | $350 – $550 |
| Luxury Vehicles | $350 – $600 | $200 – $300 | $550 – $900 |
| Trucks/SUVs | $250 – $500 | $150 – $250 | $400 – $750 |
Labor costs can vary based on the complexity of the job. Some vehicles require removing other components to access the alternator, increasing labor time. If you’re handy with tools, replacing the alternator yourself can save you a significant amount.
DIY vs Professional Alternator Replacement
Deciding whether to replace the alternator yourself or hire a professional depends on your mechanical skills, tools, and the complexity of your vehicle.
DIY Replacement
Replacing an alternator yourself can save money but requires some mechanical knowledge.
- Pros:
- Cost-effective (saves on labor).
- Satisfaction of completing the job yourself.
- Flexibility to work at your own pace.
- Cons:
- Risk of damaging other components if done incorrectly.
- May void warranties if not installed properly.
- Requires tools and a basic understanding of car mechanics.
Professional Replacement
Hiring a professional ensures the job is done correctly and efficiently.
- Pros:
- Guaranteed quality workmanship.
- Warranty protection on parts and labor.
- Faster turnaround time.
- Cons:
- Higher cost due to labor charges.
- Less control over the process.
Important: If you’re unsure about your ability to replace the alternator, it’s best to consult a professional. Electrical systems in modern cars are complex, and mistakes can lead to costly damage.
Frequently Asked Questions
Can I drive with a bad alternator?
Driving with a bad alternator is not recommended. Once the battery is drained, your car will stall, and you may be left stranded. Additionally, a failing alternator can cause electrical system malfunctions, leading to unsafe driving conditions.
How long does an alternator last?
On average, an alternator lasts between 80,000 to 150,000 miles. However, factors like driving habits, climate, and electrical demands can affect its lifespan. Regular maintenance, such as checking the alternator belt and connections, can help extend its life.
Will a bad alternator kill a new battery?
Yes, a bad alternator can kill a new battery. If the alternator isn’t charging the battery, the battery will eventually drain, even if it’s brand new. Additionally, a faulty alternator can cause voltage spikes that damage the battery.
What is the difference between an alternator and a battery?
The battery stores electrical energy and provides the initial power to start the engine. The alternator, on the other hand, generates electricity while the engine is running to recharge the battery and power the car’s electrical systems. Without the alternator, the battery would quickly drain.
Can a bad alternator cause a car to stall?
Yes, a bad alternator can cause a car to stall. If the alternator isn’t producing enough power to keep the battery charged, the engine may not receive the necessary electrical signals to continue running, leading to a stall.
Final Thoughts
Knowing how can you test if your alternator is bad empowers you to diagnose and address electrical issues before they leave you stranded. Start with a simple visual inspection and voltage test using a multimeter. If the readings are outside the normal range, it’s time to consider a replacement.
Whether you choose to tackle the job yourself or hire a professional, addressing alternator issues promptly ensures your car remains reliable and safe on the road.
Leave a Reply