
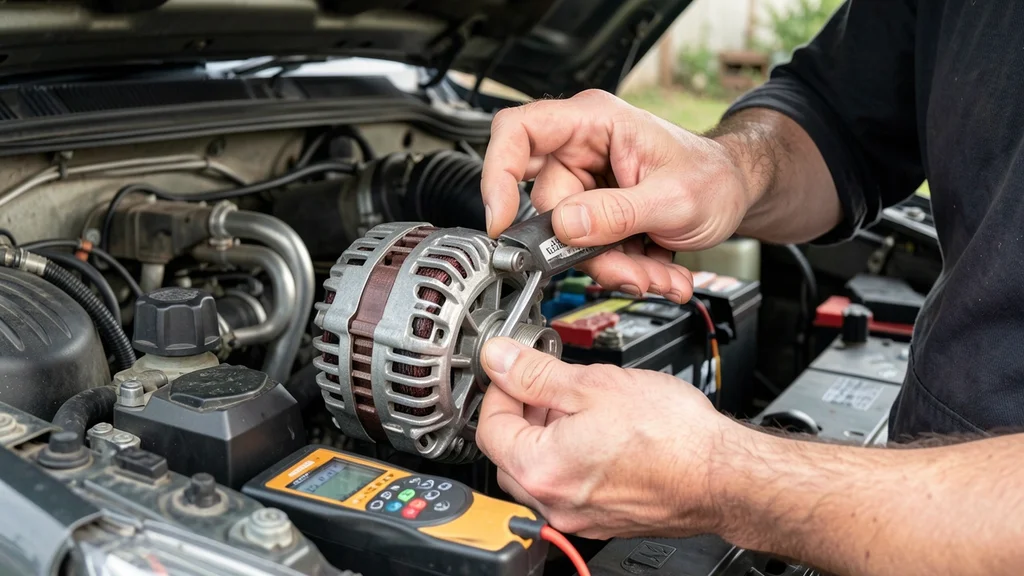
If your car refuses to start, you might wonder can you test alternator if car won t start without a jump. The alternator charges the battery while the engine runs, but a dead battery can make testing tricky. Fortunately, there are ways to check the alternator even when the engine is off, using simple tools like a multimeter or by inspecting the battery voltage.
This guide covers safe, practical methods to diagnose your alternator without relying on a running engine.
Yes you can test the alternator if the car won’t start. Use a multimeter to check battery voltage with the engine off (12.6V = good) and while cranking (below 10V = bad alternator or battery). A voltage drop test or visual inspection of the alternator belt can also reveal issues.
Signs Your Alternator Might Be Failing
The alternator is the heart of your car’s electrical system, and when it fails, the symptoms are often unmistakable. The most common sign is a lit battery warning light on the dashboard, which doesn’t always mean the battery is bad—it’s often the alternator struggling to charge it. Dim or flickering headlights, especially when the engine is idling, are another red flag.
If your car’s electronics (like the radio or power windows) start acting erratically or the engine stalls frequently, the alternator could be the culprit.
Other indicators include a weak or dead battery that won’t hold a charge, even after a jump-start, or a grinding noise coming from the engine bay, which might signal a failing alternator bearing. If you notice a burning smell near the alternator, it could indicate an overheating component or a slipping belt. These signs often appear gradually, but in some cases, the alternator can fail suddenly, leaving you stranded.
- Battery Warning Light: Appears on the dashboard when the alternator isn’t charging the battery properly.
- Dim or Flickering Lights: Headlights or interior lights that dim or flicker, especially at idle.
- Electrical Issues: Malfunctioning power windows, radio, or other electronics due to inconsistent voltage.
- Stalling or Rough Idling: The engine may stall or idle roughly if the alternator fails to provide enough power.
- Grinding Noises: A failing alternator bearing can produce a grinding noise.
- Burning Smell: Overheating alternator or slipping belt can cause a burning odor.
- Dead Battery: A battery that won’t hold a charge, even after being jump-started.
Tip: If your battery warning light comes on, don’t ignore it. Even if the car starts, the alternator may be failing and could leave you stranded.
Tools You Need to Test the Alternator
Testing the alternator doesn’t require a professional mechanic—just a few basic tools. The most essential is a digital multimeter, which measures voltage, resistance, and current. A multimeter with a clamp meter feature can also help you check the alternator’s output directly.
Jumper cables are useful if you need to jump-start the car to perform a running test, though this guide focuses on methods that don’t require the engine to be running.
Other helpful tools include a battery tester, which can quickly assess the battery’s health, and a voltage drop tester to check for excessive resistance in the charging circuit. A flashlight can help you inspect the alternator belt and connections, while a basic socket set might be needed if you have to remove the alternator for further testing. Safety gear like gloves and goggles are also recommended, as you’ll be working with electrical components.
| Tool | Purpose | Approximate Cost |
|---|---|---|
| Digital Multimeter | Measures voltage, resistance, and current | $20 – $50 |
| Battery Tester | Assesses battery health | $15 – $40 |
| Jumper Cables | Jump-start the car if needed | $10 – $30 |
| Voltage Drop Tester | Checks for resistance in the charging circuit | $25 – $60 |
| Socket Set | Removes alternator if needed | $20 – $50 |
A multimeter is the most versatile tool for testing the alternator and battery, while a battery tester can quickly confirm if the battery is the issue. Jumper cables are handy for emergency starts, but the other tools are optional for more advanced diagnostics.
Step by Step Test Alternator Without Starting the Car
Testing the alternator without starting the car is entirely possible, though it requires a bit of strategy. Since the alternator only charges the battery when the engine is running, you’ll need to rely on indirect methods to assess its health. Below are the most effective ways to test the alternator with the engine off.
Method 1: Battery Voltage Test
The battery voltage test is the simplest way to gauge the alternator’s performance indirectly. Start by turning off the engine and all electrical accessories (lights, radio, AC). Open the hood and locate the battery.
Connect the multimeter’s red probe to the positive (+) terminal and the black probe to the negative (-) terminal. A healthy battery should read between 12.6V and 12.8V when fully charged. If the voltage is below 12.4V, the battery may not be holding a charge, which could indicate a problem with the alternator.
- Turn off the engine and accessories: Ensure all lights, radio, and other electronics are off.
- Locate the battery: Open the hood and find the battery (usually near the front of the engine bay).
- Connect the multimeter: Red probe to the positive terminal, black probe to the negative terminal.
- Read the voltage: A reading of 12.6V-12.8V means the battery is fully charged. Below 12.4V suggests a charging issue.
- Check for voltage drop: If the voltage is low, the alternator may not be charging the battery properly.
Important: A voltage reading below 12.4V doesn’t always mean the alternator is bad—it could also indicate a drained battery or a parasitic draw. Further testing is needed to confirm.
Method 2: Voltage Drop Test While Cranking
If the battery has enough charge to crank the engine, you can perform a voltage drop test. This method helps determine if the alternator is struggling to provide power when the starter motor is engaged. Connect the multimeter to the battery terminals as before, then have someone turn the key to crank the engine (do not start the car).
Watch the voltage reading on the multimeter.
A healthy alternator should maintain a voltage above 10V while cranking. If the voltage drops below 10V, it could mean the alternator is not providing enough current, or the battery is too weak. However, if the voltage stays above 10V but the engine still won’t start, the issue might lie elsewhere, such as the starter motor or fuel system.
- Connect the multimeter: Red probe to positive, black probe to negative.
- Crank the engine: Have a helper turn the key to crank the engine (do not start it).
- Monitor the voltage: If it drops below 10V, the alternator or battery may be failing.
- Check consistency: Voltage should not fluctuate wildly during cranking.
- Repeat the test: Try a second time to confirm the reading.
Method 3: Visual Inspection of the Alternator
A visual inspection can reveal obvious issues with the alternator that might prevent it from working. Start by locating the alternator, which is typically mounted near the engine and connected to the battery via thick cables. Check the alternator belt for signs of wear, cracks, or looseness—a slipping or broken belt will prevent the alternator from charging the battery.
Also, inspect the wiring and connections for corrosion, fraying, or loose terminals.
Look for physical damage to the alternator itself, such as dents, leaks, or burnt marks. If the alternator pulley wobbles or doesn’t spin freely, it may indicate a bearing failure. These visual clues can help you determine if the alternator needs replacement without any electrical testing.
- Locate the alternator: Usually near the engine, connected to the battery with thick cables.
- Inspect the belt: Check for wear, cracks, or looseness.
- Check wiring and connections: Look for corrosion, fraying, or loose terminals.
- Examine the alternator: Look for physical damage, leaks, or burnt marks.
- Test the pulley: Spin the pulley by hand—it should move smoothly without wobbling.
Warning: Never touch the alternator belt or pulley while the engine is running. Always perform visual inspections with the engine off to avoid injury.
How to Test Alternator with a Multimeter
A multimeter is the most precise tool for testing the alternator, and it can be used even if the car won’t start. The process involves checking the battery voltage, testing for voltage drops, and inspecting the alternator’s output if the engine can be briefly started. Here’s a step-by-step guide to using a multimeter for alternator testing.
Step 1: Test Battery Voltage with Engine Off
Begin by setting your multimeter to the DC voltage setting (usually marked as 20V DC). Connect the red probe to the battery’s positive terminal and the black probe to the negative terminal. With the engine off and all accessories turned off, the battery should read between 12.6V and 12.8V.
If the voltage is below 12.4V, the battery may not be fully charged, which could indicate an alternator issue.
- Set the multimeter: Switch to 20V DC mode.
- Connect probes: Red to positive (+), black to negative (-).
- Read the voltage: 12.6V-12.8V = fully charged battery.
- Note low readings: Below 12.4V suggests a charging problem.
- Check for consistency: Repeat the test to confirm the reading.
Step 2: Test Voltage While Cranking
If the battery has enough charge to crank the engine, ask a helper to turn the key while you monitor the multimeter. The voltage should not drop below 10V during cranking. If it does, the alternator may not be providing enough current, or the battery could be weak.
A steady voltage above 10V suggests the alternator is functioning, but the issue may lie elsewhere, such as the starter or fuel system.
- Keep the multimeter connected: Probes remain on the battery terminals.
- Crank the engine: Have a helper turn the key to crank (do not start the engine).
- Monitor the voltage: Should stay above 10V; below 10V indicates a problem.
- Check for fluctuations: Voltage should not drop or spike erratically.
Step 3: Test Alternator Output (If Engine Starts Briefly)
If you can get the engine to start briefly (e.g., with a jump), you can test the alternator’s output directly. With the engine running, the multimeter should read between 13.8V and 14.4V. This voltage range indicates the alternator is charging the battery properly.
If the voltage is outside this range, the alternator may be overcharging or undercharging the battery.
To perform this test, start the engine and let it idle. Connect the multimeter to the battery terminals as before. If the voltage is below 13.8V, the alternator is not charging the battery sufficiently.
If it’s above 14.4V, the alternator is overcharging, which can damage the battery over time.
| Test | Engine Condition | Expected Voltage | Issue Indicated |
|---|---|---|---|
| Battery Voltage | Off | 12.6V – 12.8V | Low voltage = weak battery or alternator issue |
| Voltage While Cranking | Cranking | Above 10V | Below 10V = alternator or battery problem |
| Alternator Output | Running | 13.8V – 14.4V | Outside range = alternator over/undercharging |
This table summarizes the expected voltage readings for each test. If your readings fall outside these ranges, further diagnosis is needed to pinpoint the issue.
Common Mistakes When Testing the Alternator
Testing the alternator can be straightforward, but it’s easy to make mistakes that lead to incorrect conclusions. One of the most common errors is assuming a dead battery means the alternator is bad. The battery could simply be drained due to leaving lights on or a parasitic draw, and the alternator might be fine.
Another mistake is not checking the connections—corroded or loose battery terminals can mimic alternator failure by preventing proper charging.
People also often forget to test the alternator’s output while the engine is running. A battery voltage test alone isn’t enough; you need to confirm the alternator is charging the battery when the engine is on. Additionally, using an analog multimeter instead of a digital one can lead to inaccurate readings, as analog meters are less precise.
Finally, ignoring visual signs like a slipping belt or damaged wiring can cause you to overlook simple fixes.
- Assuming a dead battery means a bad alternator: The battery could be drained for other reasons, like leaving lights on.
- Not checking connections: Corroded or loose terminals can mimic alternator failure.
- Skipping the running test: Always check alternator output with the engine running to confirm it’s charging.
- Using an analog multimeter: Digital multimeters are more accurate for voltage readings.
- Ignoring visual signs: A slipping belt or damaged wiring can indicate alternator issues.
- Testing with accessories on: Turn off all electronics to get accurate voltage readings.
- Not confirming the multimeter setting: Ensure it’s set to DC voltage for battery and alternator tests.
Tip: Always clean the battery terminals before testing to ensure accurate readings. Corrosion can interfere with the multimeter’s connection.
How to Tell If It’s the Battery or Alternator
Distinguishing between a bad battery and a failing alternator can be tricky, as both can cause similar symptoms. The key difference is that a bad battery won’t hold a charge, while a bad alternator won’t recharge the battery. If jump-starting the car works and it stays running, the issue is likely the battery.
However, if the car starts but dies shortly after removing the jumper cables, the alternator is probably the culprit.
Another way to tell is by performing a load test on the battery. Most auto parts stores offer free battery testing, which can determine if the battery is still holding a charge. If the battery tests fine but the car still won’t start or the battery warning light comes on, the alternator is likely at fault.
You can also check the alternator’s output with a multimeter while the engine is running—if it’s not producing between 13.8V and 14.4V, the alternator is failing.
| Symptom | Likely Battery Issue | Likely Alternator Issue |
|---|---|---|
| Car won’t start (no crank) | Yes | No |
| Car starts but dies quickly | No | Yes |
| Battery warning light on | No | Yes |
| Dim headlights | Sometimes | Yes |
| Jump-start works but car dies after removing cables | No | Yes |
This table helps you differentiate between battery and alternator issues based on common symptoms. If the car starts but dies after removing jumper cables, the alternator is likely the problem.
What to Do If Your Alternator Is Bad
If your tests confirm the alternator is failing, the next step is to replace it. While it’s possible to drive short distances with a bad alternator (as long as the battery has some charge), it’s not recommended, as the battery will eventually drain, leaving you stranded. Replacing the alternator is a moderate-level DIY job, but it requires some mechanical skill and the right tools.
If you’re not comfortable working under the hood, it’s best to take the car to a professional mechanic.
Before replacing the alternator, check if it’s under warranty. Many alternators come with a limited lifetime warranty, and some auto parts stores offer free testing and installation. If you’re replacing it yourself, make sure to disconnect the battery before starting to avoid electrical shorts.
Also, compare the new alternator with the old one to ensure it’s the correct model for your vehicle. After installation, test the charging system to confirm the new alternator is working properly.
- Confirm the diagnosis: Double-check your test results to ensure the alternator is the issue.
- Check warranty: See if the alternator is still under warranty for a free replacement.
- Gather tools: Socket set, wrenches, multimeter, and a new alternator.
- Disconnect the battery: Always disconnect the negative terminal first to prevent shorts.
- Remove the old alternator: Follow your vehicle’s service manual for specific steps.
- Install the new alternator: Ensure all connections are tight and the belt is properly tensioned.
- Reconnect the battery: Reattach the negative terminal last.
- Test the charging system: Use a multimeter to confirm the new alternator is charging the battery.
Warning: Never disconnect the battery while the engine is running. This can cause a voltage spike that damages the alternator or other electrical components.
Frequently Asked Questions
Can I test the alternator without a multimeter?
Yes, you can perform a basic test without a multimeter by jump-starting the car and then removing the jumper cables. If the car dies immediately, the alternator is likely bad. However, this method isn’t as accurate as using a multimeter and doesn’t provide voltage readings to confirm the issue.
How long can I drive with a bad alternator?
You can typically drive for about 30 minutes to an hour with a bad alternator, depending on the battery’s charge. However, once the battery drains, the car will stall, and you’ll be stranded. It’s best to address the issue as soon as possible to avoid being left without power.
Why does my battery keep dying if the alternator is good?
If the alternator is working but the battery keeps dying, there may be a parasitic draw—an electrical component that continues to use power even when the car is off. Common culprits include a malfunctioning radio, interior lights, or a faulty relay. A professional can perform a parasitic draw test to identify the issue.
Can a bad alternator cause the check engine light to come on?
Yes, a failing alternator can trigger the check engine light, especially in modern vehicles with advanced electrical systems. The alternator’s output affects the engine’s performance, and irregular voltage can cause the vehicle’s computer to log a trouble code, illuminating the check engine light.
How much does it cost to replace an alternator?
The cost to replace an alternator varies depending on the make and model of your vehicle. On average, you can expect to pay between $400 and $600 for parts and labor. If you’re doing the job yourself, the alternator itself typically costs between $100 and $300, while professional installation can add an additional $200 to $400.
Final Thoughts
Testing the alternator when your car won’t start is entirely possible with the right approach. Start with a battery voltage test using a multimeter, then check for voltage drops while cranking and perform a visual inspection. If the alternator is confirmed as the issue, replace it promptly to avoid being stranded.
Remember, a bad alternator can leave you with a dead battery, so addressing the problem early is key to staying on the road.
Leave a Reply