
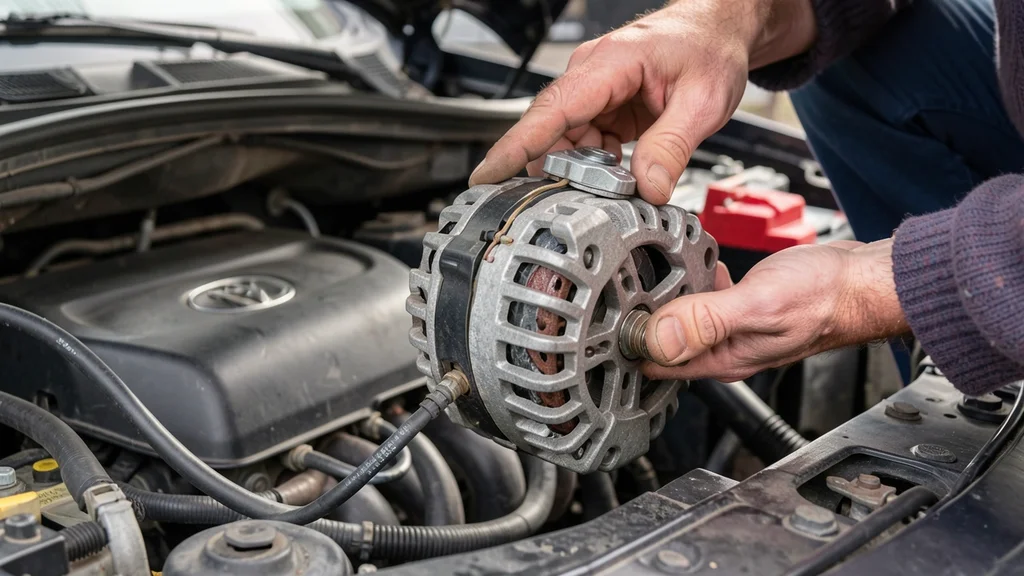
If your car’s battery light is on or you’re hearing strange noises under the hood, can you
Yes, you can replace your alternator yourself if you have basic tools and follow safety precautions. It typically takes 1-3 hours, depending on your vehicle. Always disconnect the battery first and consult your repair manual for model-specific steps.
Signs Your Alternator Needs Replacement
The alternator charges your battery and powers electrical systems while the engine runs. When it fails, you’ll notice warning signs that shouldn’t be ignored.
Catching these early can prevent being stranded with a dead battery. Here’s what to watch for:
- Battery warning light on the dashboard (most common sign)
- Dim or flickering headlights, especially at idle
- Weak or dead battery that won’t hold a charge
- Strange noises like whining or grinding from the engine bay
- Electrical accessories (radio, power windows) working poorly
- Smell of burning rubber near the alternator (serpentine belt slipping)
- Car stalling or difficulty starting (engine relies on battery power)
Warning: If your car dies while driving, pull over safely. A failing alternator can cause sudden loss of power steering and brakes.
According to AAA, alternator failures account for nearly 15% of all roadside assistance calls for electrical issues. The average lifespan is 7-10 years or 80,000-150,000 miles, but extreme heat or electrical demands can shorten this.
Tools and Materials You’ll Need
Gathering the right tools before starting ensures a smoother process. Most of these are standard in a home mechanic’s toolbox, but some may require a trip to the auto parts store.
Here’s your complete checklist:
| Tool/Material | Purpose | Estimated Cost |
|---|---|---|
| Socket set (10mm-17mm) | Removing alternator bolts | $20-$50 |
| Wrenches (same sizes) | Tight spaces where sockets won’t fit | $15-$40 |
| Serrated belt tool | Releasing tension on serpentine belt | $10-$25 |
| New alternator | Direct replacement for your make/model | $100-$400 |
| New serpentine belt | Recommended replacement during job | $20-$60 |
| Torque wrench | Properly tightening bolts to spec | $30-$100 |
| Jack and jack stands | Accessing alternator from underneath | $50-$150 |
Pro tip: Buy or borrow a serrated belt diagram for your specific vehicle. Many auto parts stores print these for free when you purchase a belt. Alternatively, take a photo of your current belt routing before removing it.
Preparation Steps Before Starting
Safety and preparation prevent damage to your vehicle or injury to yourself. These steps are non-negotiable for a successful alternator replacement.
- Park on a level surface and engage the parking brake. If working in a garage, ensure proper ventilation.
- Disconnect the negative battery terminal first, then the positive. This prevents electrical shorts. Never work on the electrical system with the battery connected.
- Let the engine cool completely if you’ve been driving. Alternators and belts get extremely hot.
- Gather all tools and parts within reach. Nothing’s worse than realizing mid-job that you’re missing a 14mm socket.
- Consult your service manual for vehicle-specific instructions. Some cars have quirks (e.g., alternator mounting on the passenger side).
- Wear safety gear: gloves to protect from sharp edges and grease, and eye protection for working under the hood.
Tip: If your car has a theft-deterrent radio, check your owner’s manual for the radio code. You may need it after reconnecting the battery.
According to the National Highway Traffic Safety Administration, nearly 20% of DIY automotive injuries occur due to improper jack use or lack of safety precautions. Always use jack stands—never rely on just a jack.
Step by Step Alternator Replacement Process
Now for the main event. Follow these steps carefully, and refer to your vehicle’s manual for any model-specific variations. The process generally follows this order, though some steps may vary.
Step 1: Locate the Alternator
Pop the hood and identify your alternator. It’s typically a cylindrical component about the size of a coconut, bolted to the engine block near the serpentine belt. Look for these visual cues:
- Mounted to the engine with 2-4 bolts
- Has a pulley that the serpentine belt wraps around
- Electrical connections (usually a large B+ terminal and a wiring harness plug)
- Often near the top of the engine on the passenger side (but varies by vehicle)
If you’re unsure, check your repair manual or search online for “ alternator location.”
Step 2: Remove the Serpentine Belt
The serpentine belt powers the alternator, AC compressor, power steering pump, and other accessories. You’ll need to remove it to access the alternator.
- Locate the belt tensioner—a pulley with a square hole for the serrated belt tool.
- Insert the tool into the tensioner and rotate it against the belt tension (usually clockwise).
- Slip the belt off the alternator pulley first, then release the tensioner.
- Remove the belt completely from the engine bay.
Important: If your belt shows cracks, fraying, or glazing, replace it even if it’s not the cause of your current issue. A failing belt can damage other components.
Step 3: Disconnect Electrical Connections
With the belt removed, you can now access the alternator’s electrical connections. These typically include:
- B+ terminal: Large nut (usually 10mm or 13mm) connecting the alternator to the battery positive cable
- Wiring harness plug: Multi-pin connector (may have a release tab or clip)
- Ground wire (if applicable): Usually a smaller bolt or nut
- Remove the nut securing the B+ terminal and disconnect the wire. It may be stiff—wiggle it gently while pulling.
- Press the release tab on the wiring harness plug and pull it straight out. Do not yank it sideways.
- If your alternator has a ground wire, remove its bolt and set the wire aside.
Step 4: Remove the Alternator Mounting Bolts
Alternators are secured to the engine block with 2-4 bolts. These are often in tight spaces, so you may need extensions or universal joints for your socket.
- Typical bolt sizes: 14mm or 15mm (but check your manual)
- Top bolt: Usually the easiest to access
- Bottom bolt: Often requires removing a brace or working from underneath
- Some vehicles have a long through-bolt that requires a special approach
Loosen all bolts before removing any completely. This prevents the alternator from shifting and making the last bolt impossible to remove.
Warning: If a bolt is seized, don’t force it. Apply penetrating oil (like PB Blaster) and wait 10-15 minutes before trying again. Forcing a bolt can strip the head or break the bolt.
Step 5: Remove the Old Alternator
Once all bolts and connections are free:
- Carefully lift the alternator out of its mounting bracket.
- It may be heavy (10-20 lbs), so support it with both hands.
- Compare the old alternator with the new one to ensure they match. Check:
- Same physical size and shape
- Same pulley size and orientation
- Same electrical connections (B+ terminal location, plug type)
- Same mounting bolt pattern
If anything looks different, do not install the new alternator. Return it to the parts store for an exchange.
Step 6: Install the New Alternator
Installation is the reverse of removal, but with some critical checks:
- Position the new alternator in the mounting bracket. It should sit flush without forcing.
- Hand-start all mounting bolts to ensure they thread correctly.
- Tighten bolts in a cross pattern to evenly seat the alternator. Torque to your vehicle’s specifications (usually 30-50 ft-lbs).
- Reconnect the electrical connections:
- Wiring harness plug: Push in until it clicks
- B+ terminal: Secure with the nut, then tug the wire to confirm it’s tight
- Ground wire (if applicable): Reattach and tighten
Step 7: Reinstall the Serpentine Belt
This is where your belt diagram comes in handy. Follow these steps:
- Route the new belt around all pulleys except the alternator pulley.
- Place the belt over the alternator pulley last.
- Use the serrated belt tool to tension the belt by rotating the tensioner.
- Slip the belt onto the alternator pulley and release the tensioner.
- Check that the belt is properly seated in all pulley grooves.
After installation, rotate the belt by hand to ensure it spins freely on all pulleys.
Step 8: Reconnect the Battery and Test
Almost done! The final steps are critical for confirming your success:
- Reconnect the positive battery terminal first, then the negative.
- Start the car. The battery light should turn off after the engine starts.
- Check all electrical systems: headlights, radio, power windows.
- Use a multimeter to test voltage at the battery with the engine running. It should read 13.8-14.4 volts.
- Recheck all connections for tightness after the engine has run for a few minutes (vibrations can loosen things).
Tip: If the battery light stays on after starting, turn off the engine immediately. You may have a loose connection or a faulty alternator.
Common Mistakes to Avoid
Even experienced DIYers can make mistakes during alternator replacement. Being aware of these pitfalls can save you hours of frustration—or worse, damage to your vehicle.
| Mistake | Why It’s Bad | How to Avoid |
|---|---|---|
| Not disconnecting the battery first | Can cause shorts, damage to electrical system, or injury | Always disconnect negative terminal first, positive last |
| Using the wrong belt size | Belt may be too loose (slipping) or too tight (damaging pulleys) | Check your manual or old belt for the correct part number |
| Overtightening alternator bolts | Can crack the alternator housing or strip threads | Use a torque wrench and follow specs (usually 30-50 ft-lbs) |
| Skipping the belt diagram | Incorrect belt routing can damage accessories or cause immediate failure | Take a photo before removal or get a diagram from the parts store |
| Mixing up B+ and ground connections | Can cause electrical system damage or alternator failure | Label connections with tape before disconnecting |
| Not testing after installation | Won’t know if the job was successful until it’s too late | Always test voltage with a multimeter (13.8-14.4V at battery) |
Another common mistake is not checking the new alternator before installation. Always verify that the new unit spins freely by hand and that the pulley is aligned with the other accessories. A defective new alternator is rare but possible.
When to Call a Professional
While many people can replace an alternator themselves, some situations call for professional help. Knowing your limits prevents bigger problems down the road.
Consider hiring a mechanic if:
- You don’t have the required tools (e.g., torque wrench, serrated belt tool) and aren’t willing to buy them.
- Your vehicle has a complex engine layout (e.g., some European or luxury cars with tight engine bays).
- You’re not comfortable working with electrical systems or using a multimeter.
- The alternator is in a hard-to-reach location (e.g., under the intake manifold on some V6 engines).
- You’ve attempted the job but can’t remove a seized bolt or other component.
- Your car has special requirements, like reprogramming the ECU after electrical work.
According to RepairPal, the average professional alternator
Important: If your car is still under warranty, check whether DIY work voids it. Some warranties require certified technicians to perform repairs.
Cost Comparison: DIY vs Professional
One of the biggest advantages of DIY alternator replacement is the cost savings. Here’s a detailed breakdown of what you’ll spend versus hiring a pro.
| Expense | DIY Cost | Professional Cost | Savings |
|---|---|---|---|
| Alternator (new) | $100-$400 | $200-$600 (marked up) | $100-$200 |
| Serpentine belt | $20-$60 | $50-$100 (marked up) | $30-$40 |
| Labor | $0 | $150-$300 | $150-$300 |
| Diagnostic fee | $0 (or free at auto parts stores) | $50-$120 | $50-$120 |
| Tools (if you don’t own them) | $50-$200 | $0 | – |
| Total | $170-$660 | $450-$1,120 | $280-$460 |
Note that DIY costs can vary widely based on whether you need to buy tools. However, these tools (socket set, wrenches, jack stands) are reusable for future projects. Many auto parts stores also rent tools for free with a deposit.
Also consider the time value. If you’re paying a mechanic $100/hour and the job takes them 1.5 hours, that’s $150 in labor. If it takes you 4 hours of your weekend, is the $150 savings worth your time?
Only you can decide.
Pro Tips for a Smoother Job
Veteran mechanics have learned tricks over the years to make alternator replacement easier. Here are their best tips to help you avoid headaches.
- Use a breaker bar for stubborn bolts. The long handle provides more torque than a ratchet, but be careful not to round the bolt head.
- Spray bolts with penetrating oil the night before. If you suspect a bolt might be seized, apply PB Blaster or Liquid Wrench and let it sit overnight.
- Label everything. Use masking tape to label wires and bolts as you remove them. This is especially helpful if you’re interrupted mid-job.
- Take photos at every step. Your phone’s camera is your best friend for remembering how things go back together.
- Use a magnetic tray to keep track of bolts and small parts. Nothing’s worse than dropping a 10mm nut into the engine bay.
- Check for recalls. Some vehicles have known alternator issues covered under warranty or recall. Check NHTSA’s recall database with your VIN.
- Upgrade your alternator. If you frequently use high-powered accessories (large stereos, winches, etc.), consider a high-output alternator (160-200 amps vs. standard 100-140 amps).
- Clean the battery terminals while you’re at it. Corrosion on the terminals can cause electrical issues even with a good alternator.
Tip: If your alternator bolts are accessible from the top and bottom, try loosening the top bolt first, then the bottom. This can prevent the alternator from pivoting and making the last bolt impossible to remove.
How to Test Your Alternator Before and After Replacement
Testing your alternator ensures you’re replacing the right part and that your new one is working correctly. Here’s how to do it properly.
Pre-Replacement Test (To Confirm the Problem)
- Visual inspection: Check for loose connections, melted wires, or a seized pulley.
- Battery voltage test (engine off):
- Set your multimeter to DC voltage (20V range).
- Connect red to positive (+) and black to negative (-) battery terminals.
- A healthy battery reads 12.4-12.6 volts.
- Running voltage test (engine on):
- Start the engine and let it idle.
- Measure voltage at the battery again.
- A good alternator should produce 13.8-14.4 volts.
- If voltage is below 13.5V, the alternator isn’t charging properly.
- If voltage is above 14.5V, the alternator is overcharging (can damage the battery).
- Load test:
- Turn on headlights, AC, and radio.
- Voltage should drop slightly but stay above 13.5V.
- If voltage drops below 12.5V, the alternator can’t handle the load.
Post-Replacement Test (To Confirm Success)
After installing the new alternator:
- Reconnect the battery and start the car.
- Check that the battery light turns off after the engine starts.
- Perform the running voltage test again. It should now read 13.8-14.4V.
- Take the car for a 10-15 minute test drive. This ensures the alternator is charging the battery under real conditions.
- After the drive, turn off the engine and test the battery voltage again. It should be higher than before the drive (indicating the alternator charged it).
Important: Some auto parts stores (like AutoZone or O’Reilly) will test your alternator and battery for free. If you’re unsure about your DIY tests, take advantage of this service.
According to Bosch Auto Parts, nearly 30% of returned alternators are actually working fine—the real issue was with the battery, cables, or connections. Always test thoroughly before replacing parts.
Frequently Asked Questions
How long does it take to replace an alternator yourself?
For most vehicles, can you replace your alternator yourself in 1-3 hours, depending on your experience and the car’s layout. Simple front-wheel-drive cars might take under an hour, while complex engines (e.g., some V8s or rear-wheel-drive vehicles) can take 3-4 hours. If you’re a first-timer, budget extra time for learning and potential hiccups.
Do I need to replace the serpentine belt when replacing the alternator?
It’s not mandatory, but highly recommended. The serpentine belt wears out over time (typically every 60,000-100,000 miles). Since you’ll already have it off, replacing it now saves you from doing the job twice.
A new belt costs $20-$60 and adds peace of mind.
Can I drive with a bad alternator?
You can drive very short distances (e.g., to a repair shop) with a bad alternator, but it’s risky. The battery alone can power your car for 30 minutes to a few hours, depending on the battery’s charge and electrical load. However, once the battery dies, you’ll lose power steering, brakes, and eventually the engine will stall.
Do not attempt long drives.
What happens if I connect the battery wrong when replacing the alternator?
Connecting the battery backward (positive to negative and vice versa) can cause severe electrical damage. This includes blown fuses, damaged ECU, and fried alternator diodes. Always double-check before reconnecting: positive (red) to positive (+), negative (black) to negative (-).
If you accidentally connect it wrong, disconnect immediately and check all fuses.
How do I know if my alternator or battery is bad?
A simple test can help you determine the culprit. With the engine off, test the battery voltage (12.4-12.6V = good). Then start the engine and test again (13.8-14.4V = good alternator).
If the battery reads low with the engine off but charges properly when running, the battery is likely bad. If the voltage stays low even when running, the alternator is the issue. Many auto parts stores will test both for free.
Final Thoughts
Replacing your alternator yourself is a rewarding DIY project that can save you hundreds of dollars. With basic tools, patience, and attention to detail, most car owners can tackle this job successfully. Remember to prioritize safety, test your work thoroughly, and don’t hesitate to call a professional if you hit a snag.
Whether can you replace your alternator yourself depends on your confidence and your vehicle’s complexity—but for many, the answer is a resounding yes.
Leave a Reply