
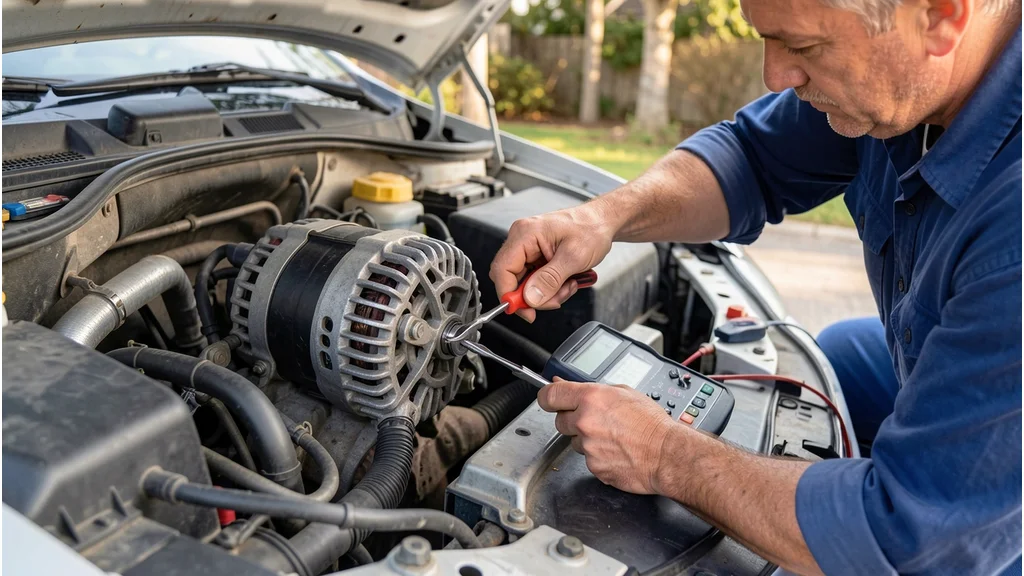
If your car’s battery light flickers or the engine struggles to start, can you test an alternator without removing it is likely your first thought. The good news is yes—you can diagnose alternator issues right in your driveway with basic tools and a multimeter. This guide covers everything you need to safely and accurately test your alternator without the hassle of removal, saving you time and potential repair costs.
Yes you can test an alternator without removing it by checking voltage output with a multimeter at the battery terminals while the engine runs. A healthy alternator should show 13.8 to 14.4 volts at idle.
Signs Your Alternator Needs Testing
The alternator is the heart of your car’s electrical system, charging the battery and powering accessories while the engine runs. When it fails, your vehicle’s performance suffers. Ignoring early signs can leave you stranded with a dead battery.
Watch for these common symptoms that signal it’s time to test your alternator:
- Dim or flickering headlights – especially at idle, as the alternator struggles to maintain consistent power.
- Battery warning light on the dashboard, which often appears as a battery symbol.
- Slow or difficult engine cranking, even after jump-starting the battery.
- Electrical accessories malfunctioning, like power windows moving sluggishly or the radio cutting out.
- Dead battery that keeps dying despite being new or recently charged.
- Whining or grinding noises from the engine bay, often caused by a failing alternator bearing.
- Smell of burning rubber or wires, which may indicate an overheating alternator.
Warning: If you notice smoke or a strong burning smell, turn off the engine immediately and consult a professional mechanic.
According to AAA, alternator failure is one of the top reasons for roadside assistance calls, accounting for nearly 15% of all battery-related breakdowns. Catching the issue early can prevent more expensive damage to your vehicle’s electrical system.
Tools You’ll Need for Testing
Testing an alternator without removing it requires minimal tools, most of which you may already have in your garage. Having the right equipment ensures accurate results and prevents damage to your vehicle’s electrical system.
Here’s what you’ll need:
| Tool | Purpose |
|---|---|
| Digital multimeter | Measures voltage output from the alternator |
| Jumper cables | Optional, for jump-starting if the battery is dead |
| Safety gloves | Protects hands from electrical shocks or hot components |
| Safety glasses | Shields eyes from sparks or debris |
| Flashlight | Illuminates the engine bay for better visibility |
| Owner’s manual | Provides vehicle-specific details and warnings |
A digital multimeter is the most critical tool for this job. Avoid using analog multimeters, as they may not provide the precision needed for accurate readings. If you don’t own one, consider borrowing or purchasing an affordable model—prices start at around $20.
Tip: If your multimeter has a low battery, replace it before testing to ensure accurate voltage readings.
Step by Step Guide to Test an Alternator Without Removing It
Follow these steps carefully to test your alternator while it remains in the vehicle. Accuracy and safety are key—rushing through the process can lead to incorrect results or even damage to your car’s electrical system.
Step 1: Prepare Your Vehicle
Park your car on a flat, stable surface and engage the parking brake. Turn off the engine and all electrical accessories, including the radio, air conditioning, and headlights. Open the hood and locate the battery and alternator.
- Ensure the vehicle is in Park (automatic) or Neutral (manual).
- Wear safety gloves and glasses to protect against accidental sparks.
- Check that the battery terminals are clean and free of corrosion.
Step 2: Check Battery Voltage with Engine Off
Before testing the alternator, verify the battery’s resting voltage. This gives you a baseline to compare against the alternator’s output.
- Set your multimeter to DC voltage (20V range).
- Connect the red probe to the battery’s positive (+) terminal.
- Connect the black probe to the battery’s negative (-) terminal.
- Read the voltage. A fully charged battery should show 12.6 to 12.8 volts.
| Battery Voltage | Battery Condition |
|---|---|
| 12.6V – 12.8V | Fully charged |
| 12.4V – 12.6V | 75% charged |
| 12.2V – 12.4V | 50% charged |
| Below 12.2V | Needs charging or replacement |
If the battery voltage is below 12.2 volts, it may not have enough charge to properly test the alternator. In this case, jump-start the vehicle or charge the battery before proceeding.
Step 3: Start the Engine and Test Alternator Output
Now it’s time to test the alternator’s performance. With the engine running, the alternator should charge the battery and power the vehicle’s electrical system.
- Start the engine and let it idle.
- Keep all electrical accessories off (lights, radio, A/C).
- Reconnect the multimeter to the battery terminals as in Step 2.
- Observe the voltage reading. A healthy alternator should produce 13.8 to 14.4 volts.
Important: If the voltage reading is below 13.5 volts or above 15 volts, your alternator may be faulty and needs further inspection.
Step 4: Test Under Load
To further verify the alternator’s performance, test it under electrical load. This simulates real-world conditions where multiple accessories are in use.
- With the engine still running, turn on the headlights (high beams), air conditioning, and radio.
- Recheck the voltage at the battery terminals.
- The voltage should remain stable between 13.5 and 14.4 volts. If it drops below 13.5 volts, the alternator may not be keeping up with demand.
If the voltage drops significantly under load, it’s a strong indication that the alternator is weak or failing. According to RepairPal, a healthy alternator should maintain consistent voltage even when multiple accessories are active.
Step 5: Inspect the Alternator Visually
While the engine is off, perform a visual inspection of the alternator for any obvious signs of damage or wear.
- Check the belt for cracks, fraying, or slack. A loose or damaged belt can prevent the alternator from spinning properly.
- Look for corrosion on the alternator’s electrical connections, which can impede performance.
- Listen for unusual noises when the engine is running, such as grinding or whining, which may indicate a failing bearing.
- Inspect the alternator housing for cracks or damage, which could signal internal issues.
If you notice any of these issues, the alternator may need to be repaired or replaced, even if the voltage readings seem normal.
Step 6: Perform a Final Check with Engine Revving
This step helps confirm whether the alternator responds correctly to changes in engine RPM.
- With the multimeter still connected, have a helper rev the engine to around 2,000 RPM.
- Observe the voltage reading. It should increase slightly, typically to 14.5 to 15 volts.
- If the voltage does not increase or drops, the alternator may be failing.
This test ensures the alternator is not only charging at idle but also responding appropriately to increased demand at higher engine speeds.
What Your Voltage Readings Mean
Interpreting your multimeter readings correctly is crucial for diagnosing alternator issues. Incorrect interpretations can lead to unnecessary part replacements or overlooked problems.
| Voltage Reading (Engine Running) | Alternator Condition |
|---|---|
| 13.8V – 14.4V | Normal |
| 14.5V – 15V | Normal (at higher RPMs) |
| Below 13.5V | Weak or failing alternator |
| Above 15V | Overcharging (faulty voltage regulator) |
| 12V – 12.8V | Alternator not charging (or dead battery) |
A reading below 13.5 volts indicates the alternator is not generating enough power to charge the battery and run the vehicle’s electrical systems. This could be due to a faulty alternator, a broken belt, or poor electrical connections.
On the other hand, a reading above 15 volts suggests the alternator is overcharging the battery, which can cause damage over time. This is often a sign of a faulty voltage regulator, which controls the alternator’s output.
Warning: If your alternator is overcharging, disconnect the battery immediately to prevent damage and consult a professional mechanic.
Common Mistakes to Avoid When Testing an Alternator
Even a simple task like testing an alternator can go wrong if you’re not careful. Avoiding these common mistakes will help you get accurate results and prevent damage to your vehicle or injury to yourself.
- Testing with a dead battery: A completely dead battery can give false readings. Always ensure the battery has some charge (at least 12.2V) before testing the alternator.
- Using the wrong multimeter setting: Set your multimeter to DC voltage (not AC) and the correct range (20V). Using the wrong setting can damage the meter or give incorrect readings.
- Ignoring safety precautions: Always wear safety gloves and glasses. Avoid touching the engine or alternator while the engine is running to prevent burns or injuries.
- Testing with accessories on: For the initial test, turn off all electrical accessories to get a baseline reading. Testing with accessories on can mask alternator issues.
- Not checking connections: Loose or corroded battery terminals or alternator connections can affect voltage readings. Always inspect and clean connections before testing.
- Skipping the visual inspection: A voltage test alone isn’t enough. Always visually inspect the alternator, belt, and connections for signs of wear or damage.
- Assuming the alternator is the problem: A dead battery or faulty starter can mimic alternator issues. Always test the battery first and consider other potential causes.
According to a study by Consumer Reports, over 30% of alternator replacements are unnecessary because the actual issue was a dead battery or poor electrical connection. Taking the time to test thoroughly can save you money and hassle.
Alternative Methods to Test an Alternator
If you don’t have a multimeter, there are a few alternative methods to test your alternator, though they are less precise. These can be useful for a quick check but should not replace a proper multimeter test.
Method 1: The Headlight Test
This simple test can give you a rough idea of whether your alternator is working.
- Start the engine and turn on the headlights.
- Rev the engine to around 2,000 RPM.
- Observe the headlights. If they brighten significantly when you rev the engine, the alternator is likely charging the battery.
- If the headlights stay dim or flicker, the alternator may not be functioning properly.
Important: This test is not as accurate as using a multimeter but can be a quick way to check for obvious alternator issues.
Method 2: The Battery Disconnect Test (Not Recommended)
This older method involves disconnecting the battery while the engine is running to see if the car stays on. However, this test is not recommended for modern vehicles, as it can damage sensitive electronics.
- Risk of damage: Disconnecting the battery can cause voltage spikes that may fry your car’s computer or other electronic components.
- Inaccurate results: Some vehicles may stay running even with a dead alternator due to residual battery charge.
- Safety hazard: There’s a risk of sparks or electrical shock when disconnecting the battery.
If you’re tempted to try this method, it’s far safer to use a multimeter or consult a professional mechanic instead.
Method 3: Use an Alternator Tester
Some auto parts stores offer free alternator testing using specialized tools. These testers can provide a more comprehensive diagnosis than a simple multimeter check.
- More accurate: Alternator testers can detect issues that a multimeter might miss, such as diode failures or internal shorts.
- Quick and easy: Many stores will perform the test for free if you bring in your vehicle.
- Professional insight: Store employees can often provide advice on whether the alternator needs replacement.
If you’re unsure about your multimeter results, consider visiting an auto parts store for a second opinion.
When to Replace Your Alternator
If your tests confirm that the alternator is faulty, it’s important to replace it promptly to avoid further damage to your vehicle’s electrical system. Here are some signs that it’s time for a replacement:
- Consistently low voltage readings (below 13.5V) during testing.
- Overcharging (voltage above 15V), which can damage the battery and other components.
- Visible damage to the alternator, such as cracks, leaks, or burnt smells.
- Noisy operation, such as grinding or whining, which may indicate a failing bearing.
- Frequent battery issues, such as a dead battery despite recent replacements or charges.
| Symptom | Likely Cause | Recommended Action |
|---|---|---|
| Low voltage (below 13.5V) | Faulty alternator | Replace alternator |
| Overcharging (above 15V) | Faulty voltage regulator | Replace alternator or voltage regulator |
| Grinding noise | Failing bearing | Replace alternator |
| Battery warning light | Alternator or battery issue | Test alternator and battery |
| Dim headlights | Weak alternator | Replace alternator |
Replacing an alternator is a moderate DIY task, but if you’re not comfortable working with car electrical systems, it’s best to leave it to a professional. The average cost to replace an alternator ranges from $400 to $800, including parts and labor, according to RepairPal.
Tip: If you’re replacing the alternator yourself, consider replacing the serpentine belt and tensioner at the same time to prevent future issues.
Frequently Asked Questions
Can you test an alternator with a dead battery?
No, you cannot accurately test an alternator with a completely dead battery. The alternator needs the battery to provide initial power to start the engine and stabilize the electrical system. If the battery is dead, charge it or jump-start the vehicle before testing the alternator.
A dead battery can give false readings, making it seem like the alternator is faulty when it’s actually fine.
How long does it take to test an alternator?
Testing an alternator without removing it typically takes 15 to 30 minutes, depending on your experience and the tools you have. This includes preparing the vehicle, checking battery voltage, testing the alternator at idle and under load, and performing a visual inspection. If you encounter issues or need to troubleshoot further, it may take a bit longer.
Can a bad alternator kill a new battery?
Yes, a bad alternator can kill a new battery. If the alternator is not charging the battery properly, the battery will eventually drain, even if it’s brand new. Additionally, if the alternator is overcharging, it can cause the battery to overheat and fail prematurely.
If you suspect a bad alternator, address the issue quickly to avoid damaging a new battery.
What happens if you drive with a bad alternator?
Driving with a bad alternator can lead to a dead battery, leaving you stranded. Once the battery is drained, the car will lose all electrical power, including the engine’s ignition system, causing it to stall. In modern vehicles, a failing alternator can also cause issues with the car’s computer and other electronic components.
It’s not safe to drive with a bad alternator, so address the problem as soon as possible.
How much does it cost to replace an alternator?
The cost to replace an alternator varies depending on the make and model of your vehicle, as well as labor rates in your area. On average, you can expect to pay between $400 and $800 for parts and labor. The alternator itself typically costs between $200 and $500, while labor can range from $200 to $300.
If you’re comfortable with DIY repairs, you can save on labor costs by replacing it yourself.
Final Thoughts
Testing an alternator without removing it is a straightforward process that can save you time and money. With a multimeter and a few simple steps, you can diagnose issues and determine whether your alternator needs replacement. Always prioritize safety, use the right tools, and interpret your readings carefully to avoid misdiagnosing the problem.
If you’re unsure about the results or uncomfortable performing the tests yourself, don’t hesitate to consult a professional mechanic. Catching alternator issues early can prevent more costly damage and keep your vehicle running smoothly.
Leave a Reply