
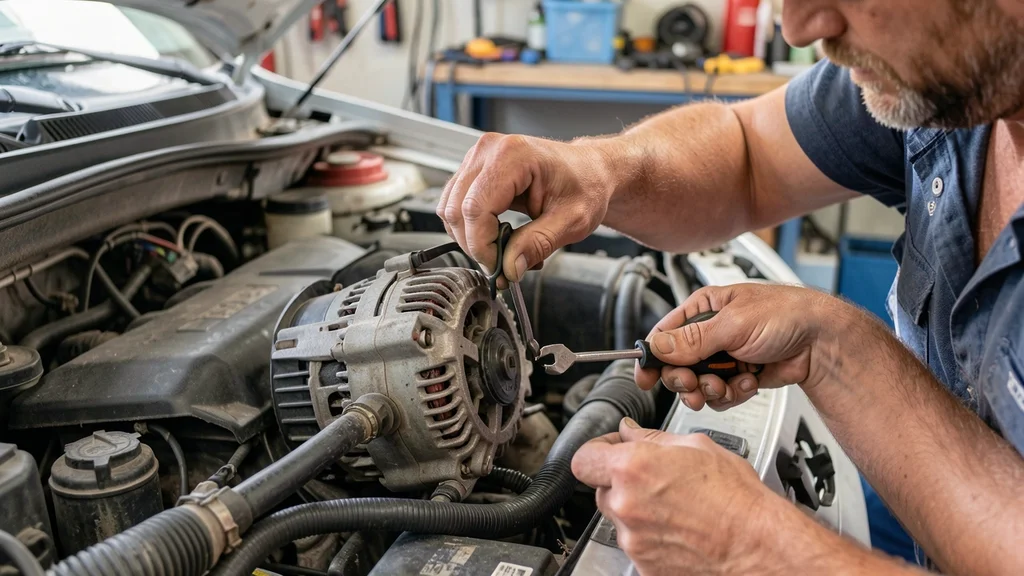
If your car is showing signs of electrical trouble, knowing can you check alternator on car without special tools can save you time and money. The alternator keeps your battery charged and powers electrical systems while the engine runs. A failing alternator can leave you stranded with a dead battery or cause dim lights and slow accessories.
This guide covers simple methods to test your alternator using basic tools or even just your senses.
You can check your alternator by observing dashboard warning lights, listening for unusual noises, or performing a simple headlight test. A visual inspection for corrosion or loose connections can also reveal issues.
Signs Your Alternator May Be Failing
The first step in checking your alternator is recognizing the warning signs. Your car often gives clear signals when the alternator is struggling. Ignoring these can lead to a complete electrical failure.
Watch for the battery warning light on your dashboard, which often looks like a rectangle with a plus and minus sign. Dim or flickering headlights, especially when idling, are another common indicator. You might also notice weak or slow accessories like power windows or a sluggish starter.
- Dashboard warning light (battery symbol)
- Dim or flickering headlights
- Weak or slow power accessories
- Dead battery after short drives
- Strange noises from the engine bay
- Electrical smells or burning odors
- Frequent need for jump starts
Warning: If you notice a burning smell or see smoke, stop the engine immediately. This could indicate a serious electrical issue that needs professional attention.
How to Perform a Headlight Test
The headlight test is one of the simplest ways to check your alternator without any tools. This method works because the alternator supplies power to your electrical system when the engine is running. If the alternator is failing, your headlights will show it.
Start by turning on your headlights with the engine off. Then start the car and observe the brightness. If the lights get brighter when you rev the engine, your alternator is likely working.
If they stay dim or get dimmer, your alternator may be failing. Here’s how to do it properly:
- Park your car in a dark area and turn on the headlights with the engine off
- Start the engine while watching the headlights
- Rev the engine slightly (around 2000 RPM)
- Observe the brightness of the headlights
- Turn on other electrical accessories (A/C, radio) and watch for dimming
| Headlight Behavior | Likely Alternator Status |
|---|---|
| Lights brighten when engine starts | Alternator working properly |
| Lights stay dim after starting | Alternator may be failing |
| Lights flicker with RPM changes | Alternator output is unstable |
| Lights dim when accessories turn on | Alternator can’t handle load |
The headlight test isn’t foolproof but gives a good initial indication. For more accurate results, combine this with other methods.
Visual Inspection of the Alternator
A thorough visual inspection can reveal obvious problems with your alternator. You don’t need to remove it to spot many common issues. Look for physical damage, loose connections, or signs of wear that could affect performance.
Start by locating your alternator, which is typically near the top of the engine. It’s usually a cylindrical component with a pulley and electrical connections. Check the belt that drives the alternator for cracks, fraying, or gluten.
Examine the wiring and connectors for corrosion, loose connections, or damage.
- Belt Condition: Look for cracks, fraying, or glossy spots (signs of slippage)
- Pulley Alignment: Check if the pulley wobbles or is misaligned
- Wiring: Inspect for damaged insulation or exposed wires
- Connectors: Look for corrosion or loose connections at the battery and alternator terminals
- Physical Damage: Check for cracks, leaks, or burnt spots on the alternator housing
- Mounting Bolts: Ensure all mounting bolts are tight and secure
Tip: If you see white powdery substance on the battery terminals or alternator connections, clean it with a mixture of baking soda and water. This corrosion can cause poor electrical connections.
Jump Start Test Method
The jump start test can help determine if your battery or alternator is the problem. This method works by observing your car’s behavior after a jump start. If the alternator is working, your car should continue running after the jumper cables are removed.
Here’s how to perform this test safely: First, jump start your car using another vehicle or a portable jump starter. Once your car is running, remove the jumper cables. If your car continues to run normally, your alternator is likely working.
If the car stalls immediately or the battery light comes on, your alternator may be the issue.
- Connect jumper cables to your car’s battery from a good battery source
- Start your car and let it run for a few minutes
- Carefully remove the jumper cables while the engine is running
- Monitor your dashboard for warning lights
- Observe if the engine continues running smoothly
- Turn on electrical accessories to test the alternator’s load capacity
| After Jump Start Removal | Likely Issue |
|---|---|
| Car continues running, no warning lights | Alternator is working |
| Car stalls immediately | Alternator is not working |
| Battery light comes on | Alternator output is insufficient |
| Car runs but accessories are weak | Alternator is struggling under load |
Important: Never remove the negative jumper cable while the engine is running. This can cause electrical spikes that may damage your car’s computer system.
Battery Terminal Test
This simple test uses your battery terminals to check alternator output. While not as precise as a multimeter, it can give you a good indication of whether your alternator is charging the battery. The method involves observing voltage changes at the battery while the engine runs.
Start with the engine off and note the battery voltage if you have a voltage tester. Then start the engine and rev it to about 2000 RPM. The voltage should increase from the base battery voltage (around 12.6V) to between 13.8V and 14.4V.
If you don’t have a tester, you can still observe the behavior of your electrical system.
- Engine Off: All electrical accessories should work normally from battery power
- Engine On: Voltage should increase slightly, accessories may work more strongly
- Reving Engine: Voltage should increase further, lights may brighten
- Accessories On: Voltage should remain stable, not drop significantly
- Engine Off Again: Voltage should return to base battery voltage
According to the Car Care Council, about 1 in 5 vehicle breakdowns are related to battery or electrical system issues. Many of these could be prevented with regular alternator checks. The council recommends checking your charging system at least twice a year, especially before extreme weather seasons.
Common Mistakes When Checking Your Alternator
Even with these simple tests, it’s easy to make mistakes that can lead to incorrect conclusions. Being aware of these common pitfalls can help you get more accurate results from your alternator checks.
One of the most common mistakes is testing with a nearly dead battery. A weak battery can mask alternator problems or give false readings. Always start with a fully charged battery for accurate testing.
Another mistake is not checking all connections – a loose belt or corroded terminal can mimic alternator failure.
- Testing with a dead battery: Always start with a fully charged battery for accurate results
- Ignoring belt condition: A loose or worn belt can prevent the alternator from working properly
- Not checking all connections: Corroded or loose connections can cause false alternator failure readings
- Testing with too many accessories on: Turn off non-essential electronics for more accurate results
- Not running the engine long enough: Some tests require the engine to run for several minutes to get accurate readings
- Overlooking visual inspection: Physical damage or wear can indicate alternator problems even if tests seem normal
- Using incorrect test procedures: Always follow the exact steps for each test method
Warning: Never disconnect the battery while the engine is running to test the alternator. This can cause voltage spikes that may damage your car’s electrical system, especially sensitive components like the ECU.
When to Seek Professional Help
While these DIY methods can help you identify potential alternator problems, there are times when professional diagnosis is necessary. Some issues require specialized equipment or expertise to properly diagnose and repair.
If your tests show inconsistent results, or if you’re not comfortable performing these checks yourself, it’s best to visit a professional mechanic. They have access to advanced diagnostic tools that can precisely test your alternator’s output and overall charging system health.
- Tests show inconsistent or unclear results
- You notice burning smells or see smoke
- The alternator is physically damaged or leaking
- You’re not comfortable performing electrical tests
- Your car has complex electrical systems or hybrid components
- You’ve replaced parts but the problem persists
- You need a precise diagnosis for warranty purposes
| Situation | Recommended Action |
|---|---|
| Inconsistent test results | Professional diagnostic test |
| Physical damage or leaks | Immediate professional inspection |
| Uncomfortable with electrical tests | Visit a trusted mechanic |
| Complex vehicle systems | Dealership or specialist service |
The National Institute for Automotive Service Excellence (ASE) reports that charging system problems account for about 15% of all vehicle breakdowns. Their certified technicians recommend regular charging system checks as part of routine maintenance, especially for vehicles over 5 years old.
Preventative Maintenance for Your Alternator
Regular maintenance can extend your alternator’s life and prevent unexpected failures. These simple steps can help keep your charging system in top condition and avoid costly repairs.
The alternator is a critical component that often gets overlooked until it fails. By incorporating these maintenance tasks into your regular vehicle care routine, you can catch potential problems early and ensure your alternator lasts as long as possible.
- Regular belt inspection: Check the alternator belt every 6 months or 6,000 miles for wear and proper tension
- Clean connections: Clean battery terminals and alternator connections annually to prevent corrosion
- Electrical system check: Have your charging system tested professionally every 2 years
- Listen for noises: Pay attention to any unusual noises from the engine bay, especially squealing or grinding
- Monitor dashboard lights: Address any warning lights immediately, especially the battery light
- Keep it dry: Avoid driving through deep water that could splash onto the alternator
- Check voltage regularly: If you have a voltage tester, check your battery voltage monthly
Tip: If you frequently drive in stop-and-go traffic or use many electrical accessories, your alternator works harder. In these cases, consider checking it more often, perhaps every 3-4 months.
Frequently Asked Questions
Can I check my alternator without any tools?
Yes, you can perform basic checks without tools using the headlight test, visual inspection, or jump start test. While these methods aren’t as precise as using a multimeter, they can give you a good indication of your alternator’s health. The headlight test is particularly effective and requires no special equipment.
How long does an alternator typically last?
Most alternators last between 80,000 to 150,000 miles, or about 7-10 years. However, this can vary based on driving conditions, electrical load, and vehicle make. Harsh conditions, frequent short trips, or excessive electrical accessory use can shorten its lifespan.
What happens if I keep driving with a bad alternator?
Driving with a failing alternator will eventually drain your battery completely, leaving you stranded. As the battery loses charge, you’ll first notice dim lights and weak accessories. Eventually, your engine may stall and won’t restart.
In modern cars, this can also cause issues with the computer system and other electrical components.
Can a bad alternator damage my battery?
Yes, a failing alternator can damage your battery in several ways. If it’s overcharging, it can cause the battery to overheat and fail prematurely. If it’s undercharging, the battery will be constantly drained, leading to sulfation and reduced capacity.
Either scenario can significantly shorten your battery’s life.
How much does it cost to replace an alternator?
The cost to replace an alternator varies by vehicle make and model. On average, you can expect to pay between $400 to $800 for parts and labor. The alternator itself typically costs $200 to $500, while labor usually runs $100 to $300.
Luxury or imported vehicles may cost more, sometimes up to $1,200 or more.
Final Thoughts
Knowing can you check alternator on car without specialized tools empowers you to catch potential problems early. Regular checks using these simple methods can save you from unexpected breakdowns. Remember that while DIY tests are helpful, professional diagnosis is sometimes necessary for accurate results.
By staying vigilant and performing these checks regularly, you can ensure your alternator keeps your car running smoothly for years to come.
Leave a Reply