
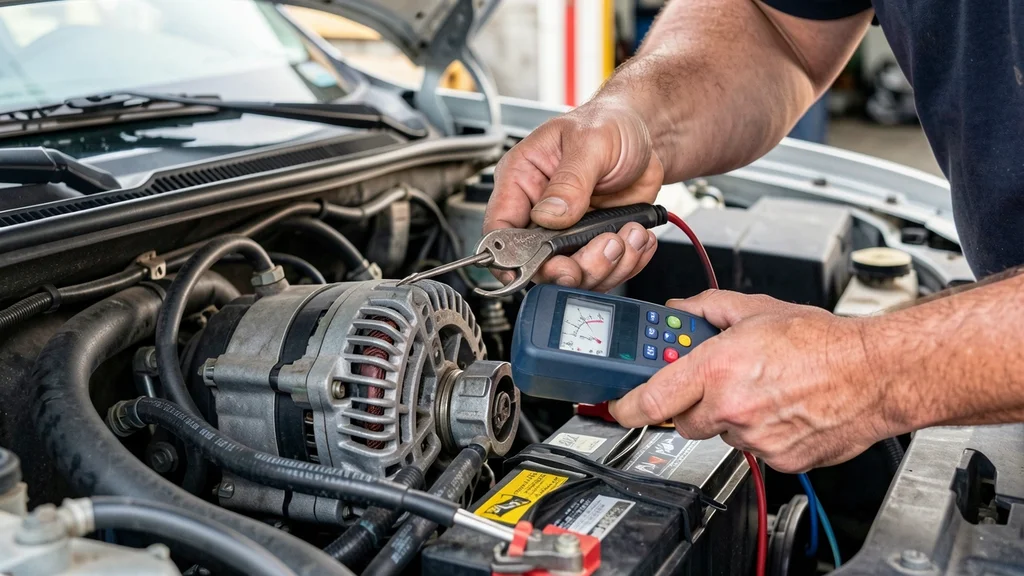
If your car’s battery light flickers or the headlights dim, you might wonder can you check alternator while car is running. Testing the alternator with the engine on is possible, but it requires caution to avoid electrical hazards or damage. This guide covers safe methods, tools you’ll need, and what to watch for when diagnosing alternator issues in real time.
Yes you can test an alternator while the car is running by measuring voltage at the battery with a multimeter. A healthy alternator shows 13.8 to 14.4 volts. Never disconnect battery cables during the test to avoid voltage spikes that can damage the electrical system.
Signs Your Alternator Needs Checking While Running
Your car often gives clear signals when the alternator is failing. The most common sign is the battery warning light on the dash, which can indicate low voltage or charging issues. Dim or flickering headlights, especially when idling, also suggest the alternator isn’t producing enough power.
Other symptoms include weak or slow cranking when starting the engine, electrical accessories like power windows or the radio working intermittently, or a burning smell from the engine bay. If you notice any of these, testing the alternator while the car is running can help confirm the issue before it leaves you stranded.
- Battery warning light on the dashboard
- Dim or flickering headlights
- Slow engine cranking
- Electrical accessories malfunctioning
- Burning rubber or electrical smell
- Dead battery after short drives
- Whining noise from the engine bay
Warning: Ignoring alternator issues can lead to a dead battery or complete electrical failure while driving, which may cause loss of power steering or brakes in some vehicles.
Tools You Need to Test the Alternator Safely
Testing an alternator while the car is running requires a few essential tools. A digital multimeter is the most important, as it measures voltage accurately. You’ll also need safety glasses to protect your eyes from sparks or debris, and insulated gloves to prevent electrical shocks.
Additionally, have a basic socket set or wrench handy in case you need to inspect the alternator’s connections. A service manual for your specific vehicle can provide wiring diagrams and voltage specifications. Never attempt this test without proper tools, as improper handling can damage the vehicle or cause injury.
| Tool | Purpose |
|---|---|
| Digital Multimeter | Measures voltage output from alternator |
| Safety Glasses | Protects eyes from sparks or debris |
| Insulated Gloves | Prevents electrical shocks |
| Socket Set/Wrench | Inspects alternator connections if needed |
| Service Manual | Provides vehicle-specific voltage specs |
Having the right tools ensures accuracy and safety. A multimeter with a voltage range up to 20V DC is ideal for this task.
Step by Step Guide to Test Alternator While Car Is Running
Testing the alternator with the engine running is straightforward if you follow the correct steps. Start by parking the car on a flat surface, engaging the parking brake, and ensuring the engine is off. Open the hood and locate the battery, which is usually near the front of the engine bay.
Before starting the engine, set your multimeter to DC voltage mode (20V range). Connect the red probe to the positive battery terminal and the black probe to the negative terminal. Note the voltage reading with the engine off—this is your battery’s resting voltage, typically around 12.6 volts for a fully charged battery.
- Prepare the Vehicle
Park on level ground, engage the parking brake, and turn off all accessories like lights, radio, and air conditioning. This ensures an accurate reading without extra electrical load. - Connect the Multimeter
Attach the red probe to the positive (+) battery terminal and the black probe to the negative (-) terminal. Ensure the connections are secure to avoid fluctuations in the reading. - Start the Engine
Have an assistant start the engine while you monitor the multimeter. The voltage should immediately rise to between 13.8 and 14.4 volts. This indicates the alternator is charging the battery properly. - Increase Engine RPM
Ask your assistant to rev the engine to about 2000 RPM. The voltage should remain stable or increase slightly but stay within the 13.8-14.4 volt range. If it drops below 13 volts, the alternator may be failing. - Test Under Load
Turn on the headlights, air conditioning, and other accessories to simulate real driving conditions. The voltage should stay above 13 volts. If it drops significantly, the alternator may not handle the load. - Check for Voltage Fluctuations
Watch the multimeter for any sudden drops or spikes in voltage. Consistent fluctuations can indicate a problem with the alternator’s internal regulator or diodes.
Tip: If your multimeter shows a voltage above 14.5 volts consistently, the alternator may be overcharging, which can damage the battery and electrical components over time.
What Voltage Readings Mean for Your Alternator
Understanding the voltage readings from your multimeter is key to diagnosing alternator health. A reading between 13.8 and 14.4 volts with the engine running indicates a properly functioning alternator. This range means the alternator is charging the battery and powering the vehicle’s electrical system effectively.
If the voltage reads below 13 volts, the alternator is likely not generating enough power to charge the battery or run the car’s electronics. This could be due to worn brushes, a faulty voltage regulator, or a slipping alternator belt. On the other hand, a reading consistently above 14.5 volts suggests overcharging, which can damage the battery and other components.
| Voltage Range | Alternator Condition | Likely Issue |
|---|---|---|
| 12.6V (Engine Off) | Healthy Battery | Normal resting voltage |
| 12.0V or Below (Engine Off) | Weak or Dead Battery | Battery may need charging or replacement |
| 13.8-14.4V (Engine On) | Good Alternator | Normal charging range |
| Below 13.0V (Engine On) | Failing Alternator | Worn brushes, faulty regulator, or slipping belt |
| Above 14.5V (Engine On) | Overcharging Alternator | Faulty voltage regulator or diodes |
According to AAA automotive studies, over 40% of alternator failures are due to worn bearings or brushes, which can cause voltage fluctuations. Regular testing can help catch these issues early.
Common Mistakes to Avoid When Testing Alternator
Many DIY mechanics make critical errors when testing an alternator while the car is running. One of the most dangerous mistakes is disconnecting the battery cables to see if the engine stays running. This can cause a voltage spike that damages sensitive electronics like the ECU, radio, or power steering control module.
Another common error is using a cheap or inaccurate multimeter, which can give false readings. Always use a high-quality digital multimeter for precise measurements. Additionally, testing the alternator with a dead or nearly dead battery can skew results, as the alternator may struggle to charge a completely drained battery.
- Disconnecting Battery Cables
This can create a voltage spike that fries electrical components. Always keep the battery connected during testing. - Using an Analog Multimeter
Analog multimeters can be less accurate and harder to read. A digital multimeter with a clear display is recommended. - Testing with a Dead Battery
A dead battery can prevent the alternator from functioning normally. Charge or replace the battery before testing. - Ignoring Accessory Load
Not testing under load (e.g., with headlights on) can miss alternator issues that only appear when the vehicle demands more power. - Loose or Corroded Connections
Dirty or loose battery terminals can affect voltage readings. Clean the terminals before testing. - Testing at Idle Only
Some alternator issues only appear at higher RPMs. Always test at idle and at 2000 RPM. - Overlooking Belt Condition
A slipping or worn serpentine belt can cause alternator issues. Inspect the belt for cracks or wear.
Important: If you accidentally disconnect the battery while the engine is running and notice electrical issues afterward, turn off the engine immediately and check for blown fuses or damaged components.
How to Inspect the Alternator Visually Before Testing
A visual inspection can often reveal obvious alternator problems before you even start the engine. Begin by checking the serpentine belt for signs of wear, such as cracks, fraying, or glossy spots, which indicate slippage. A loose or damaged belt can prevent the alternator from spinning properly, leading to charging issues.
Next, examine the alternator itself for physical damage, such as dents or corrosion on the housing. Look at the electrical connections and wiring harness for any signs of corrosion, loose connections, or melted insulation. These issues can cause poor electrical contact and affect the alternator’s performance.
- Serpentine Belt
Check for cracks, fraying, or glossy spots. Replace if damaged or if it’s been over 60,000 miles. - Alternator Housing
Look for dents, corrosion, or oil leaks, which can indicate internal damage. - Electrical Connections
Inspect the battery terminals and alternator connectors for corrosion or looseness. - Wiring Harness
Check for melted insulation or damaged wires, especially near the alternator. - Pulley Alignment
Misaligned pulleys can cause belt wear and alternator failure. Ensure the alternator pulley is in line with the others. - Cooling Fins
Blocked or damaged cooling fins can cause the alternator to overheat. Clean any debris around the alternator.
| Issue | What to Look For | Solution |
|---|---|---|
| Worn Belt | Cracks, fraying, glossy spots | Replace the serpentine belt |
| Corroded Terminals | White or green crust on terminals | Clean with baking soda and water |
| Loose Connections | Wiggly or disconnected wires | Tighten or replace connectors |
| Damaged Housing | Dents, cracks, or oil leaks | Replace the alternator |
The Car Care Council reports that nearly 20% of alternator replacements are due to belt-related issues, making visual inspections a critical first step.
When to Replace vs Repair Your Alternator
Deciding whether to repair or replace a faulty alternator depends on the severity of the issue and the age of the component. If the alternator is relatively new and the problem is minor, such as a loose connection or a worn belt, a simple repair may suffice. However, if the alternator has internal damage, like a failed voltage regulator or worn-out brushes, replacement is usually the best option.
Consider the cost of repair versus replacement. Rebuilding an alternator can cost between $150 to $300, while a new alternator typically ranges from $200 to $500, depending on the vehicle make and model. If the alternator has over 100,000 miles or shows signs of significant wear, replacement is often more cost-effective in the long run.
| Factor | Repair | Replace |
|---|---|---|
| Age of Alternator | Under 5 years old | Over 5 years old or high mileage |
| Issue Type | External (belt, connections) | Internal (regulator, brushes, bearings) |
| Cost | $150-$300 | $200-$500 |
| Warranty | May void warranty if tampered | Preserves warranty if done professionally |
| Time | 1-2 hours | 1-2 hours (plus parts ordering) |
Tip: If you’re unsure about the extent of the damage, many auto parts stores offer free alternator testing. They can bench-test the alternator to determine if it needs repair or replacement.
Frequently Asked Questions
Can I test the alternator without a multimeter?
While it’s not as accurate, you can perform a basic check by starting the car and then disconnecting the positive battery terminal. If the engine stalls, the alternator is likely bad. However, this method is risky and can damage electrical components, so using a multimeter is strongly recommended.
Why does my alternator work at idle but fail at higher RPMs?
This issue often indicates a problem with the voltage regulator or the alternator’s internal diodes. At higher RPMs, the alternator spins faster, and if the regulator or diodes are failing, they may not handle the increased load. A professional diagnosis is best for this type of problem.
How long can I drive with a bad alternator?
You can typically drive for about 30 minutes to an hour with a failing alternator, depending on the battery’s charge and the electrical load. However, once the battery is drained, the car will stall. It’s best to address the issue immediately to avoid being stranded.
What causes an alternator to fail prematurely?
Common causes of premature alternator failure include overloading the electrical system with aftermarket accessories, exposure to water or oil, and wear and tear from high mileage. Poor quality belts or tensioners can also cause the alternator to work harder, leading to early failure.
Can a bad alternator damage my battery?
Yes, a failing alternator can either undercharge or overcharge the battery. Undercharging can lead to a dead battery, while overcharging can cause the battery to overheat and fail. Both scenarios can significantly shorten the battery’s lifespan.
Final Thoughts
Testing can you check alternator while car is running is a straightforward process with the right tools and precautions. A healthy alternator should maintain a steady voltage between 13.8 and 14.4 volts with the engine running. Regular checks can prevent unexpected breakdowns and extend the life of your vehicle’s electrical system.
If you’re unsure about the results or the process, consult a professional mechanic to avoid costly mistakes.
Leave a Reply