
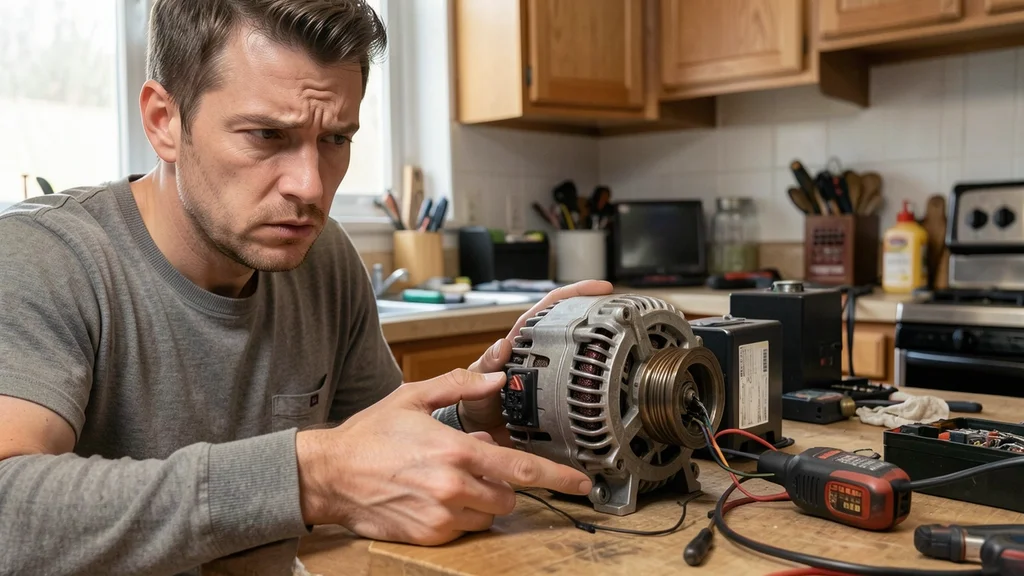
If your car’s battery light is on or you’re experiencing dim headlights, you might wonder can you fix an alternator instead of replacing it. The good news is that some alternator issues can be repaired, especially if the problem is minor like a faulty voltage regulator, worn-out brushes, or a bad bearing. This guide covers the most common alternator problems, how to diagnose them, and step-by-step repair methods to save you money and get your vehicle running smoothly again.
You can fix an alternator yourself if the issue is a bad diode, worn brushes, or a faulty voltage regulator. Most repairs cost under $50 in parts, while a full replacement alternator runs $300-$800. Always test the alternator first to confirm the problem before attempting repairs.
Signs Your Alternator Needs Repair
Your alternator charges the battery and powers electrical systems while the engine runs. When it starts failing, several warning signs appear that are hard to miss.
Catching these early can mean the difference between a simple repair and a full replacement. Here’s what to watch for:
- Dim or flickering headlights – The alternator struggles to maintain consistent voltage, causing lights to dim, especially at idle.
- Battery warning light on dashboard – This is often the first sign. The light may appear as “ALT” or “GEN” or a battery symbol.
- Weak or dead battery – If your battery keeps dying despite being new, the alternator may not be charging it.
- Strange noises – A whining or grinding sound often indicates a failing bearing inside the alternator.
- Electrical issues – Power windows move slowly, radio cuts out, or other electrical accessories behave erratically.
- Burning rubber smell – A slipping or worn serpentine belt can overheat and produce a burning odor near the alternator.
- Engine stalling or difficulty starting – If the alternator fails completely, the battery will drain, leaving you stranded.
Important: If you notice multiple symptoms, address them immediately. Driving with a failing alternator can damage your battery and leave you with a vehicle that won’t start.
According to a study by AAA, alternator and battery issues account for nearly 20% of all roadside assistance calls. Most of these could have been prevented with early diagnosis and repair.
Tools and Materials You Need
Before you start, gather the right tools and materials. Having everything ready will make the repair process smoother and faster.
Most of these are standard tools you might already have in your garage. For parts, check auto parts stores or online retailers like RockAuto, Amazon, or O’Reilly Auto Parts.
| Tool/Material | Purpose |
|---|---|
| Socket set (10mm, 13mm, 15mm) | Removing alternator bolts and brackets |
| Ratchet and extensions | Accessing tight bolts on the alternator |
| Multimeter | Testing alternator voltage output |
| Serpentine belt diagram | Reinstalling the belt correctly |
| Alternator repair kit | Includes brushes, bearings, diodes (if needed) |
| Bearing grease | Lubricating new bearings during installation |
| Screwdrivers (flathead and Phillips) | Removing electrical connections and housing screws |
| Pry bar | Loosening tight alternator brackets |
A basic alternator repair kit typically costs between $20 and $50 and includes the most commonly replaced parts. Investing in a quality multimeter (around $20-$40) is also wise, as it’s essential for diagnosing electrical issues.
Step by Step Alternator Repair Guide
Repairing an alternator involves removing it from the vehicle, disassembling it, replacing the faulty components, and reinstalling it. Follow these steps carefully to avoid mistakes.
Tip: Always disconnect the negative battery terminal before starting any electrical work to prevent short circuits or damage to your vehicle’s electronics.
Step 1: Remove the Alternator
Park your car on a flat surface and engage the parking brake. Disconnect the negative battery terminal to cut power to the electrical system.
- Locate the alternator – It’s usually on the front of the engine, driven by the serpentine belt. Refer to your vehicle’s service manual for the exact location.
- Remove the serpentine belt – Use a serpentine belt diagram (often under the hood or in the manual) to route the belt correctly. Loosen the tensioner pulley to slip the belt off.
- Disconnect electrical connections – Unplug the wiring harness and remove the nut securing the main power wire (usually 10mm or 13mm).
- Unbolt the alternator – Most alternators are held by 2-3 bolts. You may need to remove a bracket or two. Keep track of all bolts and brackets for reassembly.
- Remove the alternator – Once all bolts and connections are free, carefully pull the alternator out. It’s heavy, so support it as you remove the last bolt.
If the bolts are seized, apply penetrating oil and let it sit for 10-15 minutes before attempting to remove them again.
Step 2: Disassemble the Alternator
Once the alternator is on your workbench, you’ll need to take it apart to access the internal components. This step requires patience and attention to detail.
- Clean the alternator – Use a wire brush or compressed air to remove dirt and debris from the exterior. This prevents contamination when you open it.
- Remove the rear housing – Most alternators have 3-4 long bolts holding the two halves together. Remove these bolts to separate the front and rear housings.
- Inspect the brushes – The brushes are small carbon blocks that wear down over time. If they’re shorter than 5mm, they need replacing. Brushes are often part of the voltage regulator assembly.
- Check the bearings – Spin the pulley and rotor shaft by hand. If you feel roughness or hear grinding, the bearings are bad and need replacement.
- Test the diodes – Use a multimeter in diode mode to test the rectifier bridge (diodes). A good diode will show continuity in one direction and no continuity in the other. Replace any faulty diodes.
- Inspect the rotor and stator – Look for signs of damage, burning, or worn insulation. If either is damaged, replacement is usually the best option.
Warning: Never force parts apart. If a component is stuck, check for hidden bolts or screws. Forcing it can damage the alternator beyond repair.
Step 3: Replace Faulty Components
Once you’ve identified the problematic parts, replace them with new ones from your repair kit. Here’s how to handle the most common replacements:
- Replacing brushes – If your alternator has a replaceable voltage regulator/brush assembly, unscrew the old one and screw in the new. Ensure the brushes move freely in their holders.
- Replacing bearings – Use a bearing puller or a press to remove old bearings. Clean the housing thoroughly, then press in new bearings. Apply a small amount of bearing grease before installation.
- Replacing diodes – Solder or press in new diodes to replace faulty ones in the rectifier bridge. This requires some soldering skills, but many repair kits include pre-assembled diode packs.
- Replacing the voltage regulator – If your alternator has an external regulator, unbolt the old one and bolt in the new. For internal regulators, you’ll need to replace the entire brush/regulator assembly.
| Component | Estimated Cost | Difficulty Level |
|---|---|---|
| Brushes | $5-$15 | Easy |
| Bearings | $10-$25 each | Moderate |
| Diodes/Rectifier Bridge | $10-$20 | Moderate to Hard |
| Voltage Regulator | $15-$30 | Easy to Moderate |
| Full Repair Kit | $20-$50 | Varies |
Replacing brushes and bearings are the most common and cost-effective repairs. Diodes and regulators require a bit more skill but are still manageable with patience.
Step 4: Reassemble the Alternator
Once you’ve replaced the faulty components, it’s time to put the alternator back together. Take your time to ensure everything is aligned correctly.
- Reinstall the rotor and stator – Carefully place the rotor back into the stator, ensuring it spins freely without rubbing.
- Reattach the rear housing – Align the housings and reinsert the long bolts. Tighten them evenly to avoid warping the housing.
- Reconnect internal wiring – If you disconnected any wires to access components, reconnect them now. Ensure all connections are secure.
- Test the alternator – Before reinstalling, perform a bench test. Connect the alternator to a 12V power source (like a battery) and use a multimeter to check for proper voltage output (13.8-14.4V).
Step 5: Reinstall the Alternator in Your Car
With the alternator repaired and tested, it’s time to put it back in your vehicle. This is the reverse of the removal process, but there are a few key points to remember.
- Position the alternator – Carefully maneuver the alternator back into its mounting position. It may take some wiggling to align the bolts.
- Secure the bolts – Start all bolts by hand to avoid cross-threading. Once they’re started, tighten them snugly but don’t over-tighten.
- Reconnect electrical connections – Reattach the wiring harness and secure the main power wire with its nut. Ensure all connections are tight and corrosion-free.
- Reinstall the serpentine belt – Use your belt diagram to route the belt correctly. Apply tension to the tensioner pulley to slip the belt into place.
- Reconnect the battery – Reattach the negative battery terminal last. Once connected, start the car and check for proper charging.
After reinstallation, check the battery light on your dashboard. It should turn off once the engine is running. Use your multimeter to confirm the alternator is charging the battery properly (13.8-14.4V at the battery terminals with the engine running).
Common Alternator Problems and Fixes
Not all alternator issues require a full rebuild. Some can be fixed with simple adjustments or part replacements. Here are the most common problems and their solutions:
| Problem | Symptoms | Likely Cause | Fix |
|---|---|---|---|
| Worn brushes | Dim lights, battery not charging | Age, high mileage | Replace brushes or voltage regulator |
| Bad bearing | Grinding or whining noise | Worn or damaged bearing | Replace front or rear bearing |
| Faulty diode | Battery drains, electrical issues | Short or open diode | Replace diode or rectifier bridge |
| Bad voltage regulator | Overcharging or undercharging | Faulty regulator | Replace voltage regulator |
| Slipping belt | Squealing noise, battery light | Worn or loose belt | Replace or tighten serpentine belt |
| Corroded connections | Intermittent charging, electrical issues | Corrosion on terminals | Clean connections, apply dielectric grease |
According to data from RepairPal, the average cost to replace an alternator is between $400 and $800, including parts and labor. However, if you’re able to repair it yourself, you can often fix the issue for under $50 in parts, saving hundreds of dollars.
How to Test Your Alternator Before Repairing
Before you dive into repairs, it’s crucial to confirm that the alternator is indeed the problem. A simple multimeter test can give you the answers you need.
Important: Always test the battery first. A dead battery can cause symptoms similar to a bad alternator. Charge or replace the battery if it’s weak before testing the alternator.
Method 1: Voltage Test at the Battery
- Set your multimeter to DC voltage (20V range).
- Connect the leads – Red to the positive (+) battery terminal, black to the negative (-) terminal.
- Test with the engine off – A fully charged battery should read around 12.6V.
- Start the engine – With the engine running, voltage should rise to between 13.8V and 14.4V. If it’s below 13.5V or above 15V, the alternator may be faulty.
- Turn on accessories – Turn on headlights, A/C, and radio. Voltage should drop slightly but stay above 13.5V. If it drops below 13V, the alternator isn’t keeping up with demand.
Method 2: Bench Test (Alternator Out of Car)
If you’ve already removed the alternator, you can perform a bench test to confirm it’s the issue.
- Connect the alternator to a 12V power source (like a car battery). Connect the positive (+) terminal to the alternator’s B+ (main power) terminal.
- Ground the alternator – Connect the negative (-) battery terminal to the alternator’s housing.
- Connect a multimeter – Set to DC voltage, connect the red lead to the B+ terminal and the black lead to the alternator housing (ground).
- Spin the pulley – Use a drill to spin the alternator pulley at a high speed (have a helper for this). The multimeter should show 13.8-14.4V. If not, the alternator is faulty.
If the alternator fails either test, it’s time to repair or replace it. If it passes, the issue may be elsewhere in your charging system, such as a bad battery, corroded cables, or a faulty voltage regulator (if external).
When to Replace vs Repair Your Alternator
While many alternator issues can be repaired, there are times when replacement is the better option. Here’s how to decide:
Repair Your Alternator If:
- The issue is minor – Problems like worn brushes, bad bearings, or faulty diodes are usually repairable.
- You have the tools and skills – If you’re comfortable with basic mechanical work and have the necessary tools, repairing is cost-effective.
- The alternator is high-quality – If your alternator is a premium or OEM unit, it’s often worth repairing.
- Parts are available – If you can find a repair kit for your specific alternator model, repair is a viable option.
- Time isn’t an issue – If you have the time to diagnose and repair, it’s a great way to save money.
Replace Your Alternator If:
- The alternator is old or high-mileage – If your alternator has over 100,000 miles, other components may be worn out, making replacement more practical.
- Internal damage is severe – If the rotor, stator, or housing is damaged, replacement is usually the best option.
- You lack the tools or confidence – If you’re not comfortable with disassembling and repairing the alternator, a new or remanufactured unit may be the safer choice.
- Remanufactured units are affordable – Many auto parts stores offer remanufactured alternators with warranties for around the same cost as a repair.
- Time is a factor – If you need your car back on the road quickly, replacing the alternator is faster than repairing it.
| Factor | Repair | Replace |
|---|---|---|
| Cost | $20-$100 | $300-$800 |
| Time Required | 2-4 hours | 1-2 hours |
| Skill Level | Intermediate | Beginner |
| Warranty | None (unless using new parts) | 1-3 years (remanufactured) |
| Longevity | Varies (depends on parts used) | 3-7 years (remanufactured) |
Remanufactured alternators are a popular choice because they often come with a warranty and are tested to ensure they meet OEM specifications. According to the Automotive Parts Remanufacturers Association, remanufactured alternators can save consumers up to 50% compared to new units while providing the same reliability.
Common Mistakes to Avoid
Repairing an alternator is a rewarding project, but it’s easy to make mistakes that can cost you time or even damage your alternator further. Here are the most common pitfalls and how to avoid them:
- Not testing the battery first – A weak or dead battery can mimic alternator problems. Always test the battery’s voltage before assuming the alternator is at fault. A battery with less than 12.4V may need charging or replacement.
- Skipping the bench test – If you remove the alternator, always perform a bench test before disassembling it. This confirms that the alternator is indeed the problem and saves you from unnecessary work.
- Over-tightening bolts – Alternator housings are made of aluminum and can crack if bolts are over-tightened. Use a torque wrench and follow the manufacturer’s specifications (usually 15-25 ft-lbs for housing bolts).
- Ignoring the serpentine belt – A worn or loose serpentine belt can cause charging issues. Always inspect the belt for cracks, fraying, or glazing, and replace it if necessary.
- Replacing only one bearing – If one bearing is bad, the other is likely on its way out too. Replace both front and rear bearings to avoid having to redo the job later.
- Forgetting to grease new bearings – New bearings should be lightly greased before installation to ensure smooth operation and longevity. Use a high-temperature bearing grease.
- Mixing up wiring connections – Alternators have specific wiring configurations. Take photos or label wires before disconnecting them to ensure you reconnect everything correctly.
- Not cleaning corrosion – Corrosion on terminals or connections can cause poor electrical contact. Always clean terminals with a wire brush and apply dielectric grease to prevent future corrosion.
Warning: Never disconnect the battery while the engine is running. This can cause a voltage spike that damages your vehicle’s electrical system, including the ECU, radio, and other sensitive components.
Frequently Asked Questions
Can I drive with a bad alternator?
You can drive with a bad alternator for a short distance, but it’s not recommended. Once the battery is drained (usually within 30 minutes to an hour, depending on electrical load), your car will stall and refuse to restart. Driving with a failing alternator also risks damaging your battery and other electrical components.
How long does an alternator last?
The average lifespan of an alternator is between 100,000 and 150,000 miles, or about 7-10 years. However, this can vary based on driving conditions, electrical demand, and the quality of the alternator. Extreme heat, frequent short trips, and high electrical loads (like aftermarket audio systems) can shorten its lifespan.
How much does it cost to fix an alternator?
Repairing an alternator yourself typically costs between $20 and $100, depending on the parts needed. A professional repair at a shop may cost $150-$300. Replacing the alternator with a new or remanufactured unit usually costs $300-$800, including parts and labor.
DIY replacement can reduce this to $150-$400 for the part alone.
Can I repair an alternator without removing it?
Most alternator repairs require removing the unit from the vehicle to access internal components like brushes, bearings, or diodes. However, you can replace an external voltage regulator (if your alternator has one) or clean corroded connections without full removal. For most issues, though, disassembly is necessary.
What happens if I ignore a bad alternator?
Ignoring a bad alternator will eventually leave you stranded with a dead battery. In the short term, you may experience dim lights, weak electrical accessories, and engine stalling. Over time, a failing alternator can also damage your battery by overcharging or undercharging it, leading to a premature battery failure.
Final Thoughts
So, can you fix an alternator? Absolutely. With the right tools, a bit of patience, and this guide, you can diagnose and repair many common alternator issues yourself.
Whether it’s replacing worn brushes, faulty bearings, or bad diodes, a DIY repair can save you hundreds of dollars compared to a full replacement. Just remember to test thoroughly before and after repairs to ensure everything is working correctly. If the damage is extensive or you’re unsure, a remanufactured alternator might be the smarter choice.
Either way, addressing the problem early will keep your car running reliably and your wallet happy.
Leave a Reply