
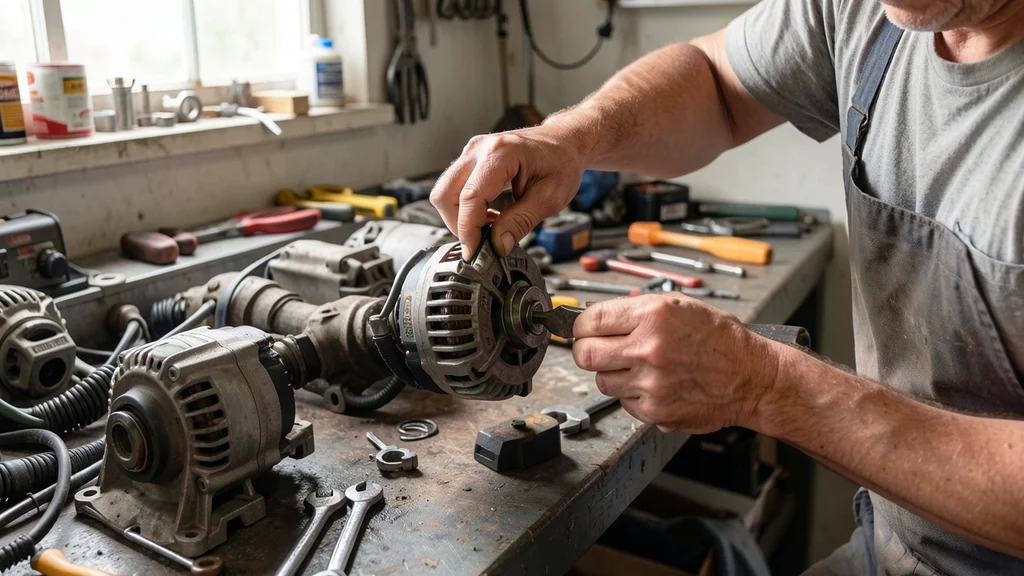
If your car’s battery light is on or the engine stutters, can you install an alternator yourself to save time and money? Replacing an alternator is a common DIY task for those with basic mechanical skills and the right tools. This guide covers everything you need to know, from diagnosing the problem to safely swapping the old unit for a new one.
Yes you can install an alternator yourself if you have basic tools a repair manual and about 1-2 hours. Most DIYers complete the job successfully by following the correct steps and safety precautions.
Signs Your Alternator Needs Replacement
Recognizing the symptoms of a failing alternator early can prevent you from being stranded. The alternator charges the battery and powers the electrical system while the engine runs. When it fails, your car relies solely on the battery, which will eventually die.
Here are the most common warning signs:
- Dashboard Warning Light: The battery or alternator warning light (often shaped like a battery or “ALT”) illuminates on your dashboard.
- Dim or Flickering Lights: Headlights or interior lights appear dimmer than usual or flicker while driving.
- Dead Battery: Your car won’t start, or the battery dies frequently, even after jump-starting.
- Strange Noises: A whining or grinding noise from the engine bay, often caused by a worn-out alternator bearing.
- Electrical Issues: Power windows, radio, or other accessories work intermittently or fail.
- Stalling or Poor Performance: The engine stalls or struggles to accelerate due to insufficient power.
- Smell of Burning Rubber: A burning smell near the alternator may indicate a slipping belt or overheating components.
Warning: Ignoring these signs can lead to a completely dead battery or even damage to your car’s electrical system. If you notice multiple symptoms, address the issue promptly.
According to a study by AAA, alternator failures account for nearly 15% of all roadside assistance calls. This highlights how common the issue is and why knowing how to diagnose it is valuable.
Tools and Materials You Will Need
Before you start, gather all the necessary tools and materials. Having everything on hand will make the job smoother and prevent delays. Here’s a complete list:
| Tool/Material | Purpose |
|---|---|
| Socket wrench set (10mm, 13mm, 14mm, 15mm) | Removing bolts and nuts securing the alternator |
| Screwdrivers (Phillips and flathead) | Loosening electrical connections and brackets |
| Serpentine belt diagram | Reference for belt routing during reinstallation |
| New alternator (match your car’s make, model, and year) | Replacement part |
| Belt tensioner tool | Releasing tension on the serpentine belt |
| Multimeter | Testing battery and alternator voltage |
| Safety gloves and goggles | Protection from sharp edges and electrical hazards |
| Jack and jack stands (if needed) | Accessing the alternator from underneath |
Pro tip: Check your car’s repair manual for the exact socket sizes and alternator specifications. Some vehicles may require additional tools, like a breaker bar for stubborn bolts.
Preparation Steps Before Starting
Safety and preparation are critical when working on your car’s electrical system. Skipping these steps can lead to injury or damage to your vehicle. Follow this checklist before you begin:
- Park on a Flat Surface: Ensure your car is on a level, stable surface to prevent it from rolling. Engage the parking brake.
- Disconnect the Battery: Always disconnect the negative (black) battery terminal first to avoid electrical shorts. This is non-negotiable for safety.
- Let the Engine Cool: If you’ve been driving, wait at least 30 minutes for the engine to cool down to avoid burns.
- Gather Your Tools: Have all tools and the new alternator within reach to avoid interruptions.
- Consult the Repair Manual: Review the alternator removal and installation steps specific to your vehicle. Some cars have unique configurations.
- Take Photos: Use your phone to take pictures of the alternator and belt routing before removing anything. This will be a helpful reference during reinstallation.
- Wear Safety Gear: Put on gloves and goggles to protect yourself from sharp edges, dirt, and electrical sparks.
Important: Never work on the alternator while the engine is running or the battery is connected. This can cause serious injury or damage to electrical components.
Step by Step Alternator Replacement Process
Now that you’re prepared, follow these steps to remove the old alternator and install the new one. The process may vary slightly depending on your vehicle, but these general steps apply to most cars.
Step 1: Locate the Alternator
Open the hood and locate the alternator. It’s typically mounted on the engine block near the front, driven by the serpentine belt. Refer to your repair manual or the photos you took earlier if you’re unsure.
In most vehicles, the alternator is on the passenger side of the engine bay. It’s a cylindrical component with electrical connections and a pulley for the belt.
Step 2: Remove the Electrical Connections
Start by disconnecting the electrical connectors from the alternator. There are usually two main connections:
- Battery Cable: A thick wire (often red or black) bolted to the alternator with a nut. Use a wrench to loosen and remove the nut, then disconnect the cable.
- Plug-in Connector: A smaller multi-pin connector that may have a release tab. Press the tab and gently pull the connector apart.
Inspect the connections for corrosion or damage. Clean them with a wire brush if necessary.
Step 3: Release the Serpentine Belt
The serpentine belt drives the alternator, power steering, and other accessories. To remove it:
- Locate the belt tensioner, which is usually a pulley with a square hole for a breaker bar or a bolt in the center.
- Use a belt tensioner tool or a breaker bar to rotate the tensioner in the direction that releases tension (usually clockwise).
- While holding the tensioner, slip the belt off the alternator pulley.
- Slowly release the tensioner and remove the belt from the engine bay.
If your car uses a V-belt instead of a serpentine belt, the process is similar, but you may need to loosen the alternator mounting bolts slightly to release tension.
Step 4: Remove the Alternator Mounting Bolts
The alternator is typically secured by 2-3 bolts. The exact number and size depend on your vehicle. Use the appropriate socket wrench to remove these bolts:
- Start with the most accessible bolt, usually on the top or side of the alternator.
- Remove the remaining bolts, which may be harder to reach. Some vehicles require removing a bracket or other components for access.
- Once all bolts are removed, carefully lift the alternator out of the engine bay. It may be heavy, so support it with one hand while removing the last bolt.
If the bolts are stubborn, apply penetrating oil and wait a few minutes before trying again. Avoid using excessive force, as this can strip the bolts or damage the alternator.
Step 5: Install the New Alternator
Now it’s time to install the new alternator. Follow these steps:
- Position the new alternator in the same location as the old one. Align it with the mounting holes.
- Hand-tighten the mounting bolts to secure the alternator in place. Don’t fully tighten them yet.
- Reconnect the electrical connections. Start with the plug-in connector, ensuring it clicks into place. Then, reattach the battery cable and tighten the nut securely.
- Reinstall the serpentine belt. Use your belt routing diagram or the photos you took earlier to ensure the belt is routed correctly. Apply tension to the belt using the tensioner tool and slip it onto the alternator pulley.
- Fully tighten the alternator mounting bolts to the manufacturer’s specified torque (check your repair manual for the exact value).
Double-check all connections and bolt tightness before moving to the next step.
Step 6: Reconnect the Battery and Test
Reconnect the negative (black) battery terminal last. Once reconnected:
- Start the engine and let it run for a few minutes.
- Check the dashboard for warning lights. The battery or alternator light should be off.
- Turn on the headlights and other electrical accessories to ensure they’re working properly.
- Use a multimeter to test the alternator’s output. With the engine running, the voltage at the battery should read between 13.8V and 14.4V. If it’s outside this range, the alternator may not be functioning correctly.
If everything checks out, turn off the engine and close the hood. Take your car for a short test drive to ensure the alternator is working under normal driving conditions.
Tip: If the battery light remains on after installation, double-check all electrical connections and ensure the belt is properly tensioned. A loose belt can prevent the alternator from charging the battery.
Common Mistakes to Avoid
Even experienced DIYers can make mistakes during alternator replacement. Being aware of these common pitfalls will help you avoid them and ensure a successful installation.
| Mistake | How to Avoid |
|---|---|
| Not disconnecting the battery first | Always disconnect the negative battery terminal before working on the alternator to avoid electrical shorts. |
| Using the wrong tools | Use the correct socket sizes for your vehicle. Consult your repair manual if unsure. |
| Skipping the belt diagram | Take photos or refer to a belt routing diagram before removing the belt to ensure correct reinstallation. |
| Over-tightening bolts | Tighten bolts to the manufacturer’s specified torque to avoid stripping or damaging components. |
| Ignoring corrosion | Clean electrical connections with a wire brush to ensure a good connection and prevent voltage drops. |
| Not testing after installation | Always test the alternator’s output with a multimeter after installation to confirm it’s charging the battery. |
Another common mistake is mixing up the alternator’s electrical connections. Ensure the battery cable and plug-in connector are reconnected to the correct terminals on the new alternator. Consult the alternator’s packaging or your repair manual if you’re unsure.
How to Test Your Alternator Before and After Replacement
Testing your alternator before and after replacement ensures you’re addressing the right issue and confirms the new part is working correctly. Here’s how to perform these tests:
Testing Before Replacement
A simple multimeter test can help determine if the alternator is the problem:
- Set your multimeter to DC voltage (20V range).
- Connect the red probe to the positive battery terminal and the black probe to the negative terminal.
- With the engine off, the battery voltage should read between 12.2V and 12.6V. If it’s below 12V, the battery may be weak or dead.
- Start the engine and let it run. The voltage should increase to between 13.8V and 14.4V. If it stays the same or drops, the alternator is likely faulty.
- Rev the engine slightly. If the voltage drops below 13V, the alternator may not be generating enough power.
Testing After Replacement
After installing the new alternator, repeat the multimeter test:
- Ensure all electrical connections are secure and the belt is properly tensioned.
- With the engine running, the voltage at the battery should again read between 13.8V and 14.4V.
- Turn on the headlights, radio, and other accessories. The voltage should remain stable within the same range. If it drops significantly, the alternator may not be able to handle the electrical load.
- Check for warning lights on the dashboard. If the battery or alternator light is on, there may be an issue with the installation or the new alternator.
If the voltage readings are outside the expected range, double-check your connections and belt tension. If the issue persists, the new alternator may be defective.
Important: Some modern vehicles require a battery reset or alternator initialization after replacement. Consult your repair manual or a professional mechanic if you’re unsure.
Cost Comparison DIY vs Professional Installation
One of the main reasons people choose to replace their alternator themselves is to save money. Here’s a breakdown of the costs involved in DIY vs. professional installation:
| Cost Factor | DIY Cost | Professional Cost |
|---|---|---|
| Alternator Part | $100 – $300 | $150 – $400 (often marked up) |
| Tools (if you don’t own them) | $20 – $50 | Included in labor |
| Labor | $0 | $150 – $300 |
| Total Estimated Cost | $120 – $350 | $300 – $700 |
As you can see, DIY installation can save you 50-70% compared to professional service. However, keep in mind that if you make a mistake, you may end up paying for both the part and professional labor to fix it.
According to RepairPal, the average cost for professional alternator replacement is between $400 and $600, including parts and labor. This varies depending on your vehicle’s make and model, as well as local labor rates.
Frequently Asked Questions
Can you install an alternator yourself without any experience?
Yes, but it’s recommended to have some basic mechanical experience or guidance. If you’ve never worked on a car before, watch tutorial videos for your specific vehicle or ask a knowledgeable friend for help. The process is straightforward but requires attention to detail, especially with electrical connections.
How long does it take to replace an alternator?
For a first-timer, the job typically takes 1.5 to 3 hours. With experience, it can be done in under an hour. The time varies depending on your vehicle’s design and how accessible the alternator is.
Some cars require removing additional components, which can add time.
Do I need to replace the serpentine belt when replacing the alternator?
It’s not always necessary, but it’s a good idea if the belt shows signs of wear, such as cracks, fraying, or glazing. Since you’ll already have the belt off, replacing it at the same time can save you labor later. A new belt typically costs between $20 and $50.
What happens if I connect the alternator wires incorrectly?
Connecting the wires incorrectly can cause serious electrical issues, including blown fuses, damaged wiring, or even a fire. Always double-check the connections against your repair manual or the alternator’s packaging. If you’re unsure, consult a professional.
Can a bad alternator destroy a new battery?
Yes. If the alternator is faulty and not charging the battery, the battery will eventually drain completely. Additionally, a failing alternator can overcharge the battery, causing it to overheat and fail prematurely.
This is why it’s important to address alternator issues as soon as they arise.
Final Thoughts
Replacing an alternator yourself is a rewarding DIY project that can save you hundreds of dollars. With the right tools, a bit of patience, and attention to detail, most car owners can complete the job successfully. Remember to prioritize safety, follow the steps carefully, and test your work afterward.
If you’re ever in doubt, don’t hesitate to consult a professional mechanic. But for those willing to tackle the challenge, can you install an alternator yourself is a resounding yes.
Leave a Reply