
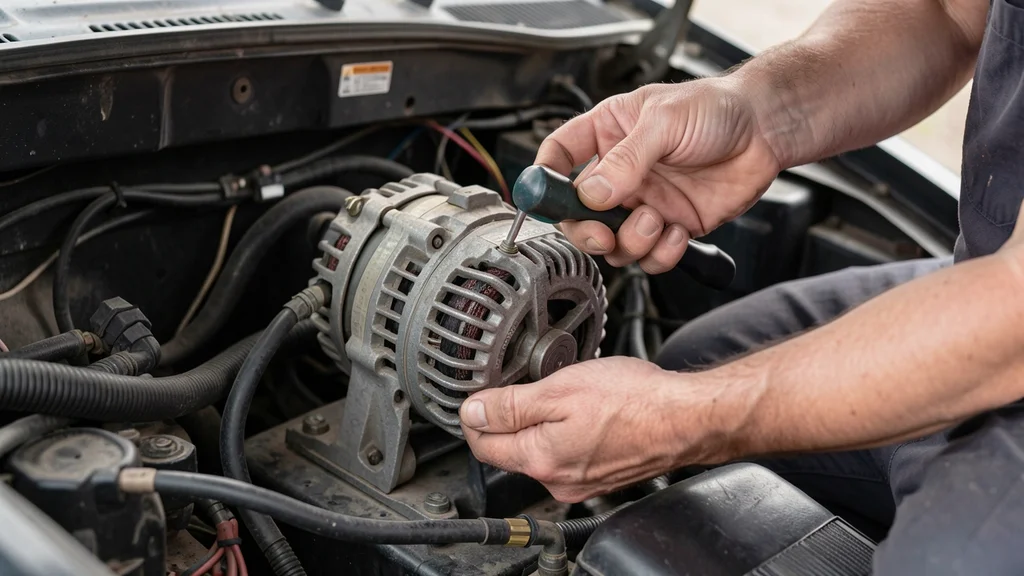
A dead battery often gets the blame when your car refuses to start, but the real culprit might be a failing alternator. The question can you test alternator if car wont start is common among drivers facing this frustrating scenario. Testing your alternator without a running engine is possible with the right approach and tools.
This guide covers the most effective methods to diagnose the issue safely and accurately, even when your vehicle won’t turn over.
Yes you can test an alternator if the car wont start by using a multimeter on the battery terminals to check voltage before and after a jump start or by removing the alternator for a bench test.
Signs Your Alternator Might Be the Problem
Before diving into testing, it’s important to recognize the symptoms of a failing alternator. These signs often overlap with battery issues, but there are key differences to watch for.
An alternator that’s on its way out may cause dim or flickering headlights, especially when the engine is idling or under load. You might also notice the battery warning light on your dashboard, which can indicate a charging system problem. Another common sign is electrical accessories like power windows or the radio working intermittently or slower than usual.
In some cases, you might hear a whining or grinding noise coming from the alternator, which could signal a failing bearing. If your car starts but then dies shortly after, this could also point to an alternator issue, as it’s not maintaining the battery’s charge.
- Dim or Flickering Lights: Headlights or interior lights that dim or flicker, especially at idle.
- Battery Warning Light: A dashboard warning light that looks like a battery or says “ALT” or “GEN.”
- Slow or Weak Accessories: Power windows, seats, or radio that move or operate sluggishly.
- Strange Noises: Whining or grinding sounds from the engine bay, often due to a failing alternator bearing.
- Car Starts Then Dies: The engine starts but stalls shortly after, indicating the battery isn’t being recharged.
- Dead Battery: A battery that’s frequently dead, even after being jump-started or replaced.
- Smell of Burning Rubber: A burning smell, often from a slipping alternator belt.
Important: If you notice any of these symptoms, it’s best to test your alternator as soon as possible to avoid being stranded with a dead battery.
Tools You Will Need for Testing
Testing an alternator when your car won’t start doesn’t require a professional mechanic, but you will need a few essential tools. Having these on hand will make the process smoother and more accurate.
A digital multimeter is the most critical tool for this job. It allows you to measure voltage, resistance, and current, which are essential for diagnosing alternator issues. You’ll also need a reliable set of jumper cables if you plan to jump-start the car to test the alternator under load.
Safety gear, including gloves and safety glasses, is highly recommended to protect yourself from electrical hazards.
If you’re removing the alternator for a bench test, you’ll need basic hand tools like wrenches and sockets to disconnect the battery and unbolt the alternator. A service manual for your specific vehicle can also be helpful, as it will provide diagrams and specifications tailored to your car’s make and model.
| Tool | Purpose |
|---|---|
| Digital Multimeter | Measures voltage to test alternator output and battery charge |
| Jumper Cables | Allows jump-starting the car to test alternator under load |
| Basic Hand Tools | Removes alternator for bench testing if needed |
| Safety Gloves and Glasses | Protects against electrical hazards and debris |
| Service Manual | Provides vehicle-specific diagrams and specifications |
Having these tools ready will ensure you can perform the tests efficiently and safely. If you don’t have a multimeter, consider borrowing one or purchasing an affordable model, as it’s an invaluable tool for any DIY car maintenance.
Step by Step How to Test Alternator Without Starting Car
Testing your alternator when the car won’t start might seem challenging, but it’s entirely doable with a methodical approach. Below is a step-by-step guide to help you diagnose the issue accurately.
Step 1: Check the Battery Voltage
Start by testing the battery voltage with your multimeter. A fully charged battery should read between 12.6 and 12.8 volts when the car is off. If the voltage is below 12.4 volts, the battery might not have enough charge to start the car, but this doesn’t necessarily mean the alternator is bad.
- Set your multimeter to DC voltage (20V range).
- Connect the red probe to the positive battery terminal and the black probe to the negative terminal.
- Read the voltage on the multimeter.
- If the voltage is below 12 volts, the battery is likely dead and needs charging or replacement.
Step 2: Attempt a Jump Start
If the battery voltage is low, try jump-starting the car. Once the car is running, you can test the alternator’s output. If the car won’t start even with a jump, the issue might be with the starter or another component.
- Connect the jumper cables to a donor battery or another car.
- Start the donor car and let it run for a few minutes.
- Attempt to start your car. If it starts, proceed to the next step.
Step 3: Test Alternator Output While Running
With the car running, use the multimeter to check the voltage across the battery terminals again. A healthy alternator should produce between 13.8 and 14.4 volts. If the voltage is outside this range, the alternator may be faulty.
- Keep the car running and the multimeter connected to the battery terminals.
- Rev the engine slightly to around 2,000 RPMs and observe the voltage.
- If the voltage drops below 13.8 or rises above 14.4, the alternator is likely not functioning correctly.
Tip: If the voltage is within the 13.8-14.4 range, the alternator is charging the battery properly. If not, it’s time to consider replacing the alternator.
Step 4: Perform a Load Test
A load test can help confirm whether the alternator is the issue. This involves turning on electrical accessories while the car is running to see if the alternator can handle the increased demand.
- With the car running, turn on the headlights, air conditioning, and radio.
- Check the voltage on the multimeter again.
- If the voltage drops significantly (below 13.5 volts), the alternator may not be able to handle the load, indicating a problem.
Step 5: Inspect the Alternator Physically
Sometimes, a visual inspection can reveal obvious issues with the alternator. Look for loose connections, damaged wires, or a slipping belt. These can all cause the alternator to malfunction.
- Loose or Corroded Connections: Check the alternator’s electrical connections for tightness and corrosion.
- Damaged Wires: Inspect the wiring harness for any visible damage or wear.
- Slipping or Worn Belt: Look at the serpentine belt for signs of wear, cracks, or slippage.
- Leaking Fluid: Check for any signs of fluid leaks around the alternator, which could indicate internal damage.
Step 6: Bench Test the Alternator
If you’re still unsure, you can remove the alternator and take it to an auto parts store for a bench test. Most stores offer this service for free, and it’s the most accurate way to test the alternator’s performance.
- Disconnect the battery’s negative terminal to prevent electrical shorts.
- Remove the alternator from the engine bay using the appropriate tools.
- Take the alternator to an auto parts store for testing.
Testing Alternator with a Dead Battery
If your car won’t start and the battery is completely dead, you can still test the alternator with a few additional steps. This method ensures you can diagnose the alternator even when the battery isn’t providing any power.
Method 1: Using a Portable Jump Starter
A portable jump starter can provide enough power to start your car, allowing you to test the alternator. This is a convenient option if you don’t have access to another vehicle for a jump start.
- Connect the portable jump starter to the battery according to the manufacturer’s instructions.
- Start the car and let it run for a few minutes.
- Use the multimeter to test the voltage at the battery terminals while the car is running.
- If the voltage is within the 13.8-14.4 range, the alternator is working. If not, it may be faulty.
Method 2: Testing Alternator Directly
If you can’t jump-start the car, you can test the alternator directly by removing it and checking its resistance. This method requires a bit more effort but can be done without starting the car.
- Disconnect the battery’s negative terminal.
- Remove the alternator from the engine bay.
- Set your multimeter to Ohms (resistance) mode.
- Connect the multimeter probes to the alternator’s positive and negative terminals.
- A reading of 0.3 to 0.5 ohms typically indicates a healthy alternator. Higher readings may signal an issue.
Warning: Always disconnect the battery before removing or testing the alternator to avoid electrical shocks or short circuits.
Common Mistakes to Avoid When Testing Alternator
Testing an alternator isn’t overly complex, but there are some common mistakes that can lead to inaccurate results or even damage to your vehicle. Being aware of these pitfalls will help you avoid them and get a reliable diagnosis.
One of the most frequent mistakes is not checking the battery first. A dead or weak battery can give the impression of a failing alternator, leading to unnecessary replacements. Always ensure the battery is fully charged before testing the alternator.
Another mistake is using incorrect multimeter settings, which can result in inaccurate voltage readings. Always double-check that your multimeter is set to DC voltage when testing the battery or alternator.
Loose or corroded connections can also skew your test results. Before testing, ensure all battery terminals and alternator connections are clean and tight. Additionally, some people forget to rev the engine during testing, which can lead to misleading voltage readings.
The alternator needs to be under load to provide an accurate assessment of its performance.
- Not Checking the Battery First: A weak or dead battery can mimic alternator issues. Always test the battery voltage before assuming the alternator is the problem.
- Incorrect Multimeter Settings: Using the wrong setting (e.g., AC instead of DC) can lead to inaccurate readings. Always set the multimeter to DC voltage.
- Loose or Corroded Connections: Dirty or loose battery terminals can affect voltage readings. Clean and tighten all connections before testing.
- Not Revving the Engine: The alternator’s output varies with engine RPM. Rev the engine to around 2,000 RPMs for an accurate reading.
- Ignoring Visual Inspections: Overlooking physical damage or wear on the alternator or belt can lead to misdiagnosis. Always inspect the alternator visually.
- Testing Without a Load: The alternator should be tested under load (e.g., with headlights or AC on) to ensure it can handle real-world conditions.
- Skipping the Bench Test: If you’re unsure, a bench test at an auto parts store is the most reliable way to confirm alternator health.
Alternator vs Battery: How to Tell Which Is the Problem
When your car won’t start, it’s easy to blame the battery, but the alternator could be the real issue. Understanding the differences between a failing battery and a failing alternator can save you time and money.
A dead battery typically results in no response when you turn the key, or the engine may crank very slowly. In contrast, a failing alternator might allow the car to start but then cause it to die shortly after because the battery isn’t being recharged. Another key difference is that a bad alternator often triggers the battery warning light on the dashboard, while a dead battery usually doesn’t.
You can also perform a simple test by jump-starting the car. If the car starts and stays running after removing the jumper cables, the issue is likely the battery. However, if the car dies shortly after removing the cables, the alternator is probably not charging the battery.
| Issue | Symptoms | Solution |
|---|---|---|
| Dead Battery | No response when turning the key, slow cranking, dim lights | Charge or replace the battery |
| Failing Alternator | Battery warning light, car starts but dies, dim lights while driving | Replace the alternator |
| Loose Connections | Intermittent starting issues, electrical accessories not working | Clean and tighten connections |
| Bad Starter | Clicking noise when turning the key, no cranking | Replace the starter |
If you’re still unsure, a professional diagnosis at an auto repair shop can provide clarity. However, with the right tools and steps, you can often determine the issue yourself.
Pro Tips for Alternator Maintenance
Maintaining your alternator can extend its lifespan and prevent unexpected failures. While alternators are generally low-maintenance, there are steps you can take to keep yours in good working condition.
Regularly inspect the serpentine belt for signs of wear, cracks, or glazing. A worn or slipping belt can reduce the alternator’s efficiency and lead to premature failure. Replace the belt if you notice any damage or if it’s been more than 60,000 miles since the last replacement.
Keeping the belt tensioned correctly is also important, as a loose belt can slip and cause charging issues.
Another tip is to keep the alternator clean and free of debris. Dirt and grime can accumulate on the alternator over time, leading to overheating and reduced performance. Use a soft brush or compressed air to clean the alternator’s exterior, and avoid using high-pressure water, which can damage the internal components.
- Inspect the Serpentine Belt: Check for wear, cracks, or glazing regularly. Replace every 60,000 miles or as needed.
- Keep the Alternator Clean: Remove dirt and debris to prevent overheating and ensure optimal performance.
- Check Electrical Connections: Ensure all connections are tight and free of corrosion to maintain proper electrical flow.
- Avoid Overloading the Electrical System: Excessive use of aftermarket accessories can strain the alternator. Upgrade to a higher-capacity alternator if needed.
- Test the Charging System Regularly: Use a multimeter to check the alternator’s output periodically, especially if you notice any warning signs.
- Drive Regularly: Short trips can prevent the battery from fully charging. Longer drives help keep the battery and alternator in good condition.
- Use Quality Parts: If replacing the alternator, opt for a high-quality OEM or aftermarket part to ensure reliability.
Tip: If you frequently drive in harsh conditions (e.g., extreme heat or cold), consider having your alternator checked more often, as these conditions can accelerate wear.
When to Call a Professional Mechanic
While testing and even replacing an alternator can be a DIY job, there are situations where it’s best to call a professional mechanic. Recognizing these scenarios can save you from causing further damage or putting yourself at risk.
If you’re uncomfortable working with electrical systems or don’t have the necessary tools, it’s safer to leave the job to a professional. Additionally, if you’ve tested the alternator and battery but are still experiencing issues, a mechanic can perform a more comprehensive diagnosis to identify the root cause.
Another reason to call a professional is if you suspect there’s an issue with the vehicle’s wiring or fuse box. Electrical problems can be tricky to diagnose and repair, and a mistake could lead to shorts, fires, or other serious issues. If your car is under warranty, it’s also a good idea to have any repairs done by a certified mechanic to avoid voiding the warranty.
- Lack of Experience: If you’re not confident in your ability to test or replace the alternator safely.
- Persistent Issues: If the problem continues even after testing and replacing the alternator or battery.
- Electrical Problems: If you suspect there’s an issue with the wiring, fuse box, or other electrical components.
- Warranty Concerns: If your car is under warranty, have repairs done by a certified mechanic.
- Time Constraints: If you don’t have the time or tools to diagnose and fix the issue yourself.
- Safety Concerns: If you’re unsure about handling electrical components safely.
Frequently Asked Questions
Can I test the alternator without disconnecting the battery?
Yes, you can test the alternator without disconnecting the battery. Simply use a multimeter to check the voltage at the battery terminals while the car is running. A healthy alternator should produce between 13.8 and 14.4 volts.
However, always exercise caution when working around a running engine.
How long does an alternator usually last?
An alternator typically lasts between 80,000 and 150,000 miles, or about 7-10 years. However, this can vary depending on driving conditions, electrical load, and the quality of the alternator. Harsh conditions like extreme heat or frequent short trips can shorten its lifespan.
What happens if I drive with a bad alternator?
Driving with a bad alternator can lead to a dead battery, as the alternator won’t recharge it while the engine is running. This can leave you stranded if the battery loses all its charge. Additionally, a failing alternator can cause electrical issues like dim lights, slow power windows, or a malfunctioning radio.
Can a bad alternator cause a car to stall?
Yes, a bad alternator can cause a car to stall. If the alternator isn’t charging the battery, the battery will eventually lose power, and the engine may stall. This can happen suddenly, especially if you’re using electrical accessories like the air conditioning or headlights.
How much does it cost to replace an alternator?
The cost to replace an alternator varies depending on the make and model of your vehicle, as well as whether you do it yourself or hire a professional. On average, you can expect to pay between $200 and $600 for parts and labor. The alternator itself typically costs between $100 and $350, while labor can range from $100 to $250.
Final Thoughts
Testing an alternator when your car won’t start is entirely possible with the right tools and steps. By recognizing the symptoms of a failing alternator, using a multimeter to check voltage, and following a systematic approach, you can diagnose the issue accurately. Whether you decide to replace the alternator yourself or seek help from a professional, addressing the problem promptly will ensure your car remains reliable and ready to hit the road.
Leave a Reply