
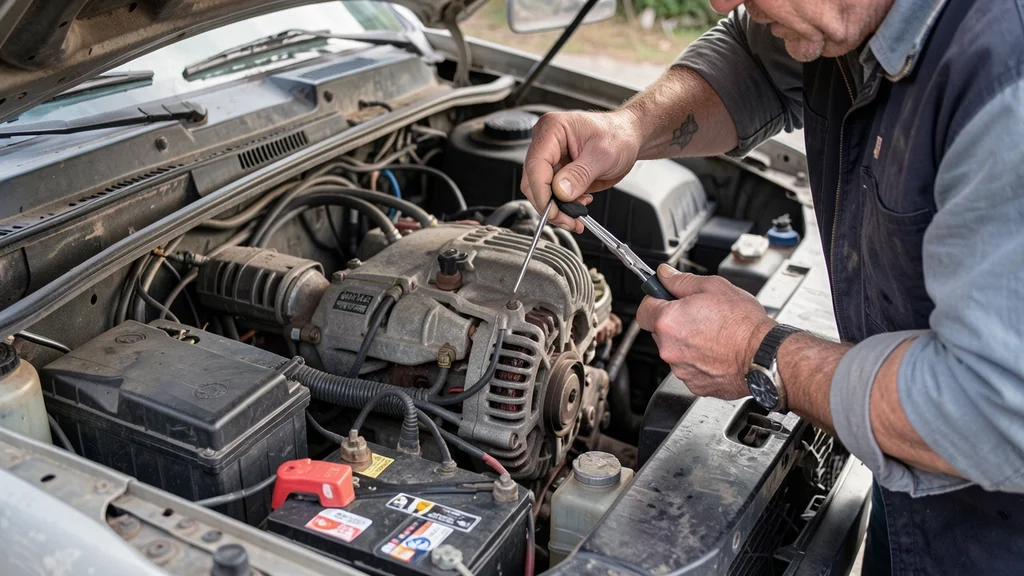
If your car won’t start, you may wonder can you test an alternator with a bad battery. The answer isn’t as straightforward as you might think. Testing an alternator with a dead or weak battery can lead to inaccurate results or even damage to your vehicle’s electrical system.
This guide explains how to properly diagnose the issue without risking further problems.
You can test an alternator with a bad battery but it is not recommended. A weak battery may cause false readings or fail to provide enough power for accurate testing. For reliable results, charge or replace the battery first.
How Alternators and Batteries Work Together
An alternator and a battery form the core of your vehicle’s electrical system. The battery provides the initial power to start the engine, while the alternator takes over once the engine is running, supplying electricity to the car’s systems and recharging the battery. When one fails, it can mask or mimic symptoms of the other failing.
If the battery is dead, the alternator may not function properly because it relies on the battery to regulate voltage. Conversely, a failing alternator can drain a good battery, leaving you stranded. This interdependence means testing one component without considering the other can lead to misdiagnosis.
- Battery Role: Provides initial power to start the engine and stabilizes voltage.
- Alternator Role: Recharges the battery and powers electrical systems while the engine runs.
- Symptoms of a Bad Battery: Slow cranking, dim lights, or a clicking noise when turning the key.
- Symptoms of a Bad Alternator: Dim or flickering lights, battery warning light, or electrical accessories failing.
- Interdependence: A weak battery can cause the alternator to overwork, and a bad alternator can drain the battery.
Tip: If your car struggles to start, test the battery first. A fully charged battery is essential for accurate alternator testing.
Why Testing an Alternator with a Bad Battery Is Problematic
Testing an alternator with a bad battery can yield misleading results for several reasons. First, a weak battery may not supply enough current to the alternator, causing it to underperform. This can lead to a false diagnosis of a failing alternator when the real issue is the battery.
Second, a dead battery can trigger warning lights on the dashboard, such as the battery or alternator warning light, which may not accurately reflect the alternator’s condition. These lights can stay on or flicker erratically if the battery voltage is too low.
Lastly, some testing methods, like using a multimeter to check voltage output, require a stable power source. A bad battery cannot provide this stability, making it difficult to interpret the results correctly.
- Inaccurate Voltage Readings: A weak battery may cause voltage drops, leading to false alternator failure readings.
- False Warning Lights: Low battery voltage can trigger dashboard lights unrelated to the alternator’s health.
- Insufficient Power for Testing: Some diagnostic tools require a minimum voltage to function properly.
- Risk of Damaging Electrical Components: Testing with a bad battery can cause power surges that may harm sensitive electronics.
| Issue | Effect on Alternator Testing |
|---|---|
| Dead Battery | Alternator may not engage; false failure reading. |
| Weak Battery | Inconsistent voltage output; unreliable test results. |
| Low Voltage | Dashboard lights may mislead; alternator seems faulty. |
Testing an alternator with a compromised battery often leads to confusion. Always ensure the battery is in good condition before proceeding with any diagnostics.
Step-by-Step Guide to Testing an Alternator Properly
To accurately test an alternator, follow these steps carefully. Ensure the battery is fully charged or replace it if it’s dead. Testing with a bad battery will only lead to frustration and incorrect conclusions.
What You Need
- A fully charged battery or a known good battery.
- A digital multimeter (set to DC voltage).
- Jumper cables (optional, for battery backup).
- Safety gloves and goggles.
- A helper (optional, to monitor readings).
Step 1: Check Battery Voltage
Before testing the alternator, verify the battery’s condition. Connect the multimeter’s red probe to the positive terminal and the black probe to the negative terminal. A fully charged battery should read between 12.6 and 12.8 volts with the engine off.
If the voltage is below 12.4V, charge or replace the battery.
Step 2: Start the Engine
Start the engine and let it idle. With the engine running, the voltage should increase to between 13.8 and 14.4 volts. This indicates the alternator is charging the battery.
If the voltage stays below 13.5V, the alternator may be faulty.
Step 3: Test Under Load
Turn on the headlights, heater, and other electrical accessories to place a load on the alternator. The voltage should remain stable or drop slightly but stay above 13.0 volts. If the voltage drops significantly (below 12.5V), the alternator may not be able to handle the load.
Step 4: Inspect for Physical Damage
Visually inspect the alternator for any signs of damage, such as frayed wires, corrosion on terminals, or a worn-out belt. Address any visible issues before proceeding with electrical tests.
Warning: Never disconnect the battery while the engine is running. This can cause a voltage spike that may damage the alternator or other electrical components.
Common Mistakes to Avoid When Testing an Alternator
Many DIY mechanics make critical errors when testing an alternator, especially when the battery is suspect. Avoid these common pitfalls to ensure accurate results and prevent damage to your vehicle.
- Testing with a Dead Battery: As mentioned earlier, a dead battery can lead to false readings. Always start with a fully charged battery.
- Ignoring Battery Terminals: Corroded or loose battery terminals can disrupt the electrical flow, affecting alternator performance. Clean and tighten terminals before testing.
- Using an Analog Multimeter: Analog multimeters are less precise than digital ones. Use a digital multimeter for accurate voltage readings.
- Not Checking the Alternator Belt: A loose or worn alternator belt can prevent the alternator from charging properly. Inspect the belt for tension and wear.
- Disconnecting the Battery While Engine Runs: This can cause a dangerous voltage spike, potentially damaging the alternator or other electrical systems.
- Overlooking Fuses and Wiring: Blown fuses or damaged wiring can mimic alternator failure. Check all fuses and wiring related to the charging system.
| Mistake | Consequence | Solution |
|---|---|---|
| Testing with a dead battery | False alternator failure | Charge or replace battery first |
| Corroded terminals | Poor electrical connection | Clean terminals before testing |
| Loose alternator belt | Alternator fails to charge | Tighten or replace the belt |
Avoiding these mistakes will save you time and prevent unnecessary replacements. Always approach alternator testing methodically.
Alternative Methods to Test an Alternator
If you’re unsure about using a multimeter, there are alternative methods to test an alternator. However, these methods also require a good battery to ensure accuracy.
Using a Battery Tester with Alternator Test Function
Some advanced battery testers also include an alternator testing function. These devices can provide a quick and accurate assessment of both the battery and alternator. Simply connect the tester to the battery terminals and follow the on-screen instructions.
- Pros: Quick, easy, and often more accurate than manual testing.
- Cons: Requires a specialized tool that may not be available to everyone.
Jump-Starting the Vehicle
If the battery is dead, you can jump-start the vehicle using jumper cables and another car with a good battery. Once the engine is running, disconnect the jumper cables and let the engine run for a few minutes. Then, turn off the engine and try to restart it.
If the car starts easily, the alternator is likely functioning correctly. If it struggles or doesn’t start, the alternator may be the issue.
Important: Jump-starting is a temporary solution. Always follow up with a proper alternator test once the battery is charged.
Visual and Auditory Inspection
Sometimes, the alternator may show signs of failure without any testing. Listen for unusual noises, such as grinding or whining, which may indicate a failing alternator bearing. Additionally, look for warning lights on the dashboard, such as the battery or alternator light.
- Grinding Noise: Often indicates a worn-out bearing in the alternator.
- Whining Noise: May suggest a failing alternator or a loose belt.
- Dashboard Warning Lights: Battery or alternator light may indicate an issue with the charging system.
- Burning Smell: A burning odor near the alternator could signal an electrical issue.
Signs of a Failing Alternator vs. a Bad Battery
Distinguishing between a failing alternator and a bad battery can be tricky, as both can cause similar symptoms. However, there are key differences to look for that can help you pinpoint the issue.
| Symptom | Bad Battery | Bad Alternator |
|---|---|---|
| Slow cranking or no start | Yes | No (unless battery is completely dead) |
| Dim or flickering headlights | Yes (especially when engine is off) | Yes (especially when engine is running) |
| Battery warning light on dashboard | Rarely | Yes |
| Electrical accessories fail | Yes (when engine is off) | Yes (when engine is running) |
| Engine stalls or dies | No | Yes (due to lack of power) |
| Grinding or whining noise | No | Yes |
Use this table to help differentiate between a bad battery and a failing alternator. If symptoms persist after replacing the battery, the alternator is likely the culprit.
Tools You Need for Accurate Alternator Testing
Having the right tools is essential for accurately diagnosing alternator issues. While some methods require minimal equipment, others may need specialized tools for a thorough assessment.
- Digital Multimeter: The most essential tool for testing voltage output. Choose one with a DC voltage range up to at least 20V.
- Battery Tester: A dedicated battery tester can quickly assess the battery’s condition, ensuring it’s not the source of the problem.
- Jumper Cables: Useful for jump-starting the vehicle if the battery is dead, allowing you to test the alternator.
- Alternator Tester: Some advanced testers are specifically designed for alternator diagnostics, providing precise results.
- Inspection Mirror and Flashlight: Helps inspect hard-to-reach areas, such as the alternator belt or terminals.
- Wrenches and Sockets: Needed for removing and replacing the alternator if a replacement is necessary.
- Safety Gear: Gloves and goggles protect you from electrical shocks and debris.
Tip: Invest in a quality digital multimeter. It’s a versatile tool that can be used for various automotive and household electrical tests.
When to Replace Your Alternator
If testing confirms that the alternator is faulty, it’s important to replace it promptly to avoid further issues. Ignoring a failing alternator can lead to a dead battery, leaving you stranded, or even cause damage to other electrical components in your vehicle.
Signs It’s Time for a Replacement
- Consistent Low Voltage Output: If the alternator consistently outputs less than 13.0 volts with the engine running, it’s time for a replacement.
- Grinding or Whining Noises: Unusual noises from the alternator often indicate internal damage, such as a failing bearing.
- Burning Smell: A burning odor near the alternator may signal an electrical issue, such as a short circuit.
- Warning Lights: If the battery or alternator warning light stays on, the alternator may be failing.
- Frequent Battery Failures: If the battery keeps dying despite being new or fully charged, the alternator may not be recharging it properly.
Choosing a Replacement Alternator
When selecting a replacement alternator, consider the following factors:
- Compatibility: Ensure the alternator is compatible with your vehicle’s make, model, and year.
- Amperage Rating: Match or exceed the original alternator’s amperage rating to meet your vehicle’s electrical demands.
- Brand Reputation: Opt for reputable brands known for quality and reliability, such as Bosch, Denso, or ACDelco.
- Warranty: Choose an alternator with a solid warranty to protect your investment.
- Price: While cost is a factor, prioritize quality and compatibility over the cheapest option.
Frequently Asked Questions
Can a bad battery cause an alternator to fail?
A bad battery itself won’t directly cause an alternator to fail, but it can force the alternator to work harder to compensate for the lack of power. Over time, this extra strain can lead to premature alternator failure. Additionally, a dead battery can cause voltage spikes that may damage the alternator.
How long does it take to test an alternator?
Testing an alternator with a multimeter takes about 10-15 minutes, including setup and interpretation of results. If you’re using a dedicated alternator tester, the process may be even quicker. Always ensure the battery is fully charged before beginning the test.
Can I drive with a bad alternator?
Driving with a bad alternator is not recommended. The alternator charges the battery and powers the electrical systems while the engine runs. Without a functioning alternator, the battery will eventually drain, leaving you stranded.
Additionally, some electrical components may fail, leading to unsafe driving conditions.
What happens if I ignore a failing alternator?
Ignoring a failing alternator can lead to a dead battery, leaving you unable to start your car. It can also cause electrical accessories, such as headlights or the radio, to fail while driving. In severe cases, a failing alternator can damage other electrical components or even cause the engine to stall.
Can a bad alternator kill a new battery?
Yes, a bad alternator can drain a new battery. If the alternator isn’t charging the battery properly, the battery will eventually lose its charge. Additionally, a faulty alternator can cause voltage spikes that may damage the battery or other electrical components.
Final Thoughts
Testing an alternator with a bad battery is possible but not advisable. A weak or dead battery can lead to inaccurate readings and misdiagnosis. Always start with a fully charged battery and use the right tools, such as a digital multimeter, to ensure accurate results.
By following the steps outlined in this guide, you can confidently diagnose and address alternator issues, keeping your vehicle running smoothly.
Leave a Reply