
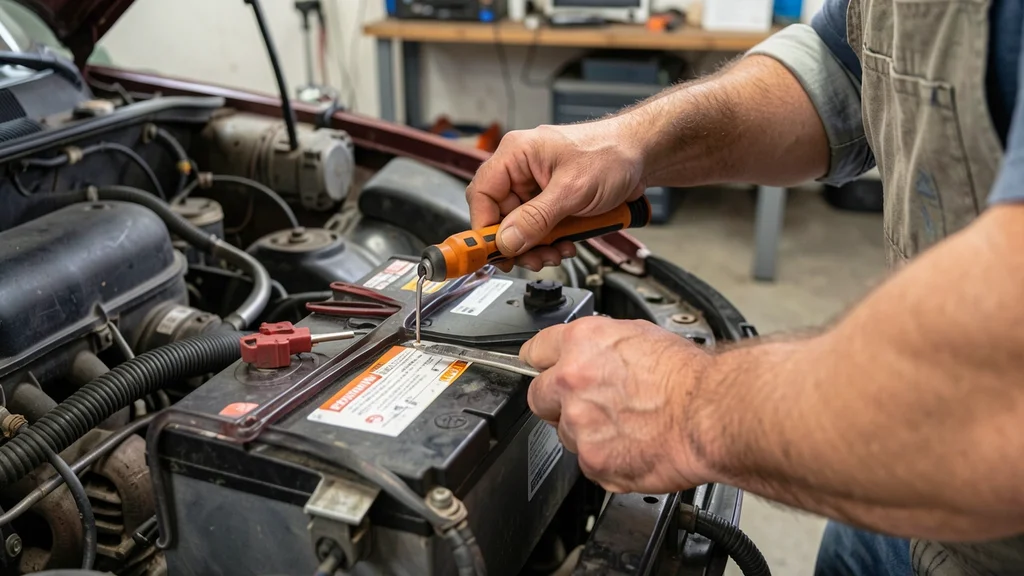
If your car’s battery light flickers or the engine struggles to start, can you test to see if an alternator is bad without a mechanic? The answer is yes—and you don’t need expensive tools. A failing alternator can leave you stranded, so knowing how to diagnose it early saves time and money.
This guide covers simple tests you can do at home with basic equipment.
You can test an alternator by checking voltage at the battery with the engine off and running, listening for unusual noises, or using a multimeter to measure output. A healthy alternator should produce 13.8-14.4 volts when the engine is running.
Signs Your Alternator Might Be Failing
Before testing, watch for these common warning signs. Dim headlights or interior lights often indicate electrical trouble. A dead battery that keeps dying after jumps is another red flag.
Strange noises like grinding or whining from the engine bay can point to a failing alternator bearing.
Modern cars may show a battery warning light on the dashboard, but this doesn’t always mean the battery itself is bad. The alternator could be the culprit. Other symptoms include weak or slow cranking when starting, or electrical accessories like power windows moving sluggishly.
- Dim or flickering headlights
- Battery warning light on dashboard
- Dead battery that won’t hold a charge
- Grinding or whining noises from engine
- Electrical accessories underperforming
- Engine stalling or difficulty starting
- Burning rubber smell from overheating belts
Warning: Never disconnect the battery while the engine is running to test the alternator. This can cause voltage spikes that damage sensitive electronics in modern vehicles.
Tools You’ll Need for Testing
You don’t need professional diagnostic tools to check your alternator. Most tests can be done with items you already have or can borrow. A digital multimeter is the most accurate tool, but you can also use a simple voltage tester or even just your car’s battery for basic checks.
For a thorough test, gather these tools before you start. Having everything ready will make the process smoother and more accurate. If you don’t have a multimeter, some auto parts stores will test your alternator for free.
| Tool | Purpose | Where to Get |
|---|---|---|
| Digital multimeter | Measure voltage output accurately | Auto parts store, hardware store, online |
| Jumper cables | Jump start if battery is dead | Any auto store, gas station |
| Flashlight | Inspect alternator and belts | Home, hardware store |
| Screwdriver | Check belt tension and connections | Home toolkit |
| Safety gloves | Protect hands from electrical shock | Auto store, hardware store |
A basic multimeter costs around $20 and is one of the most useful tools for car maintenance. If you plan to do more DIY car care, consider investing in a slightly better model with additional features like temperature measurement or continuity testing.
Step by Step Guide to Test Your Alternator
Testing your alternator involves several methods, from simple visual checks to precise voltage measurements. Start with the easiest tests and work your way to more detailed diagnostics. Remember to always prioritize safety—disconnect the negative battery terminal before working on any electrical components.
Here’s a systematic approach to diagnose your alternator. Follow these steps in order, as each test builds on the previous one. If any test fails, you’ve likely found your problem.
- Visual Inspection
Pop the hood and locate your alternator—it’s usually near the engine with a belt connected to it. Check for any obvious damage like cracked housing, burnt wires, or loose connections. Look at the belt for cracks, fraying, or glaze (shiny spots).
A loose or damaged belt can prevent the alternator from charging properly.
Also inspect the battery terminals for corrosion. White or greenish crusty deposits on the terminals can prevent proper electrical contact. Clean them with a wire brush if needed.
- Battery Voltage Test (Engine Off)
Set your multimeter to DC voltage (20V range) and connect the red probe to the positive battery terminal and the black probe to the negative terminal. A fully charged battery should read between 12.2 and 12.6 volts. If it’s below 12 volts, your battery may be drained, which could be due to a bad alternator not charging it.
Important: If your battery reads below 12 volts, charge it fully before proceeding with further tests. A dead battery can give false readings when testing the alternator.
- Alternator Output Test (Engine Running)
Start the engine and let it run at idle. With the multimeter still connected to the battery terminals, you should now see a voltage reading between 13.8 and 14.4 volts. This is the alternator charging the battery.
If the voltage stays below 13.5 volts, your alternator isn’t producing enough power.
Next, rev the engine to about 2000 RPM. The voltage should increase slightly, typically to around 14.5-14.8 volts. If the voltage drops when you rev the engine, this is a clear sign of alternator problems.
- Load Test
Turn on as many electrical accessories as possible—headlights, air conditioning, radio, and rear defroster. With all these running, check the voltage again. It should stay above 13.5 volts.
If it drops below 13 volts, your alternator can’t handle the electrical load.
According to AAA, about 80% of alternator failures are due to internal component wear rather than external damage. This test helps identify if your alternator is struggling under real-world conditions.
- Belt Tension Test
With the engine off, press down on the alternator belt halfway between the alternator pulley and the crankshaft pulley. There should be about 1/2 inch of deflection. If the belt is too loose, it can slip and prevent the alternator from charging properly.
If it’s too tight, it can damage the alternator bearings.
Most modern cars use serpentine belts that are tensioned automatically, but older vehicles with V-belts need manual adjustment. Refer to your owner’s manual for the correct tension specification.
- Alternator Bench Test (Advanced)
If you’ve removed the alternator from the vehicle, you can perform a bench test. Connect the alternator’s output terminal to the positive probe of your multimeter and the ground terminal to the negative probe. Spin the alternator pulley with a drill (while holding the alternator securely) and check for voltage output.
This test requires removing the alternator, which is more advanced. If you’re not comfortable with this, most auto parts stores will bench test your alternator for free if you bring it to them.
How to Interpret Your Test Results
Understanding your test results is crucial for accurate diagnosis. Different voltage readings indicate different problems, and some issues might require additional investigation. Here’s how to interpret what you’ve found during testing.
Remember that electrical systems can be tricky. Sometimes multiple components fail simultaneously, or a problem in one area can affect others. When in doubt, consult a professional mechanic for a second opinion.
| Test | Normal Reading | Problem Indicated | Likely Cause |
|---|---|---|---|
| Battery voltage (engine off) | 12.2-12.6V | Below 12V | Dead battery or parasitic drain |
| Alternator output (idle) | 13.8-14.4V | Below 13.5V | Bad alternator or loose belt |
| Alternator output (2000 RPM) | 14.5-14.8V | No increase or drop | Alternator not responding to load |
| Load test (accessories on) | Above 13.5V | Below 13V | Alternator can’t handle load |
| Belt tension | 1/2 inch deflection | Too loose or too tight | Belt or tensioner issue |
If your voltage readings are borderline, consider that alternators typically last between 100,000 to 150,000 miles according to industry data. If yours is approaching this mileage, it might be time for replacement even if it’s still working marginally.
Common Alternator Problems and Solutions
Alternators can fail in several ways, and understanding these common problems can help you diagnose issues more accurately. Some problems are easy to fix, while others require alternator replacement. Here are the most frequent issues car owners encounter.
According to a study by the Car Care Council, electrical problems account for about 15% of all vehicle breakdowns, with alternator failure being one of the top causes. Regular maintenance can help prevent many of these issues.
- Worn Brushes
The brushes inside the alternator wear out over time, reducing electrical contact. This is a common issue in older alternators. The solution is to replace the brushes, though in many cases it’s more cost-effective to replace the entire alternator.
- Faulty Voltage Regulator
The voltage regulator controls the alternator’s output to prevent overcharging the battery. When it fails, you might see voltage readings that are too high (above 15V) or too low (below 13V). This component can sometimes be replaced separately.
- Bad Bearings
Alternators have bearings that can wear out, causing noise or binding. If you hear a grinding or whining noise coming from the alternator, the bearings are likely failing. The only solution is to replace the alternator.
- Diode Failure
The diodes in the alternator convert AC current to DC current. When diodes fail, you might see voltage readings that are too low or alternating current (AC) in your DC system. This requires alternator replacement.
- Slipped or Broken Belt
A loose or broken serpentine belt can prevent the alternator from spinning properly. This is an easy fix—just replace or adjust the belt. However, if the belt broke due to alternator bearing failure, you’ll need to address both issues.
- Corroded Connections
Corrosion at the alternator’s electrical connections can prevent proper charging. Clean the connections with a wire brush and apply dielectric grease to prevent future corrosion.
Tip: If you’re replacing your alternator, consider upgrading to a higher-output model if you’ve added aftermarket electrical accessories like a powerful sound system or off-road lights.
DIY Alternator Replacement Guide
If your tests confirm a bad alternator, replacing it yourself can save you hundreds of dollars in labor costs. The process varies slightly between vehicles, but the general steps are similar for most cars. Always consult your vehicle’s service manual for specific instructions.
Before you begin, gather all necessary tools and parts. Make sure you have the correct replacement alternator for your vehicle’s make, model, and year. Many auto parts stores can look up the right part for you using your vehicle information.
- Disconnect the Battery
Always start by disconnecting the negative battery terminal to prevent electrical shorts. This is a critical safety step that protects both you and your vehicle’s electrical system.
- Remove the Serpentine Belt
Locate the belt tensioner and use a wrench or socket to release tension on the belt. Slide the belt off the alternator pulley. On some vehicles, you might need to remove other components to access the belt.
- Disconnect Electrical Connections
Unplug the wiring harness from the alternator. There’s usually a main power wire connected to the alternator’s output terminal—this is often secured with a nut that you’ll need to remove. Keep track of all bolts and connections.
- Remove Mounting Bolts
Alternators are typically mounted with two or three bolts. Remove these bolts to free the alternator from its mounting bracket. You might need to use extensions or universal joints to reach some bolts.
- Install the New Alternator
Position the new alternator and secure it with the mounting bolts. Don’t fully tighten them yet—you’ll need to adjust the position for belt alignment. Reconnect all electrical connections, making sure they’re tight and secure.
- Reinstall the Serpentine Belt
Route the belt over all pulleys according to your vehicle’s belt diagram (usually found on a sticker under the hood or in the owner’s manual). Use the tensioner to apply proper tension to the belt.
- Reconnect the Battery
Reconnect the negative battery terminal. Start the engine and check for proper charging voltage at the battery. You should see 13.8-14.4 volts with the engine running.
| Tool/Part | Estimated Cost | Time to Replace |
|---|---|---|
| Replacement alternator | $100-$400 | 1-2 hours |
| Serpentine belt | $20-$50 | Included in alternator replacement |
| Basic tool set | $50-$100 | N/A |
| Socket set | $30-$80 | N/A |
If you’re not comfortable with DIY repairs, most repair shops charge between $300 to $800 for alternator replacement, including parts and labor. The exact cost depends on your vehicle make and model, as well as local labor rates.
When to Call a Professional Mechanic
While many alternator tests and replacements can be done at home, some situations call for professional help. If you’re unsure about any part of the process, it’s better to consult an expert than risk damaging your vehicle or injuring yourself.
Here are signs that you should take your car to a professional mechanic instead of attempting DIY repairs:
- Complex Vehicle Systems
Some modern vehicles have complex electrical systems that require specialized diagnostic tools. Hybrid vehicles, for example, have high-voltage systems that can be dangerous to work with without proper training and equipment.
- Difficult Access
In some vehicles, the alternator is located in a hard-to-reach spot that requires removing multiple components to access. If you’re not comfortable with extensive disassembly, leave it to the professionals.
- Electrical System Problems
If you’ve tested the alternator but are still experiencing electrical issues, there might be problems with other components like the battery, starter, or wiring. A professional can perform a comprehensive electrical system diagnosis.
- Warranty Concerns
If your vehicle is still under warranty, attempting DIY repairs might void the warranty. Always check your warranty terms before performing any work yourself.
- Lack of Proper Tools
If you don’t have the necessary tools or a safe workspace, it’s better to have a professional handle the job. Using improper tools can lead to damage or injury.
- Time Constraints
If you need your car back on the road quickly and don’t have time to troubleshoot and repair, a professional mechanic can usually diagnose and fix the problem faster.
Important: If your car stalls or dies while driving, pull over safely and call for assistance. This could indicate a serious alternator problem that might leave you stranded.
Preventative Maintenance for Your Alternator
While alternators do wear out over time, proper maintenance can extend their lifespan and prevent unexpected failures. Regular checks can help you catch problems early before they leave you stranded.
According to the National Institute for Automotive Service Excellence (ASE), following a regular maintenance schedule can prevent up to 50% of common alternator failures. Here’s what you can do to keep your alternator in good shape:
- Regular Belt Inspections
Check your serpentine belt every 6 months or 6,000 miles for signs of wear, cracking, or glaze. Replace it if you see any damage or if it’s been more than 50,000 miles. A good belt ensures proper alternator operation.
- Keep Connections Clean
Clean your battery terminals and alternator connections at least once a year. Corrosion can prevent proper electrical contact and reduce charging efficiency. Use a wire brush and baking soda solution to clean terminals.
- Check Battery Health
A weak battery forces the alternator to work harder, which can lead to premature failure. Test your battery’s health regularly and replace it if it’s not holding a charge properly.
- Avoid Electrical Overload
Don’t run too many electrical accessories at once, especially when the engine is idling. This puts extra strain on the alternator. If you’ve added aftermarket electronics, consider upgrading to a higher-output alternator.
- Drive Regularly
Short trips don’t allow the alternator enough time to fully recharge the battery. If you mostly drive short distances, consider taking your car for a longer drive occasionally to keep the battery charged.
- Listen for Warning Signs
Pay attention to any unusual noises coming from the engine bay. A whining or grinding noise could indicate alternator bearing failure. Addressing these issues early can prevent more expensive damage.
Most alternators last between 5 to 7 years or 100,000 to 150,000 miles under normal driving conditions. However, extreme temperatures, frequent short trips, and electrical overload can shorten this lifespan significantly.
Frequently Asked Questions
Can I test an alternator without a multimeter?
Yes, you can perform some basic tests without a multimeter. Start the engine and disconnect the positive battery terminal. If the engine stalls, your alternator is likely bad.
However, this test isn’t foolproof and can damage sensitive electronics in modern vehicles, so it’s better to use a multimeter if possible.
How long can I drive with a bad alternator?
You can typically drive for about 30 minutes to an hour with a bad alternator, depending on your battery’s charge level. However, this is risky as you might get stranded. The battery will eventually drain completely, leaving you with no electrical power for lights, ignition, or other systems.
What causes an alternator to fail prematurely?
Several factors can shorten an alternator’s lifespan. Overloading the electrical system with aftermarket accessories is a common cause. Fluid leaks (like oil or coolant) onto the alternator can damage it over time.
Extreme temperatures, either hot or cold, can also stress the components. Poor battery health can force the alternator to work harder, leading to early failure.
Can a bad alternator damage my battery?
Yes, a bad alternator can damage your battery in several ways. If it’s overcharging, it can cause the battery to overheat and fail prematurely. If it’s undercharging, the battery will repeatedly drain and never fully recharge, leading to sulfation and reduced capacity.
Either scenario can significantly shorten your battery’s lifespan.
How much does it cost to replace an alternator?
The cost varies depending on your vehicle make and model. Parts typically range from $100 to $400, while labor can cost between $200 to $400. Luxury or imported vehicles might cost more due to specialized parts and labor.
Many repair shops offer free alternator testing, so you can confirm the diagnosis before committing to the repair.
Final Thoughts
Testing whether can you test to see if an alternator is bad is a valuable skill that can save you time and money. With basic tools and a systematic approach, most car owners can diagnose alternator problems at home. Regular maintenance and early detection can prevent unexpected breakdowns and extend the life of your vehicle’s electrical system.
Remember that while DIY testing is empowering, there’s no shame in seeking professional help when needed. The key is to address alternator issues promptly to avoid being stranded with a dead battery.
Leave a Reply