
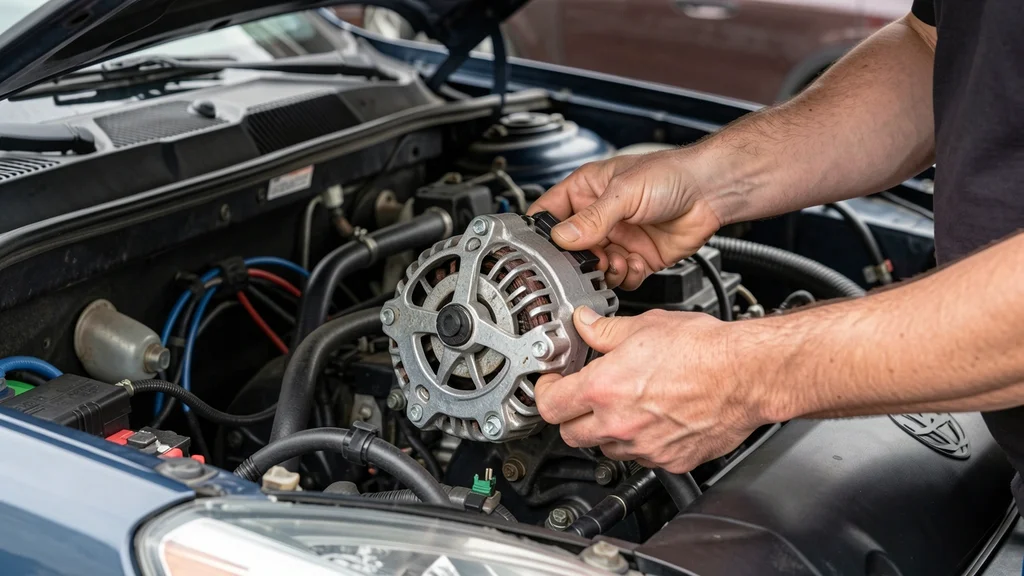
If your vehicle struggles with electrical demands or you want more power for high-performance accessories, can you upgrade a alternator is a question many car enthusiasts ask. Upgrading your alternator can prevent dimming lights, weak stereo performance, and battery drain while supporting aftermarket additions. This guide explains how to determine if an upgrade is right for you, the benefits it offers, and the steps involved in making the switch.
Yes you can upgrade your alternator to handle higher electrical loads. High-output alternators provide 130-300+ amps compared to the stock 60-100 amp units, supporting aftermarket stereos, lighting, and performance accessories without draining your battery.
Why Upgrade Your Alternator
Modern vehicles come with alternators designed to meet basic electrical needs, typically producing 60-100 amps. When you add power-hungry accessories like high-wattage stereos, LED light bars, or electric superchargers, your stock alternator may struggle to keep up. This can lead to voltage drops, dimming headlights, and a drained battery.
Upgrading to a high-output alternator solves these issues by providing more amperage to meet increased demand. These alternators can produce 130-300+ amps, ensuring stable voltage delivery regardless of how many accessories you run. They’re particularly beneficial for off-road vehicles, competition audio systems, or performance builds where electrical reliability is crucial.
- Prevents voltage drops under heavy electrical loads
- Supports aftermarket accessories without battery drain
- Extends battery life by reducing strain
- Improves overall electrical system stability
- Enables better performance for high-demand applications
- Reduces risk of alternator failure from overheating
| Stock Alternator | High-Output Alternator |
|---|---|
| 60-100 amps output | 130-300+ amps output |
| Basic electrical needs | High-demand accessories |
| May struggle with additions | Handles multiple additions easily |
| OEM specifications | Performance-focused design |
According to Car Audio Magazine, vehicles with aftermarket sound systems often experience alternator failure within 1-2 years if not upgraded, as stock units weren’t designed for sustained high-load operation.
Signs Your Car Needs an Alternator Upgrade
Several warning signs indicate your current alternator may be struggling. The most obvious is dimming headlights when you turn on accessories or at idle. You might also notice your stereo cutting out during high-volume moments or your battery warning light appearing on the dashboard.
More subtle signs include slow power window operation, weak HVAC performance, or the smell of burning wires from an overworked alternator. If you’ve added new electrical components and experience any of these issues, it’s likely time for an upgrade. Modern vehicles with complex electronics are particularly susceptible to these problems as their electrical demands increase.
Warning: Ignoring these signs can lead to complete alternator failure, leaving you stranded with a dead battery and no electrical power.
- Dimming headlights when using accessories
- Battery warning light on dashboard
- Weak or cutting out stereo at high volumes
- Slow power window operation
- Burning smell from electrical system
- Frequent battery replacements needed
- Electrical gremlins (random system failures)
| Symptom | Likely Cause | Solution |
|---|---|---|
| Dimming lights with accessories | Alternator overloaded | Upgrade to higher amp alternator |
| Battery warning light | Low voltage output | Check alternator output, upgrade if needed |
| Stereo cuts out | Voltage drop under load | High-output alternator required |
The Society of Automotive Engineers reports that electrical system failures account for nearly 20% of all vehicle breakdowns, with alternator issues being the leading cause.
How to Choose the Right Alternator for Your Vehicle
Selecting the correct high-output alternator requires matching your vehicle’s electrical demands with the alternator’s capacity. Start by calculating your total electrical load: add up the amperage of all your accessories (stereo, lights, etc.) plus a 20-30% safety margin. This gives you the minimum amperage rating you need.
Consider your driving habits too. If you frequently idle with accessories running (like at car shows or off-roading), you’ll need more capacity than someone who mostly drives on the highway. Also verify the alternator’s physical size and mounting configuration matches your vehicle’s specifications – not all high-output alternators are universal fits.
Tip: Consult with a professional auto electrician to ensure your vehicle’s wiring and battery can handle the increased output of a high-performance alternator.
Key Factors to Consider
- Amperage rating: Match to your total electrical load + safety margin
- Physical size: Must fit in your engine bay
- Mounting configuration: Check bolt patterns and belt alignment
- Voltage regulation: Ensure compatibility with your vehicle’s system
- Brand reputation: Stick with trusted manufacturers
- Warranty coverage: Look for at least 1-2 year warranties
- Cooling features: High-output alternators generate more heat
| Accessory | Amperage Draw | Notes |
|---|---|---|
| Stock electrical system | 40-60 amps | Basic vehicle needs |
| High-end stereo system | 50-150 amps | At full volume |
| LED light bars | 20-50 amps | Multiple lights add up |
| Electric supercharger | 100-200 amps | Performance applications |
| Winch | 200-400 amps | During operation |
For most enthusiasts, an alternator rated at 150-200 amps provides a good balance between capacity and cost, handling most common aftermarket additions without breaking the bank.
Top Alternator Brands for Upgrades
When investing in a high-output alternator, brand reputation matters. Quality manufacturers use better components, offer better warranties, and provide more reliable performance. Some brands specialize in specific vehicle types or applications, so choosing the right one can make your upgrade smoother.
Consider brands that have been in the automotive electrical business for decades and have a track record of reliability. Also look for companies that offer good customer support and technical assistance, as proper installation is crucial for optimal performance and longevity.
Recommended Alternator Manufacturers
- Powermaster: Known for high-performance alternators for racing and street applications, with options up to 300 amps. Their units feature heavy-duty components and excellent voltage regulation.
- Mechman: Specializes in extreme high-output alternators (up to 500 amps) for competition audio systems and off-road vehicles. Their “Alternator of the Gods” series is particularly popular.
- DC Power: Offers a range of alternators from 100 to 350 amps, with a focus on compact designs that fit in tight engine bays. Their units are known for quiet operation.
- Singer Alternators: Provides OEM-quality high-output alternators for a wide range of vehicles. Their units are often used in police and emergency vehicles.
- Bosch: A trusted name in automotive electrical components, offering reliable high-output alternators with excellent durability and performance.
- Denso: Known for their efficient designs and high-quality construction, Denso alternators are popular for both daily drivers and performance vehicles.
| Brand | Max Amperage | Best For | Warranty |
|---|---|---|---|
| Powermaster | 300 amps | Racing/Street | 2 years |
| Mechman | 500 amps | Competition Audio | 1-3 years |
| DC Power | 350 amps | Compact Designs | 1 year |
| Singer | 250 amps | OEM Quality | 2 years |
| Bosch | 200 amps | Reliability | 1-2 years |
According to Car and Driver, Mechman alternators are particularly popular in the car audio competition circuit, with over 70% of top competitors using their products in recent events.
Step by Step Alternator Upgrade Process
Upgrading your alternator is a manageable DIY project if you have basic mechanical skills and the right tools. The process typically takes 2-4 hours, depending on your vehicle and experience level. Start by gathering all necessary tools and parts before beginning, and always disconnect the battery before working on any electrical components.
Remember that some vehicles may require additional modifications, such as larger gauge wiring or a upgraded battery, to handle the increased output of a high-performance alternator. If you’re unsure about any step, consult a professional mechanic or auto electrician.
Tools and Materials Needed
- Socket and ratchet set
- Wrenches (metric and standard)
- Screwdrivers (Phillips and flathead)
- Wire cutters and strippers
- Crimping tool
- Multimeter (for testing)
- New high-output alternator
- Replacement belts (if needed)
- Dielectric grease
- Thread locker
- Safety glasses and gloves
Installation Steps
- Disconnect the battery: Always start by disconnecting the negative battery terminal to prevent electrical shorts.
- Remove the old alternator: Locate the alternator in your engine bay (usually near the front), then remove the electrical connections and mounting bolts.
- Compare old and new units: Check that the new alternator matches the old one in terms of mounting and electrical connections.
- Prepare mounting points: Clean the mounting surfaces and apply thread locker to bolts for added security.
- Install the new alternator: Mount the new unit in place, securing it with the original bolts (or new ones if provided).
- Connect electrical wiring: Attach all electrical connections, ensuring they’re tight and secure. Use dielectric grease on connections.
- Install new belt: If your kit includes a new belt, install it now, ensuring proper tension.
- Reconnect the battery: Reattach the negative battery terminal.
- Test the installation: Start the vehicle and use a multimeter to check voltage output at idle and under load.
Important: The National Institute for Automotive Service Excellence (ASE) recommends having your electrical system professionally tested after installation to ensure everything is working correctly and safely.
Common Mistakes to Avoid When Upgrading
Even experienced DIYers can make mistakes when upgrading their alternator. One of the most common is not properly sizing the alternator to their electrical needs, leading to either insufficient power or unnecessary expense. Another frequent error is failing to upgrade supporting components like wiring and batteries, which can bottleneck the system.
Improper installation can also cause issues, from loose connections that create resistance to incorrect belt tension that leads to premature wear. Many people also overlook the importance of proper grounding, which is crucial for the alternator to function efficiently and safely.
Top Alternator Upgrade Pitfalls
| Mistake | Problem It Causes | Solution |
|---|---|---|
| Underestimating amperage needs | Insufficient power for accessories | Calculate total load + 20-30% margin |
| Not upgrading wiring | Voltage drop and overheating | Use appropriate gauge wiring |
| Ignoring battery condition | Premature alternator failure | Replace old battery if needed |
| Improper belt tension | Belt slippage or damage | Follow manufacturer specifications |
| Poor grounding | Electrical system instability | Ensure solid chassis grounding |
| Wrong mounting | Physical fitment issues | Verify compatibility before purchase |
Warning: Never use undersized wiring with a high-output alternator. This can create a fire hazard due to excessive heat buildup from the increased current flow.
Alternator Upgrade Cost Considerations
The cost of upgrading your alternator varies significantly based on the amperage rating, brand, and whether you choose to do the installation yourself or hire a professional. Basic high-output alternators start around $200-$300, while extreme high-performance units can cost $600-$1,200 or more. Installation costs typically range from $100-$300 at a repair shop, depending on your vehicle’s complexity.
Remember to factor in additional costs for supporting components. You may need to upgrade your battery ($100-$300), wiring ($50-$200), or other electrical system parts. While these add to the upfront cost, they’re essential for getting the most out of your new alternator and preventing premature failures.
Cost Breakdown
| Component | Price Range | Notes |
|---|---|---|
| Basic high-output alternator (130-160 amps) | $200-$400 | Entry-level upgrade |
| Mid-range alternator (170-220 amps) | $400-$600 | Most common choice |
| High-end alternator (230-300+ amps) | $600-$1,200 | Extreme performance |
| Professional installation | $100-$300 | Varies by vehicle |
| Battery upgrade | $100-$300 | AGM or deep-cycle recommended |
| Wiring upgrade | $50-$200 | Larger gauge cables |
According to a J.D. Power study, the average cost of electrical system repairs is $350, with alternator-related issues accounting for about 40% of these cases. Investing in a quality upgrade can actually save money in the long run by preventing these common failures.
Maintenance Tips for Your Upgraded Alternator
Once you’ve installed your high-output alternator, proper maintenance will ensure it provides reliable service for years to come. Regular checks of your electrical system can prevent minor issues from becoming major problems. Pay special attention to connections, as high-current systems can cause corrosion or loosening over time.
Keep your alternator clean and free of debris, as dirt buildup can cause overheating. Also monitor your battery’s condition, as a failing battery can put extra strain on your alternator. Regular voltage checks at idle and under load can help you catch potential issues early.
Alternator Maintenance Checklist
- Monthly visual inspection: Check for loose connections, corrosion, or physical damage.
- Every 3,000 miles: Clean the alternator exterior and check belt tension.
- Every 6 months: Test voltage output with a multimeter (should be 13.8-14.4V at idle).
- Annually: Inspect wiring harness for wear or damage.
- As needed: Replace belts at first sign of wear or cracking.
- Immediately: Address any warning lights or electrical issues.
Tip: Use a battery maintainer if your vehicle sits unused for extended periods. This prevents the battery from draining and reduces stress on your alternator when you start the vehicle again.
| Task | Frequency | Tools Needed |
|---|---|---|
| Visual inspection | Monthly | Flashlight, basic tools |
| Cleaning | Every 3,000 miles | Compressed air, soft brush |
| Voltage testing | Every 6 months | Multimeter |
| Belt inspection | Every 6 months | Visual inspection |
The Automotive Maintenance and Repair Association states that proper alternator maintenance can extend its lifespan by up to 50%, saving vehicle owners significant money over time.
Frequently Asked Questions
How do I know if my alternator is failing?
The most common signs are dimming headlights, a battery warning light on your dashboard, or electrical accessories that don’t work properly. You might also notice a burning smell from the engine bay or hear a whining noise from the alternator itself. A simple test with a multimeter can confirm: at idle, voltage should be between 13.8-14.4V.
If it’s lower, your alternator may be failing.
Can I upgrade my alternator myself?
Yes, if you have basic mechanical skills and tools, upgrading your alternator is a manageable DIY project. The process typically involves removing the old unit, installing the new one, and connecting the wiring. However, some vehicles may require additional modifications like larger gauge wiring or a new battery.
If you’re unsure about any step, it’s best to consult a professional to avoid damaging your electrical system.
What size alternator do I need for a car audio system?
For a basic upgraded stereo system (500-1000 watts), a 130-160 amp alternator is usually sufficient. For more powerful systems (1000-2000 watts), look for 180-220 amps. Competition-level systems (2000+ watts) typically require 250+ amps.
Always add a 20-30% safety margin to your calculated load to ensure reliable performance. Remember that your battery and wiring must also be upgraded to handle the increased current.
Will a high-output alternator damage my electrical system?
No, a properly sized and installed high-output alternator won’t damage your electrical system. In fact, it’s designed to better support your vehicle’s electrical needs. However, you must ensure that all components (battery, wiring, fuses) can handle the increased output.
Using undersized wiring or a weak battery with a high-output alternator can create safety hazards. Always follow manufacturer recommendations for supporting components.
How long does an upgraded alternator last?
With proper maintenance, a high-quality high-output alternator can last 100,000-150,000 miles or more. The lifespan depends on factors like driving conditions, electrical load, and maintenance practices. High-performance alternators are built with more robust components than stock units, which contributes to their longevity.
Regular voltage checks and keeping connections clean can help maximize your alternator’s lifespan.
Final Thoughts
Upgrading your alternator is a smart investment for anyone looking to enhance their vehicle’s electrical system. Whether you’re adding performance accessories, a powerful stereo, or just want more reliable electrical performance, a high-output alternator can provide the power you need. Remember to properly size your new alternator, upgrade supporting components as needed, and follow proper installation procedures for the best results.
With the right approach, you can enjoy improved electrical performance and reliability for years to come.
Leave a Reply