
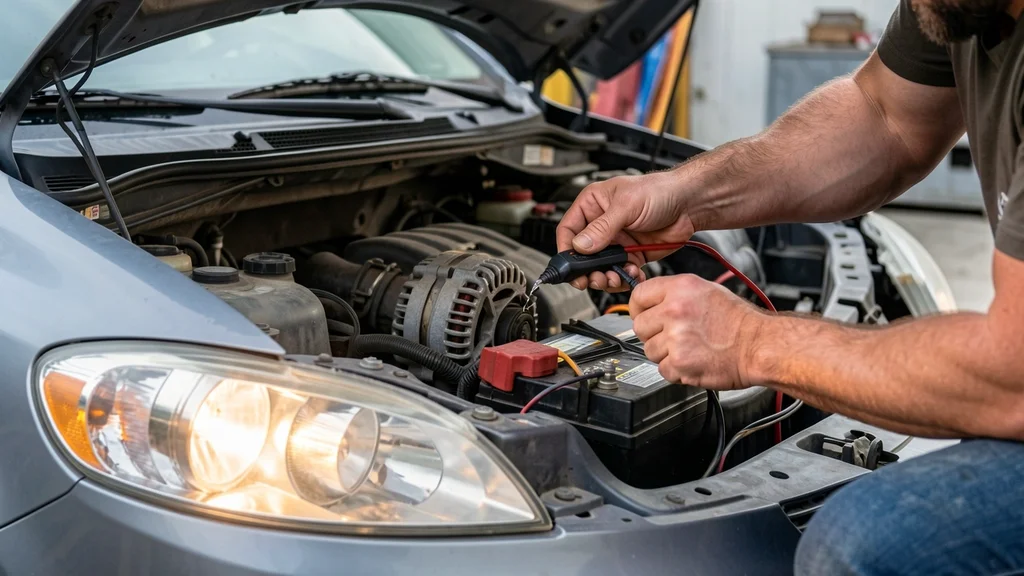
If your car’s electrical system is acting up, knowing how can you check if the alternator is bad can save you from a sudden breakdown. A failing alternator often causes dim lights, a weak battery, or strange dashboard warnings. This guide walks you through simple tests to diagnose the issue without specialized tools.
You can check if the alternator is bad by testing headlight brightness with the engine running or using a multimeter to measure voltage at the battery. A reading below 13.5V or above 14.5V signals a problem.
Signs Your Alternator Might Be Failing
The first step in diagnosing alternator issues is recognizing the common symptoms. These signs often appear before a complete failure, giving you time to act.
Watch for dim or flickering headlights, especially when the engine is idling. This happens because the alternator isn’t supplying enough power to keep the lights bright. Another red flag is a dead battery that won’t hold a charge, even after a jump-start.
If your battery is frequently dying, the alternator might not be recharging it properly.
- Dashboard Warning Lights: The battery or alternator warning light on your dashboard is the most obvious sign. Modern cars often trigger this light when the charging system voltage drops below normal.
- Weak or Slow Accessories: Power windows, seats, or the radio may operate sluggishly. This is due to insufficient electrical power.
- Strange Noises: A whining or grinding noise from the alternator could indicate a failing bearing or internal damage.
- Smell of Burning Rubber: This could mean the alternator’s drive belt is slipping or overheating.
- Frequent Stalling: The engine may stall or have difficulty starting because the alternator isn’t keeping the battery charged.
Important: Ignoring these signs can lead to a complete electrical failure, leaving you stranded. Address them as soon as possible.
Tools You Need for Testing
Before you start testing, gather the necessary tools. Having these on hand will make the process smoother and more accurate.
A digital multimeter is the most important tool for checking alternator output. It measures voltage, which is critical for diagnosing electrical issues. You’ll also need a basic set of hand tools like wrenches and sockets to access the alternator if required.
Jumper cables can help if the battery is too weak to start the engine for testing.
| Tool | Purpose |
|---|---|
| Digital Multimeter | Measures voltage output from the alternator and battery |
| Basic Hand Tools | Access alternator and battery terminals |
| Jumper Cables | Jump-start the car if the battery is dead |
| Flashlight | Inspect alternator and belt in dark areas |
A flashlight can help you inspect the alternator and its connections, especially in dimly lit engine bays. Safety gear like gloves and goggles are also recommended to protect yourself from electrical hazards.
Step by Step How to Test the Alternator with a Multimeter
Testing the alternator with a multimeter is the most reliable way to check its health. This method gives you precise voltage readings to determine if the alternator is charging the battery properly.
Start by ensuring the car’s engine is off and the key is out of the ignition. Open the hood and locate the battery. The battery is usually a rectangular box with two terminals (positive and negative) and is often near the front of the engine bay.
- Set Up the Multimeter: Turn the multimeter to the DC voltage setting (usually labeled as “V DC” or “20V DC”). This setting measures the direct current voltage produced by the alternator.
- Test the Battery Voltage (Engine Off): Connect the multimeter’s red probe to the battery’s positive terminal and the black probe to the negative terminal. A healthy battery should read between 12.2V and 12.6V. If the reading is below 12V, the battery may be weak or discharged.
- Start the Engine: Have a helper start the car while you monitor the multimeter. The voltage should immediately jump to between 13.5V and 14.5V. This indicates the alternator is charging the battery.
- Check Voltage at Idle: With the engine running, keep the multimeter connected. A stable reading between 13.5V and 14.5V means the alternator is working correctly. If the voltage is below 13.5V, the alternator may not be charging the battery sufficiently.
- Rev the Engine: Ask your helper to rev the engine to around 2000 RPM. The voltage should increase slightly but stay within the 13.5V to 14.5V range. If the voltage drops below 13.5V or spikes above 14.5V, the alternator may be faulty.
- Turn On Electrical Accessories: Turn on the headlights, heater, and radio to increase the electrical load. The voltage should remain steady. If it drops significantly, the alternator may not be able to handle the demand.
Tip: If the voltage reading is consistently below 13.5V or above 14.5V, it’s time to have the alternator tested by a professional or consider replacing it.
Quick Alternator Test Without a Multimeter
If you don’t have a multimeter, you can still perform a basic alternator test using your car’s headlights. This method isn’t as precise as using a multimeter, but it can give you a quick indication of alternator health.
Start the car and turn on the headlights. With the engine running, the headlights should be bright. Have a helper rev the engine to around 2000 RPM.
If the headlights get significantly brighter as the engine revs, it suggests the alternator is producing more power, which is a good sign. However, if the headlights dim or flicker, especially at idle, the alternator may not be charging the battery properly.
- Start the Engine: Turn the key in the ignition to start the car. Let it idle normally.
- Turn On Headlights: Switch on the headlights to their normal setting (not high beams).
- Observe Brightness at Idle: Pay attention to the brightness of the headlights while the engine is idling. They should be bright and steady.
- Rev the Engine: Have a helper rev the engine to around 2000 RPM. Watch the headlights closely.
- Check for Changes: If the headlights get noticeably brighter when the engine is revved, the alternator is likely working. If they dim or flicker, the alternator may be failing.
- Test Other Electrical Accessories: Turn on additional accessories like the radio or heater. If the headlights dim significantly, the alternator may not be able to handle the electrical load.
Warning: This test is not foolproof. A failing alternator can still produce enough power to brighten headlights at higher RPMs but may not charge the battery properly. For a definitive diagnosis, use a multimeter.
How to Inspect the Alternator Visually
A visual inspection can reveal obvious issues with the alternator or its components. This is a simple but effective way to spot potential problems before they lead to a complete failure.
Start by opening the hood and locating the alternator. It’s usually mounted near the engine and connected to the battery via thick cables. Look for any signs of physical damage, such as cracks or corrosion on the alternator housing.
Check the electrical connections to the alternator for loose, corroded, or damaged wires. Tighten any loose connections and clean off any corrosion with a wire brush.
- Check the Drive Belt: The alternator is driven by a belt connected to the engine’s crankshaft. Inspect the belt for signs of wear, such as cracks, fraying, or glazing. A loose or damaged belt can prevent the alternator from spinning properly, leading to charging issues.
- Look for Fluid Leaks: Alternators can leak fluid, which may indicate internal damage. Check around the alternator for any signs of oil or coolant leaks.
- Inspect the Pulley: The alternator pulley should spin freely and without noise. If it’s wobbling or making a grinding noise, the pulley or bearing may be worn out.
- Check for Overheating: Alternators can overheat, especially if they’re working too hard. Look for signs of heat damage, such as melted wiring or discolored housing.
- Examine the Cooling Fins: Many alternators have cooling fins to dissipate heat. Make sure these fins are not clogged with dirt or debris, which can cause overheating.
| Issue | Signs | Solution |
|---|---|---|
| Loose or Damaged Belt | Squealing noise, alternator not spinning | Replace or tighten the belt |
| Corroded Connections | Poor electrical contact, voltage drops | Clean connections with a wire brush |
| Worn Pulley or Bearing | Grinding noise, wobbling pulley | Replace the alternator or pulley |
| Fluid Leaks | Oil or coolant around alternator | Inspect for internal damage, replace if necessary |
A thorough visual inspection can often reveal issues that might not be caught by electrical tests alone. If you notice any of these problems, address them promptly to avoid further damage.
Common Mistakes to Avoid When Testing
Testing the alternator seems straightforward, but there are common mistakes that can lead to incorrect diagnoses or even damage to your car’s electrical system. Avoiding these pitfalls will ensure your test results are accurate and reliable.
One of the most common mistakes is testing the alternator with the battery disconnected. This can cause a voltage spike that damages the alternator or other electrical components. Always keep the battery connected when testing the alternator.
Another mistake is relying solely on the headlight test. While this can give you a quick indication, it’s not as accurate as using a multimeter.
- Not Checking Battery Health First: A weak or dead battery can give false readings when testing the alternator. Always check the battery’s voltage before testing the alternator.
- Using the Wrong Multimeter Setting: Make sure your multimeter is set to DC voltage, not AC voltage or resistance. Using the wrong setting will give you inaccurate readings.
- Ignoring Safety Precautions: Working on a car’s electrical system can be dangerous. Always wear safety gear like gloves and goggles, and avoid touching any moving parts or hot surfaces.
- Testing Under Heavy Electrical Load: Turning on all electrical accessories (e.g., headlights, heater, radio) can cause the voltage to drop, leading to a false diagnosis. Test the alternator with a normal electrical load.
- Not Revving the Engine: The alternator produces more power at higher RPMs. Failing to rev the engine during testing can result in a low voltage reading, even if the alternator is working correctly.
- Assuming the Alternator is Bad Based on One Test: If your first test suggests a problem, perform additional tests (e.g., visual inspection, headlight test) to confirm the diagnosis.
Tip: If you’re unsure about your test results, consider taking your car to a professional mechanic. Many auto parts stores also offer free alternator testing.
When to Replace the Alternator
If your tests confirm that the alternator is faulty, it’s important to replace it as soon as possible. Driving with a bad alternator can lead to a dead battery, leaving you stranded. It can also cause damage to other electrical components in your car.
Replace the alternator if it fails any of the tests described above, such as producing voltage outside the 13.5V to 14.5V range or showing physical damage during a visual inspection. If the alternator is making unusual noises, such as grinding or whining, it’s a sign that internal components are worn out and need replacement.
- Voltage Outside Normal Range: If the alternator consistently produces voltage below 13.5V or above 14.5V, it’s time for a replacement.
- Physical Damage: Cracks, corrosion, or fluid leaks on the alternator housing indicate it needs to be replaced.
- Noise or Vibration: Unusual noises or vibrations coming from the alternator suggest internal damage.
- Failing Electrical Tests: If the alternator fails multiple tests (e.g., multimeter test, headlight test), it’s likely defective.
- Age and Mileage: Alternators typically last between 80,000 and 150,000 miles. If yours is approaching this range and showing signs of wear, consider replacing it preventatively.
| Sign | Likely Cause | Action |
|---|---|---|
| Voltage below 13.5V | Faulty alternator or weak battery | Test battery, replace alternator if needed |
| Voltage above 14.5V | Overcharging alternator | Replace alternator |
| Grinding noise | Worn bearing or pulley | Replace alternator |
| Physical damage | Impact or overheating | Replace alternator |
Replacing the alternator is a job that can be done at home with basic tools, but it’s also a task best left to professionals if you’re not comfortable working on your car’s electrical system. According to AAA, alternator replacement costs between $500 and $1,000, including parts and labor, depending on the vehicle.
Frequently Asked Questions
Can I drive with a bad alternator?
Driving with a bad alternator is not recommended. Once the battery is drained, your car will stall and leave you stranded. The alternator is essential for keeping the battery charged and powering the electrical system while the engine is running.
If you suspect your alternator is failing, have it checked as soon as possible.
How long does an alternator last?
Alternators typically last between 80,000 and 150,000 miles, or about 7-10 years. However, their lifespan can vary depending on driving conditions, electrical load, and maintenance. Extreme temperatures and frequent short trips can shorten the alternator’s life.
Can a bad alternator damage the battery?
Yes, a bad alternator can damage the battery. If the alternator is undercharging, the battery won’t receive enough power to stay charged, leading to a dead battery. If the alternator is overcharging, it can cause the battery to overheat and fail prematurely.
Both scenarios can shorten the battery’s lifespan.
What’s the difference between a bad alternator and a bad battery?
A bad battery usually causes starting issues, such as slow cranking or no cranking at all, especially in cold weather. A bad alternator, on the other hand, often causes electrical issues while the engine is running, such as dim lights or a dead battery after the car has been running. Testing both components is the best way to diagnose the problem accurately.
How much does it cost to replace an alternator?
The cost to replace an alternator varies depending on the make and model of your car. On average, you can expect to pay between $500 and $1,000 for parts and labor. Some luxury or imported vehicles may cost more.
If you’re comfortable with DIY repairs, you can save on labor costs by replacing the alternator yourself.
Final Thoughts
Knowing how can you check if the alternator is bad empowers you to diagnose electrical issues before they leave you stranded. Start with simple tests like the headlight check, then move to a multimeter for precise voltage readings. Visual inspections can also reveal obvious problems.
If your tests confirm a faulty alternator, replace it promptly to avoid further damage. Regular maintenance and attention to warning signs can extend the life of your alternator and keep your car running smoothly.
Leave a Reply