
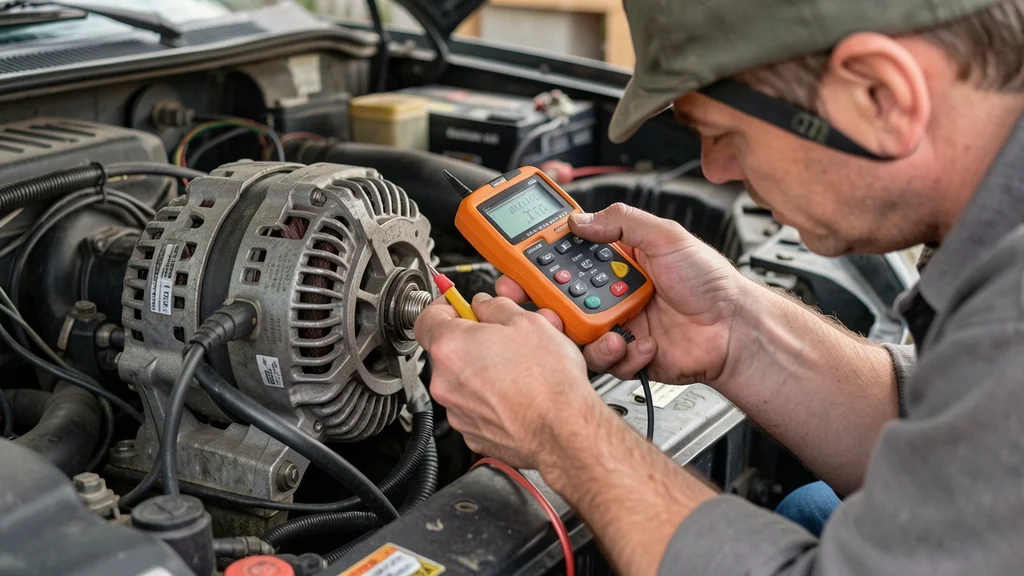
If your car’s battery light flickers or the engine stalls unexpectedly, how can you test if an alternator is bad might be the question keeping you up at night. A failing alternator can leave you stranded, but you don’t need a professional to diagnose it. This guide will walk you through simple, reliable methods to check your alternator’s health using basic tools or even just your senses.
You can test if an alternator is bad by checking voltage with a multimeter, listening for unusual noises, or observing dim lights and electrical issues. A reading below 13.5V with the engine running confirms failure.
Signs Your Alternator Might Be Failing
The first step in diagnosing alternator problems is recognizing the warning signs. These symptoms often appear before a complete failure, giving you time to act.
Watch for the battery warning light on your dashboard, which often resembles a rectangle with a plus and minus sign. This is the most obvious clue, but other signs include dim or flickering headlights, a weak or dead battery, and strange noises like grinding or whining from under the hood. Electrical accessories like power windows or the radio may also underperform.
- Battery warning light: The most direct indicator that your alternator may not be charging the battery properly.
- Dim or flickering lights: Headlights or interior lights that brighten and dim as you rev the engine.
- Weak or dead battery: A battery that won’t hold a charge, even after jumping, often points to an alternator issue.
- Strange noises: A failing alternator can produce grinding, whining, or squealing sounds.
- Electrical failures: Accessories like power seats, windows, or the radio may work intermittently or not at all.
- Stalling or difficulty starting: The engine may stall or struggle to turn over due to insufficient electrical power.
Warning: Ignoring these signs can lead to a complete electrical failure, leaving you stranded. Address them as soon as possible.
Tools You’ll Need for Testing
Before you start, gather the tools that will make testing easier and more accurate. While some methods require minimal equipment, others need specific tools for precise results.
A digital multimeter is the most essential tool for checking voltage levels. Jumper cables can help you test the alternator’s function by bypassing the battery temporarily. Basic hand tools like wrenches or sockets may be needed to access the alternator or battery terminals.
Safety gear, including gloves and goggles, is also recommended to protect yourself from electrical hazards.
| Tool | Purpose |
|---|---|
| Digital Multimeter | Measures voltage to test alternator output |
| Jumper Cables | Tests alternator function by bypassing the battery |
| Wrench or Socket Set | Accesses alternator and battery terminals |
| Safety Gloves and Goggles | Protects against electrical shocks and sparks |
If you don’t have a multimeter, you can still perform some basic checks, but the results won’t be as precise. A multimeter is the gold standard for accurate voltage readings.
Step by Step Voltage Test With a Multimeter
Testing the voltage is the most reliable way to determine if your alternator is functioning correctly. This method requires a multimeter, but it’s straightforward and provides clear results.
- Prepare your car: Park on a flat surface, turn off the engine, and open the hood. Ensure all lights and accessories are off.
- Locate the battery: Identify the positive (+) and negative (-) terminals. Clean any corrosion with a wire brush if needed.
- Set up the multimeter: Turn the dial to DC voltage (usually marked as 20V DC). Connect the red probe to the positive terminal and the black probe to the negative terminal.
- Test the battery voltage (engine off): A healthy battery should read between 12.5V and 12.8V. If it’s below 12.5V, the battery may be weak or discharged.
- Start the engine: With the engine running, the voltage should increase to between 13.5V and 14.8V. This indicates the alternator is charging the battery.
- Rev the engine: Have a helper rev the engine to about 2000 RPM. The voltage should remain stable or increase slightly. If it drops below 13.5V, the alternator is likely failing.
- Test with accessories on: Turn on the headlights, radio, and other accessories. The voltage should stay above 13.5V. If it drops significantly, the alternator can’t handle the load.
Important: If the voltage remains below 13.5V during any of these steps, your alternator is not charging the battery properly and needs replacement.
Alternative Testing Methods Without a Multimeter
If you don’t have a multimeter, you can still perform a few basic checks to assess your alternator’s health. While these methods aren’t as precise, they can give you a good idea of whether further testing is needed.
Jump Start Test
If your battery is dead, try jump-starting your car. Once the engine is running, disconnect the jumper cables. If the engine continues to run, your alternator is likely working.
If the engine dies shortly after disconnecting the cables, the alternator is probably faulty.
Headlight Test
Start your car and turn on the headlights. Rev the engine to about 2000 RPM. If the headlights brighten significantly, your alternator may be failing.
A healthy alternator should provide a steady charge, so the headlights should remain at a consistent brightness regardless of engine speed.
Battery Terminal Test
With the engine off, disconnect the negative battery terminal. Start the car and let it run for a few minutes. If the car stalls or dies, the alternator is not producing enough power to keep the engine running.
Be cautious with this method, as it can cause electrical sparks.
Tip: These tests are less accurate than using a multimeter but can help you identify obvious alternator issues.
| Method | What to Look For | Indicates Alternator Issue? |
|---|---|---|
| Jump Start Test | Engine dies after disconnecting cables | Yes |
| Headlight Test | Headlights flicker or dim at idle | Yes |
| Battery Terminal Test | Engine stalls after disconnecting terminal | Yes |
Common Mistakes to Avoid When Testing
Testing an alternator seems simple, but small errors can lead to inaccurate results or even damage your vehicle’s electrical system. Avoiding these common pitfalls ensures you get reliable readings.
One of the biggest mistakes is testing with a low or dead battery. A weak battery can skew voltage readings, making a good alternator appear faulty. Always start with a fully charged battery for accurate results.
Another error is using a cheap or inaccurate multimeter. Invest in a quality digital multimeter for precise voltage measurements.
- Testing with accessories on: Turn off all electrical accessories before testing to avoid false readings. Headlights, radios, and other devices draw power and can affect voltage levels.
- Loose or corroded connections: Ensure all battery terminals and connections are clean and tight. Corrosion or loose wires can interfere with voltage readings.
- Ignoring temperature: Cold weather can reduce battery and alternator performance. Test your alternator in a controlled environment or after the car has warmed up.
- Revving the engine too high: While revving the engine can help diagnose issues, excessive RPMs can damage the alternator or other components. Stick to moderate revving (around 2000 RPM).
- Not checking the battery first: A dead or weak battery can mimic alternator failure. Always test the battery’s resting voltage before assessing the alternator.
- Using the wrong multimeter setting: Ensure your multimeter is set to DC voltage (20V range) for accurate readings. Using the wrong setting can give incorrect results.
Warning: Never disconnect the battery while the engine is running to test the alternator. This can cause voltage spikes that damage sensitive electronics like the ECU or radio.
How to Inspect the Alternator Visually
A visual inspection can reveal obvious signs of alternator trouble. While it won’t catch all issues, it’s a quick way to spot problems before diving into electrical tests.
Start by locating the alternator, which is typically mounted near the engine and connected to the battery via thick wires. Look for signs of physical damage, such as cracks, corrosion, or loose bolts. Check the belts connected to the alternator for wear, fraying, or tension issues.
A loose or worn belt can prevent the alternator from spinning properly, leading to charging problems.
- Corrosion on terminals: White or greenish deposits on the battery terminals or alternator connections can disrupt the electrical flow.
- Damaged wiring: Frayed, melted, or exposed wires can cause shorts or poor connections.
- Leaking fluid: Alternators contain lubricating fluid. If you see leaks, it may indicate internal damage.
- Worn or loose belts: The alternator belt (often a serpentine belt) should be tight and free of cracks. A loose belt can slip, reducing alternator efficiency.
- Burning smell: A burnt odor near the alternator suggests overheating or electrical issues.
If you notice any of these signs, it’s a strong indication that your alternator needs attention. However, some problems, like internal component failure, won’t be visible from the outside.
Understanding Alternator Voltage Readings
Interpreting voltage readings correctly is key to diagnosing alternator issues. Here’s what the numbers mean and how to assess your alternator’s health based on them.
A healthy alternator should produce between 13.5V and 14.8V with the engine running. Readings outside this range can indicate problems. For example, a voltage below 13.5V suggests the alternator isn’t charging the battery sufficiently, while a reading above 14.8V may mean it’s overcharging, which can damage the battery and other electrical components.
| Voltage Reading | Engine Condition | Diagnosis |
|---|---|---|
| 12.5V – 12.8V | Off | Healthy battery (no alternator test yet) |
| 13.5V – 14.8V | Running | Alternator working correctly |
| Below 13.5V | Running | Alternator not charging battery |
| Above 14.8V | Running | Alternator overcharging (risk of damage) |
If your voltage readings are consistently outside the normal range, it’s time to consider replacing the alternator. According to AAA, alternator failures account for nearly 5% of all roadside assistance calls, making it a common issue for drivers.
Frequently Asked Questions
Can a car run with a bad alternator?
A car can run for a short time with a bad alternator if the battery has enough charge. However, once the battery is depleted, the engine will stall, and the car will die. The alternator is responsible for charging the battery and powering the electrical system while the engine runs.
How long does it take for a bad alternator to drain a battery?
The time it takes for a bad alternator to drain a battery depends on the battery’s condition and the electrical load. In most cases, a fully charged battery will last between 30 minutes to 2 hours with a failed alternator. High electrical demand (e.g., headlights, AC) will drain the battery faster.
What causes an alternator to fail?
Alternators can fail due to several reasons, including worn-out brushes, a faulty voltage regulator, a broken alternator belt, or internal component damage. Age and high mileage also contribute to wear and tear. According to Car Care Council, alternators typically last between 7-10 years or 80,000-150,000 miles.
Can I test an alternator without removing it?
Yes, you can test an alternator without removing it from the car. Using a multimeter to check voltage at the battery terminals with the engine running is the most common method. You can also perform visual inspections and listen for unusual noises without removing the alternator.
Is it safe to drive with a bad alternator?
Driving with a bad alternator is not safe. Once the battery is drained, the car will lose power, and you could be stranded. Additionally, a failing alternator can cause unpredictable electrical issues, such as stalling or loss of power steering and brakes, which can be dangerous.
Final Thoughts
Testing your alternator doesn’t require advanced mechanical skills or expensive tools. With a multimeter and a few simple steps, you can diagnose most issues at home. Pay attention to warning signs like dim lights or a battery warning light, and don’t ignore unusual noises or electrical failures.
If your tests confirm a bad alternator, replace it promptly to avoid being left stranded. Regular checks can save you time, money, and the hassle of unexpected breakdowns.
Leave a Reply