
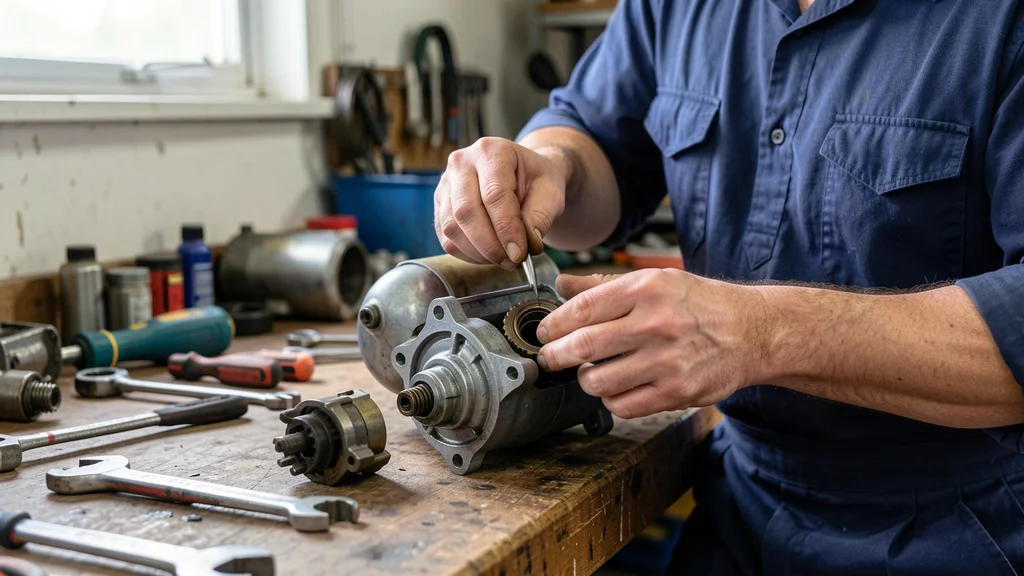
If your engine cranks slowly or fails to start, how to rebuild starter motor might be the solution you need. A worn-out starter can leave you stranded, but with the right tools and guidance, you can restore it to full working condition. This guide covers the entire process, from disassembly to reassembly, ensuring you avoid common pitfalls and get reliable performance.
You can rebuild a starter motor by disassembling it, inspecting components, replacing worn parts like brushes and bushings, and reassembling with proper lubrication. This process takes 2-3 hours and costs under $50 in parts.
Tools and Materials You Will Need
A successful rebuild starts with the right tools. Having everything ready prevents delays and ensures a smooth process. Gather these before you begin:
- Basic hand tools: Socket set, wrenches, screwdrivers (flathead and Phillips)
- Specialty tools: Starter motor puller, brush holder removal tool, bearing puller
- Cleaning supplies: Brake cleaner, shop rags, compressed air
- Replacement parts: Brushes, bushings, bearings, solenoid contacts (if needed)
- Testing equipment: Multimeter, battery tester
- Lubricants: Dielectric grease, high-temperature bearing grease
- Safety gear: Gloves, safety glasses
Tip: Buy a starter rebuild kit specific to your vehicle’s make and model. These kits typically include brushes, bushings, and bearings, ensuring compatibility.
According to AutoZone, over 60% of starter failures are due to worn brushes or bushings, which are inexpensive and easy to replace. Investing in a quality rebuild kit can save you from costly replacements down the line.
Safety Precautions Before Starting
Working with electrical components and heavy tools requires caution. Disconnect the battery before starting to avoid accidental short circuits or shocks. Here’s what to keep in mind:
- Disconnect the battery: Always remove the negative terminal first to prevent electrical mishaps.
- Work in a well-ventilated area: Fumes from brake cleaner and other solvents can be harmful.
- Use insulated tools: Avoid using metal tools directly on electrical contacts.
- Avoid wearing loose clothing: Long sleeves or jewelry can get caught in moving parts.
- Keep a fire extinguisher nearby: Electrical sparks can sometimes cause fires, especially near flammable materials.
Warning: Never test a starter motor while it’s still connected to the vehicle’s electrical system. Always bench-test after reassembly to avoid damage to your car’s wiring.
The National Highway Traffic Safety Administration (NHTSA) reports that improper handling of car electrical systems accounts for nearly 15% of DIY auto repair injuries annually. Taking precautions seriously can prevent accidents.
Step 1 Remove the Starter Motor from the Vehicle
Before you can rebuild the starter, you need to remove it from your vehicle. The exact process varies by make and model, but the general steps are consistent. Start by locating the starter, which is typically bolted to the engine block near the flywheel.
- Locate the starter: Consult your vehicle’s service manual for the exact position. It’s usually on the passenger side for most rear-wheel-drive cars.
- Disconnect the battery: As mentioned earlier, safety first. Remove the negative terminal.
- Disconnect electrical connections: Unplug the wiring harness and remove the battery cable from the solenoid.
- Remove mounting bolts: Most starters are secured with 2-3 bolts. Use a socket wrench to loosen and remove them.
- Slide the starter out: Gently wiggle it free from its housing. If it’s stuck, check for hidden bolts or corrosion.
| Common Starter Locations by Vehicle Type | Typical Removal Difficulty |
|---|---|
| Front-wheel drive (FWD) | Moderate (tight space near transmission) |
| Rear-wheel drive (RWD) | Easy (accessible from engine bay) |
| All-wheel drive (AWD) | Hard (may require removing other components) |
If you encounter resistance, double-check for hidden bolts or corrosion. Penetrating oil can help loosen stubborn bolts.
Step 2 Disassemble the Starter Motor
Once the starter is out, the next step is disassembly. This is where you’ll inspect each component for wear and damage. Start by cleaning the exterior with brake cleaner to remove grease and dirt, which can interfere with the process.
- Remove the solenoid: The solenoid is usually attached to the top or side of the starter. It’s held in place by 1-2 bolts. Once removed, you’ll see the plunger and spring inside.
- Separate the motor housing: The starter motor is typically held together by long bolts or screws. Remove these to split the housing into two halves.
- Inspect the armature: The armature is the rotating part of the motor. Check for worn commutator bars, which are copper segments at one end. If they’re grooved or pitted, they may need resurfacing or replacement.
- Remove the brushes: Brushes are small carbon blocks that press against the commutator. They wear down over time and are a common failure point. Use a brush holder tool to remove them.
- Check the bushings and bearings: These support the armature shaft. If they’re worn or loose, the armature won’t spin freely. Replace them if necessary.
Important: Take photos or notes during disassembly to ensure you can reassemble everything correctly. It’s easy to forget the order of washers, springs, and other small parts.
According to Motor Magazine, nearly 80% of starter failures are due to worn brushes or bushings. These parts are inexpensive and easy to replace, making them the first things to check during disassembly.
Step 3 Inspect and Replace Worn Components
With the starter disassembled, now is the time to inspect each part for wear and replace what’s necessary. This step is critical for ensuring your rebuild lasts. Focus on the most common failure points:
- Brushes: Measure the length of the brushes. If they’re worn down to half their original size or less, replace them. Brushes should move freely in their holders.
- Bushings and bearings: Check for excessive play or noise when spinning the armature. If the shaft wobbles, the bushings are likely worn.
- Commutator: The commutator should be smooth and free of burns or pitting. If it’s damaged, you can sometimes resurface it with fine sandpaper. If the damage is severe, replace the armature.
- Solenoid contacts: These can burn or pit over time. If they’re damaged, replace them or the entire solenoid.
- Field windings: Inspect the copper windings inside the motor housing for breaks or shorts. Use a multimeter to test for continuity.
| Component | Lifespan (Miles) | Replacement Cost |
|---|---|---|
| Brushes | 50,000 – 70,000 | $10 – $20 |
| Bushings | 80,000 – 100,000 | $5 – $15 |
| Solenoid | 100,000+ | $25 – $50 |
| Armature | 100,000+ | $40 – $80 |
Replacing worn components now will save you from having to redo the job later. Most rebuild kits include brushes, bushings, and bearings, so you can replace everything at once.
Step 4 Clean and Lubricate All Parts
Cleaning is a crucial but often overlooked step in rebuilding a starter motor. Dirt, grease, and old lubricant can cause premature wear and reduce efficiency. Take your time to ensure every part is spotless before reassembly.
- Clean the armature: Use brake cleaner and a soft brush to remove dirt and old grease from the commutator and shaft. Avoid using abrasive tools that could damage the copper segments.
- Clean the motor housing: Spray brake cleaner inside the housing to remove debris. Use compressed air to blow out any remaining particles.
- Clean the solenoid: Wipe down the solenoid with a clean rag. If the contacts are dirty, clean them with fine sandpaper or a contact cleaner.
- Inspect and clean the field windings: Use compressed air to blow out dirt from the windings. Be gentle to avoid damaging the thin copper wires.
- Dry all parts thoroughly: Allow all components to air-dry completely before reassembly. Moisture can cause electrical shorts or corrosion.
Tip: Use a parts washer if you have access to one. It’s the most effective way to clean all components thoroughly without damaging them.
After cleaning, apply fresh lubricant to moving parts. Use dielectric grease on electrical connections to prevent corrosion and ensure good conductivity. For bushings and bearings, use high-temperature bearing grease to reduce friction and wear.
Step 5 Reassemble the Starter Motor
Reassembly is the reverse of disassembly, but it’s easy to make mistakes if you’re not careful. Refer to the photos or notes you took during disassembly. Start by reinstalling the armature and ensuring it spins freely in the housing.
- Install new bushings or bearings: Press them into place using a bearing puller or a socket that matches their size. Make sure they’re seated fully and aligned properly.
- Reinstall the armature: Slide the armature into the motor housing. It should spin smoothly without any wobble. If it doesn’t, double-check the bushings.
- Install new brushes: Insert the new brushes into their holders. Ensure they make firm contact with the commutator. Some brushes have springs—make sure they’re properly seated.
- Reattach the motor housing: Align the two halves of the housing and secure them with the long bolts or screws. Tighten them evenly to avoid misalignment.
- Reinstall the solenoid: Attach the solenoid to the motor housing and secure it with its bolts. Reconnect the plunger and spring if you removed them.
Test the starter’s rotation by spinning the armature by hand. It should turn freely without grinding or resistance. If it doesn’t, disassemble and check for misaligned or improperly installed parts.
Step 6 Bench Test the Rebuilt Starter
Before reinstalling the starter in your vehicle, perform a bench test to ensure it works correctly. This step can save you from having to remove and disassemble everything again if there’s an issue.
- Secure the starter: Mount the starter in a vice or clamp it to a workbench. Make sure it’s stable and won’t move during testing.
- Connect a 12V battery: Use jumper cables to connect the starter to a 12V battery. Connect the negative (-) terminal to the starter housing and the positive (+) terminal to the solenoid’s battery terminal.
- Test the solenoid: Touch a screwdriver or similar tool between the solenoid’s battery terminal and the starter’s main terminal. The solenoid should click, and the starter should spin.
- Check for issues: Listen for unusual noises like grinding or whirring. If the starter doesn’t spin, check your connections and ensure the armature turns freely.
- Test the draw: Use a multimeter to check the starter’s current draw. A typical starter should draw 50-150 amps. If it draws more, there may be a short or excessive friction.
Warning: Never hold the starter in your hands during a bench test. It can spin at high speeds and cause injury. Always secure it to a stable surface.
If the starter passes the bench test, it’s ready to be reinstalled in your vehicle. If it fails, disassemble and inspect for issues like misaligned parts or loose connections.
Common Mistakes to Avoid
Even experienced mechanics can make mistakes when rebuilding a starter motor. Being aware of these common pitfalls can help you avoid them and ensure a successful rebuild.
- Skipping the bench test: Always test the starter before reinstalling it. This can save you from having to remove it again if there’s an issue.
- Over-tightening bolts: Over-tightening can strip threads or warp components. Use a torque wrench to tighten bolts to the manufacturer’s specifications.
- Ignoring the solenoid: The solenoid is just as important as the motor itself. If it’s faulty, the starter won’t engage properly, even if the motor is in perfect condition.
- Using the wrong lubricant: Not all greases are suitable for starter motors. Use high-temperature bearing grease and dielectric grease for electrical connections.
- Forgetting to replace worn parts: If you only replace some worn parts, others may fail soon after. Replace all worn components during the rebuild to extend the starter’s lifespan.
- Misaligning the armature: If the armature isn’t properly aligned in the housing, it can cause excessive wear or failure. Ensure it spins freely and smoothly.
| Mistake | Consequence | How to Avoid |
|---|---|---|
| Not bench-testing | Starter fails after reinstallation | Always test before reinstalling |
| Over-tightening bolts | Stripped threads or warped components | Use a torque wrench |
| Ignoring the solenoid | Starter doesn’t engage | Test and replace if faulty |
Taking your time and double-checking each step will help you avoid these mistakes and ensure a successful rebuild.
Frequently Asked Questions
How do I know if my starter motor needs rebuilding?
Common signs include slow cranking, a grinding noise when starting, or the engine not turning over at all. If the starter draws excessive current (over 150 amps) during a bench test, it likely needs rebuilding. A clicking noise without engine turnover often indicates a faulty solenoid.
Can I rebuild a starter motor without special tools?
While basic tools like screwdrivers and wrenches are sufficient for most of the process, specialty tools like a brush holder removal tool and bearing puller make the job easier and reduce the risk of damage. If you don’t have these, consider borrowing or renting them.
How long does it take to rebuild a starter motor?
For a first-timer, the process typically takes 2-3 hours, including disassembly, inspection, cleaning, and reassembly. If you’re experienced, you can complete it in under an hour. The bench test adds an additional 15-20 minutes.
Is it cheaper to rebuild or replace a starter motor?
Rebuilding a starter motor is significantly cheaper than replacing it. A rebuild kit costs between $20-$50, while a new starter can range from $100-$400, depending on the vehicle. If your starter’s housing is damaged, replacement may be the only option.
What are the most common parts to replace during a rebuild?
The most commonly replaced parts are brushes, bushings, and bearings. Solenoid contacts and the armature may also need replacement if they’re damaged. Most rebuild kits include brushes, bushings, and bearings, making it easy to replace everything at once.
Final Thoughts
Rebuilding a starter motor is a rewarding DIY project that can save you hundreds of dollars. By following the steps outlined in this guide, you can disassemble, inspect, and rebuild your starter motor with confidence. Remember to take your time, use the right tools, and bench-test before reinstalling.
With proper care, your rebuilt starter can last as long as a new one.
Leave a Reply