
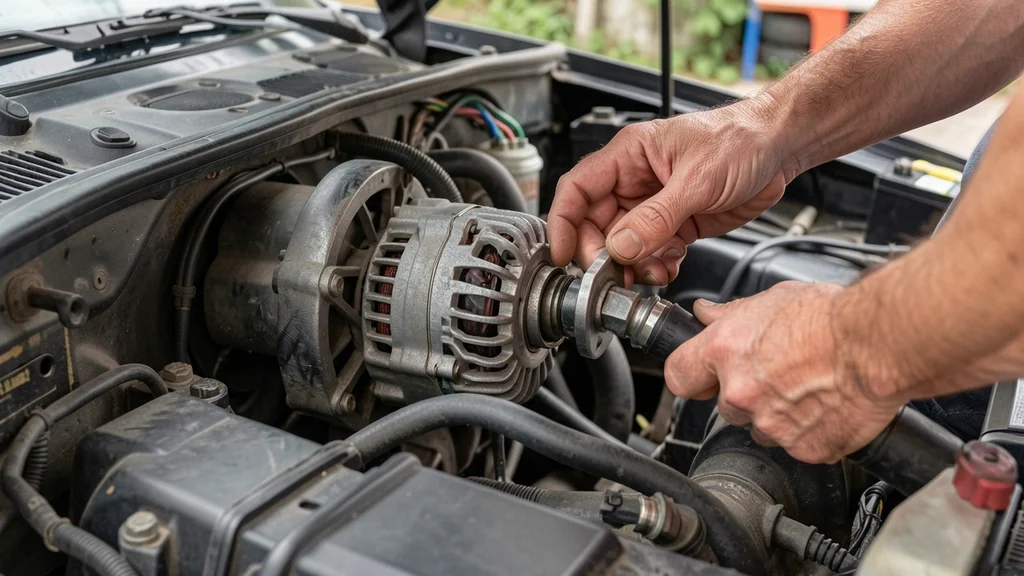
Changing your car’s alternator can sometimes lead to unexpected issues, and when you change an alternator can things start happening that may surprise even experienced drivers. While the process seems straightforward, electrical gremlins, battery resets, or wiring mishaps can cause new problems to arise. This guide explores what to expect after an alternator replacement and how to troubleshoot common post-installation hiccups.
Yes after changing the alternator your car may act up due to battery reset electrical system recalibration or loose connections but most issues are minor and fixable with basic checks.
Why Your Car Might Act Strange After an Alternator Change
Your vehicle’s electrical system is finely tuned, and the alternator plays a central role in keeping everything powered. When you swap it out, several things can trigger unusual behavior.
The alternator doesn’t just charge the battery—it regulates voltage to the entire electrical system. A new unit may output slightly different voltage, causing the engine control unit (ECU) to recalibrate. This can lead to temporary warning lights, rough idling, or even error codes until the system adapts.
- Battery Reset: The battery often loses its charge during replacement, forcing the ECU to relearn driving patterns.
- Voltage Fluctuations: A new alternator might produce higher or lower voltage initially, confusing sensors.
- Loose Connections: Improperly secured wires can cause intermittent power loss or error messages.
- Faulty Installation: Incorrect belt tension or mounting can lead to noise or premature failure.
- Computer Reboot: Modern cars have multiple control modules that may need to reinitialize.
- Aftermarket Differences: Non-OEM alternators may not match the original voltage output exactly.
Important: Always disconnect the battery before replacing an alternator to prevent electrical surges that can damage sensitive electronics.
According to AAA, electrical issues account for nearly 20% of all roadside assistance calls, and many stem from alternator or battery problems. This highlights how critical proper installation is.
Common Problems After Alternator Replacement
Even a seemingly successful alternator swap can lead to unexpected complications. Here are the most frequent issues drivers report after installation.
| Problem | Symptoms | Likely Cause |
|---|---|---|
| Check Engine Light | Illuminated warning light, possible rough idle | ECU detecting voltage irregularities |
| Battery Light Still On | Dashboard warning persists | Poor connection or faulty alternator |
| Electrical Accessories Fail | Radio, windows, or lights not working | Loose wiring or blown fuse |
| Squealing Noise | High-pitched noise from engine bay | Improper belt tension or misalignment |
| Car Won’t Start | Complete electrical failure | Dead battery from disconnected during swap |
These issues often resolve themselves after a few driving cycles as the system recalibrates. However, persistent problems likely indicate an installation error or a defective part.
Warning: If your car stalls or loses power while driving after an alternator change pull over immediately and check all connections.
How to Test If Your New Alternator Is Working Properly
Verifying your alternator’s performance is crucial to avoid being stranded with a dead battery. A few simple tests can confirm whether the replacement was successful.
Start with a visual inspection: check that all connections are tight and there are no obvious wiring issues. Then, use a multimeter to test voltage output, which should read between 13.8 and 14.4 volts with the engine running.
- Visual Check: Inspect for loose wires, corrosion, or improper belt alignment. Look for any warning lights on the dashboard.
- Battery Voltage Test: With the engine off, battery voltage should be around 12.6 volts. Anything below 12.4 indicates a weak battery.
- Alternator Output Test: Start the engine and measure voltage at the battery. It should jump to 13.8-14.4 volts. Below 13.5 means the alternator isn’t charging properly.
- Load Test: Turn on headlights and heater to create a load. Voltage should remain stable above 13.5 volts. Dropping below indicates alternator failure.
- Listen for Noises: Any grinding or squealing suggests bearing failure or belt issues that need immediate attention.
| Test | Expected Result | What It Means |
|---|---|---|
| Engine Off Voltage | 12.4-12.6V | Healthy battery |
| Engine On Voltage | 13.8-14.4V | Alternator charging properly |
| Load Test Voltage | Above 13.5V | Alternator handling load |
According to the National Institute for Automotive Service Excellence (ASE), about 15% of alternator replacements fail within the first year due to improper testing or installation. Always verify performance before considering the job complete.
What to Do If Problems Persist After Replacement
If your car continues to act up after changing the alternator, a systematic approach will help identify the root cause. Start with the simplest solutions before moving to more complex diagnostics.
First, double-check all connections. A loose wire or improperly secured terminal can cause intermittent issues that mimic alternator failure. Next, inspect the battery itself—it may need replacement if it was weakened before the alternator change.
- Recheck All Connections:
- Ensure the positive and negative terminals are tight on both the battery and alternator.
- Verify the alternator plug is fully seated and locked in place.
- Inspect the ground wire from the alternator to the chassis for corrosion or damage.
- Test the Battery:
- Load test the battery at an auto parts store—most offer this service for free.
- Check for physical damage or swelling that indicates internal failure.
- Clean any corrosion from the terminals to ensure good contact.
- Inspect the Belts:
- Check the serpentine belt for cracks, fraying, or glazing.
- Verify proper tension—most belts should have about ½ inch of deflection when pressed.
- Ensure the belt is routed correctly according to your vehicle’s diagram.
- Scan for Codes:
- Use an OBD-II scanner to check for stored trouble codes.
- Pay special attention to codes related to charging system or voltage.
- Clear codes after fixes to see if they return.
- Consider Professional Help:
- If basic checks don’t resolve the issue, a professional diagnostic may be needed.
- Some modern vehicles require ECU reprogramming after electrical work.
- Persistent issues may indicate a problem with the vehicle’s wiring harness.
Tip: If your car has a voltage gauge on the dashboard monitor it for a few days after replacement to ensure consistent charging.
How to Prevent Issues When Changing an Alternator
Proper preparation and technique can prevent most post-installation problems. Many issues stem from rushing through the process or overlooking small but critical details.
Begin by disconnecting the battery to protect sensitive electronics. This simple step prevents voltage spikes that can damage your car’s computer systems. Also, take note of how the original alternator was installed—photographing the setup can be invaluable when reinstalling the new unit.
- Disconnect the Battery First: Always remove the negative terminal first to prevent short circuits. This protects both you and the car’s electronics.
- Use Quality Parts: Opt for OEM or high-quality aftermarket alternators. Cheap units often have shorter lifespans and inconsistent voltage output.
- Clean All Contacts: Use a wire brush to clean battery terminals, alternator connections, and ground points. Corrosion is a common cause of electrical issues.
- Check Belt Condition: Replace the serpentine belt if it shows signs of wear. A new alternator with an old belt can lead to premature failure.
- Torque to Spec: Use a torque wrench to tighten all bolts to manufacturer specifications. Over-tightening can damage components, while under-tightening can cause vibration issues.
- Verify Compatibility: Ensure the new alternator matches your vehicle’s amperage and voltage requirements. Some high-output alternators may require wiring upgrades.
- Test Before Finalizing: Reconnect the battery and test voltage output before buttoning everything up. This saves time if there’s an issue.
| Prevention Step | Tools Needed | Time Required |
|---|---|---|
| Disconnect battery | 10mm wrench | 2 minutes |
| Clean connections | Wire brush, cleaner | 5 minutes |
| Test alternator output | Multimeter | 3 minutes |
| Check belt tension | Belt tension gauge | 2 minutes |
The Car Care Council reports that 80% of vehicle electrical problems are preventable with proper maintenance and careful installation practices. Taking these extra steps can save you from costly repairs down the road.
When to Seek Professional Help
While many alternator-related issues can be resolved with basic troubleshooting, some situations call for professional expertise. Knowing when to stop DIY efforts can prevent further damage to your vehicle.
If you’ve checked all the obvious issues—connections, battery health, belt condition—and problems persist, there may be a deeper electrical issue. Modern vehicles have complex wiring systems and multiple control modules that require specialized diagnostic equipment to properly assess.
- Persistent Warning Lights: If the check engine or battery light stays on after basic checks, a professional scan tool may be needed to access manufacturer-specific codes.
- Intermittent Electrical Issues: Problems that come and go often indicate wiring harness issues or ground problems that are difficult to trace without experience.
- Unusual Noises: Grinding or whining noises from the alternator area may indicate bearing failure that requires immediate attention.
- Computer System Resets: If your car’s infotainment, climate control, or other systems keep resetting, there may be a voltage regulation problem.
- Failed DIY Tests: If your alternator tests as good but the battery keeps dying, there may be a parasitic drain somewhere in the electrical system.
- Complex Vehicle Systems: Hybrid vehicles or those with advanced electrical systems often require specialized knowledge and tools.
Important: Never ignore charging system warnings as they can lead to complete electrical failure leaving you stranded.
According to a study by AAA, the average cost of a professional alternator replacement is between $500 and $1,000, including parts and labor. While this may seem expensive, it often includes a warranty and the peace of mind that comes with professional installation.
Signs Your Alternator Is Failing Soon
Catching alternator problems early can prevent the inconvenience of a sudden breakdown. Several warning signs typically appear before complete failure, giving you time to address the issue proactively.
The most obvious sign is a battery warning light on the dashboard, but there are often earlier indicators. Dimming headlights, especially when idling, can signal that the alternator isn’t producing enough power. Similarly, electrical accessories like power windows may operate more slowly than usual.
- Dashboard Warning Lights:
- The battery or charging system light is the most direct indicator.
- In some vehicles, the check engine light may also illuminate.
- These lights often appear when the alternator output drops below a certain threshold.
- Dimming or Flickering Lights:
- Headlights that dim when idling but brighten when revving the engine.
- Interior lights that flicker or appear dimmer than usual.
- Dashboard lights that fluctuate in brightness.
- Electrical Accessory Issues:
- Power windows that move more slowly than usual.
- Radio that cuts out or resets frequently.
- Air conditioning that struggles to maintain temperature.
- Battery Problems:
- Frequent need to jump-start the vehicle.
- Battery that seems to lose charge overnight.
- Corrosion on battery terminals due to overcharging.
- Unusual Noises:
- Whining or grinding noise from the engine bay.
- Squealing that increases with electrical load (like turning on headlights).
- Rattling noises that may indicate loose mounting or failing bearings.
- Engine Performance Issues:
- Rough idling or stalling, especially when electrical loads are high.
- Difficulty starting the engine, particularly in cold weather.
- Poor fuel economy as the engine works harder to compensate for electrical issues.
| Symptom | Likely Cause | Urgency |
|---|---|---|
| Battery light on | Alternator not charging | High |
| Dimming headlights | Low alternator output | Medium |
| Whining noise | Bearing failure | High |
| Frequent jump starts | Weak battery or alternator | Medium |
The National Highway Traffic Safety Administration (NHTSA) notes that electrical system failures account for thousands of roadside breakdowns annually. Paying attention to these warning signs can help you address alternator issues before they leave you stranded.
Frequently Asked Questions
How long does it take for a car to reset after changing the alternator?
Most modern vehicles need about 30-50 miles of driving to fully reset their systems after an alternator replacement. During this time, you might notice some unusual behavior like rough idling or warning lights as the ECU relearns the vehicle’s parameters. If issues persist beyond this period, there may be an underlying problem that needs attention.
Can a bad alternator cause transmission problems?
Yes, a failing alternator can indirectly affect your transmission. Modern vehicles rely on electrical systems for transmission control, and inconsistent voltage can cause erratic shifting, delayed engagement, or even transmission limp mode. If you notice transmission issues along with electrical problems, have your charging system checked immediately.
Why does my car run rough after alternator replacement?
A rough idle after changing the alternator is often caused by the ECU recalibrating to the new voltage output. The engine control module may need time to adjust to the slightly different electrical parameters. However, if the rough idling continues after several driving cycles, check for vacuum leaks or other issues that may have been disturbed during the replacement process.
What happens if you don’t disconnect the battery when changing the alternator?
Failing to disconnect the battery can result in electrical surges that may damage sensitive components like the ECU, radio, or other control modules. It can also cause sparks when removing the alternator connections, which is a fire hazard. Always disconnect the negative battery terminal first to prevent these risks.
How do I know if my new alternator is defective?
Test the new alternator with a multimeter to check its voltage output, which should be between 13.8 and 14.4 volts with the engine running. Also, listen for unusual noises like grinding or whining, and check for warning lights on the dashboard. If the alternator fails these basic tests, it may be defective and should be replaced under warranty.
Final Thoughts
Changing an alternator can indeed cause unexpected issues, but most are temporary and easily resolved. Proper installation, thorough testing, and patience for system recalibration can prevent the majority of post-replacement problems. Remember that your car’s electrical system is interconnected, so what seems like an alternator issue might sometimes point to other components.
When in doubt, don’t hesitate to consult a professional to ensure your vehicle remains reliable and safe on the road.
Leave a Reply